
Inviting Users
This guide covers adding users to projects from the Accounts Page. To remove users or change their roles, see the Edit dropdown on the USERS tab. For the full permission model, see User Permissions.
Inviting a User to a Project
Section titled “Inviting a User to a Project”User invitations are managed from the Project Info Panel on the Accounts Page.
-
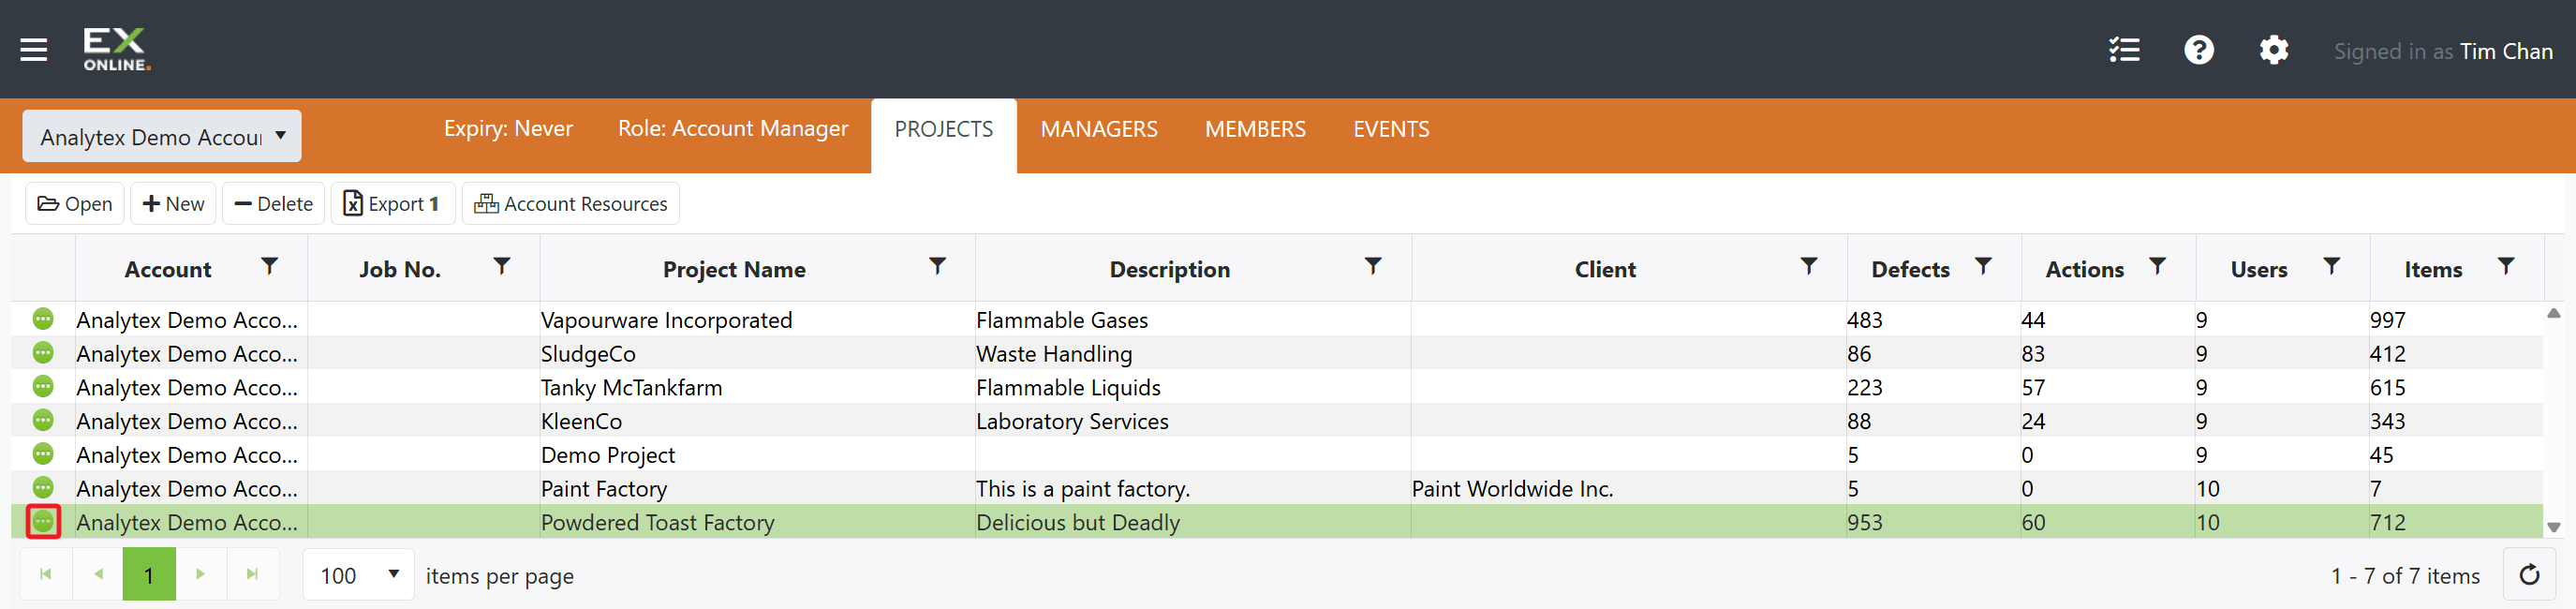
From the Accounts Page, click the green circle icon on the left of the project row to open the Project Info Panel.
-
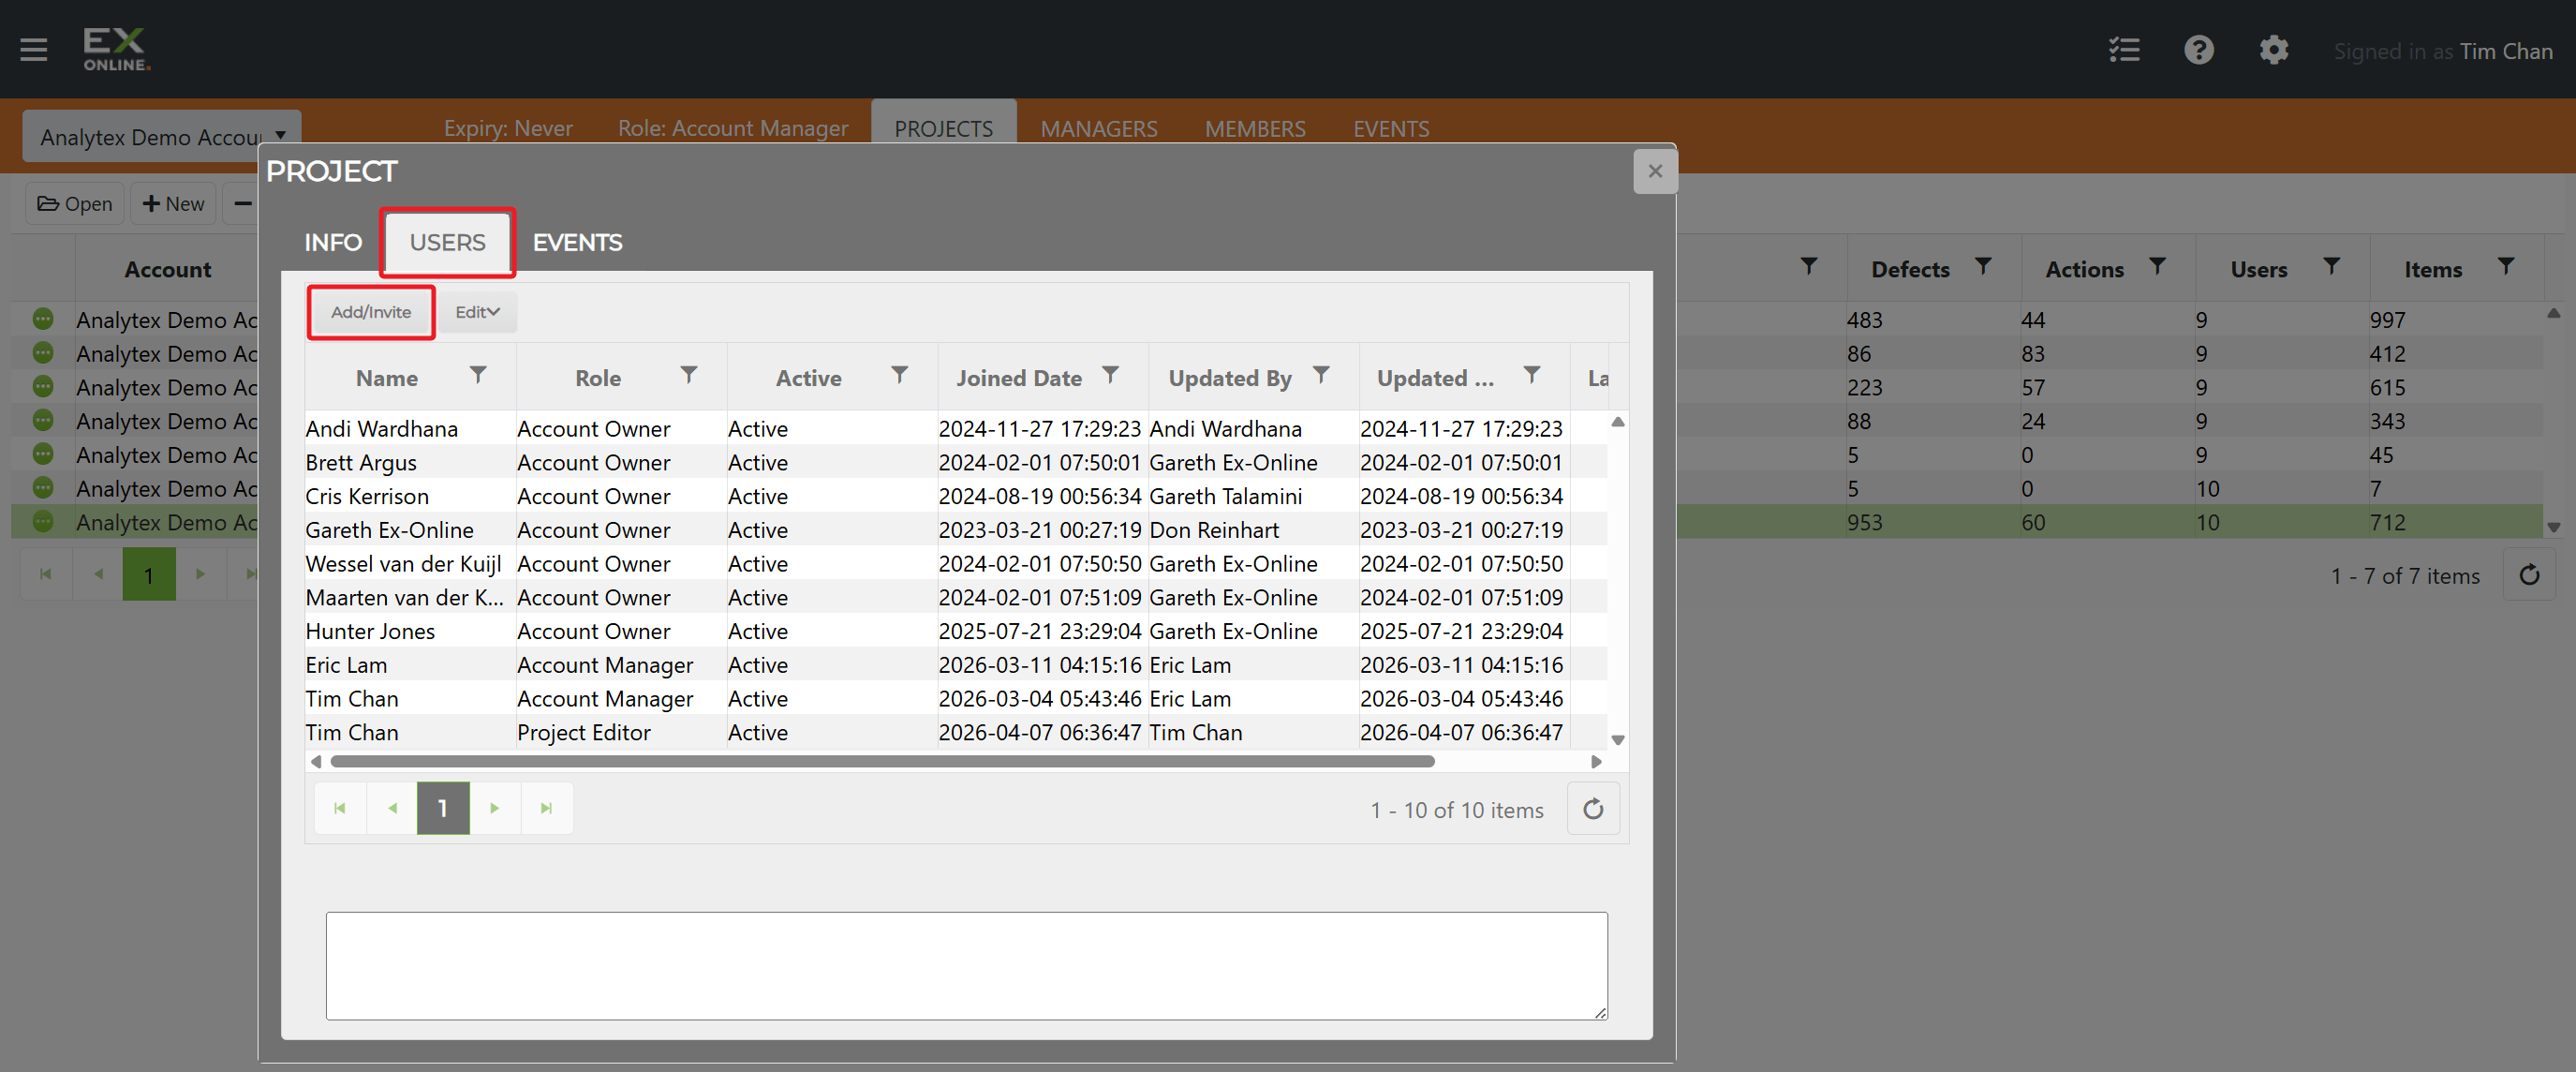
Click the USERS tab, then click Add/Invite.
-
Enter the email address of the invitee (separate multiple addresses with a comma).
-
Select a Role:
- Project Manager — full project management access
- Editor — can view and make changes
- Viewer — can view but not edit
-
Optionally add an Invite Message.
-
Click Add/Invite to send the invitation.
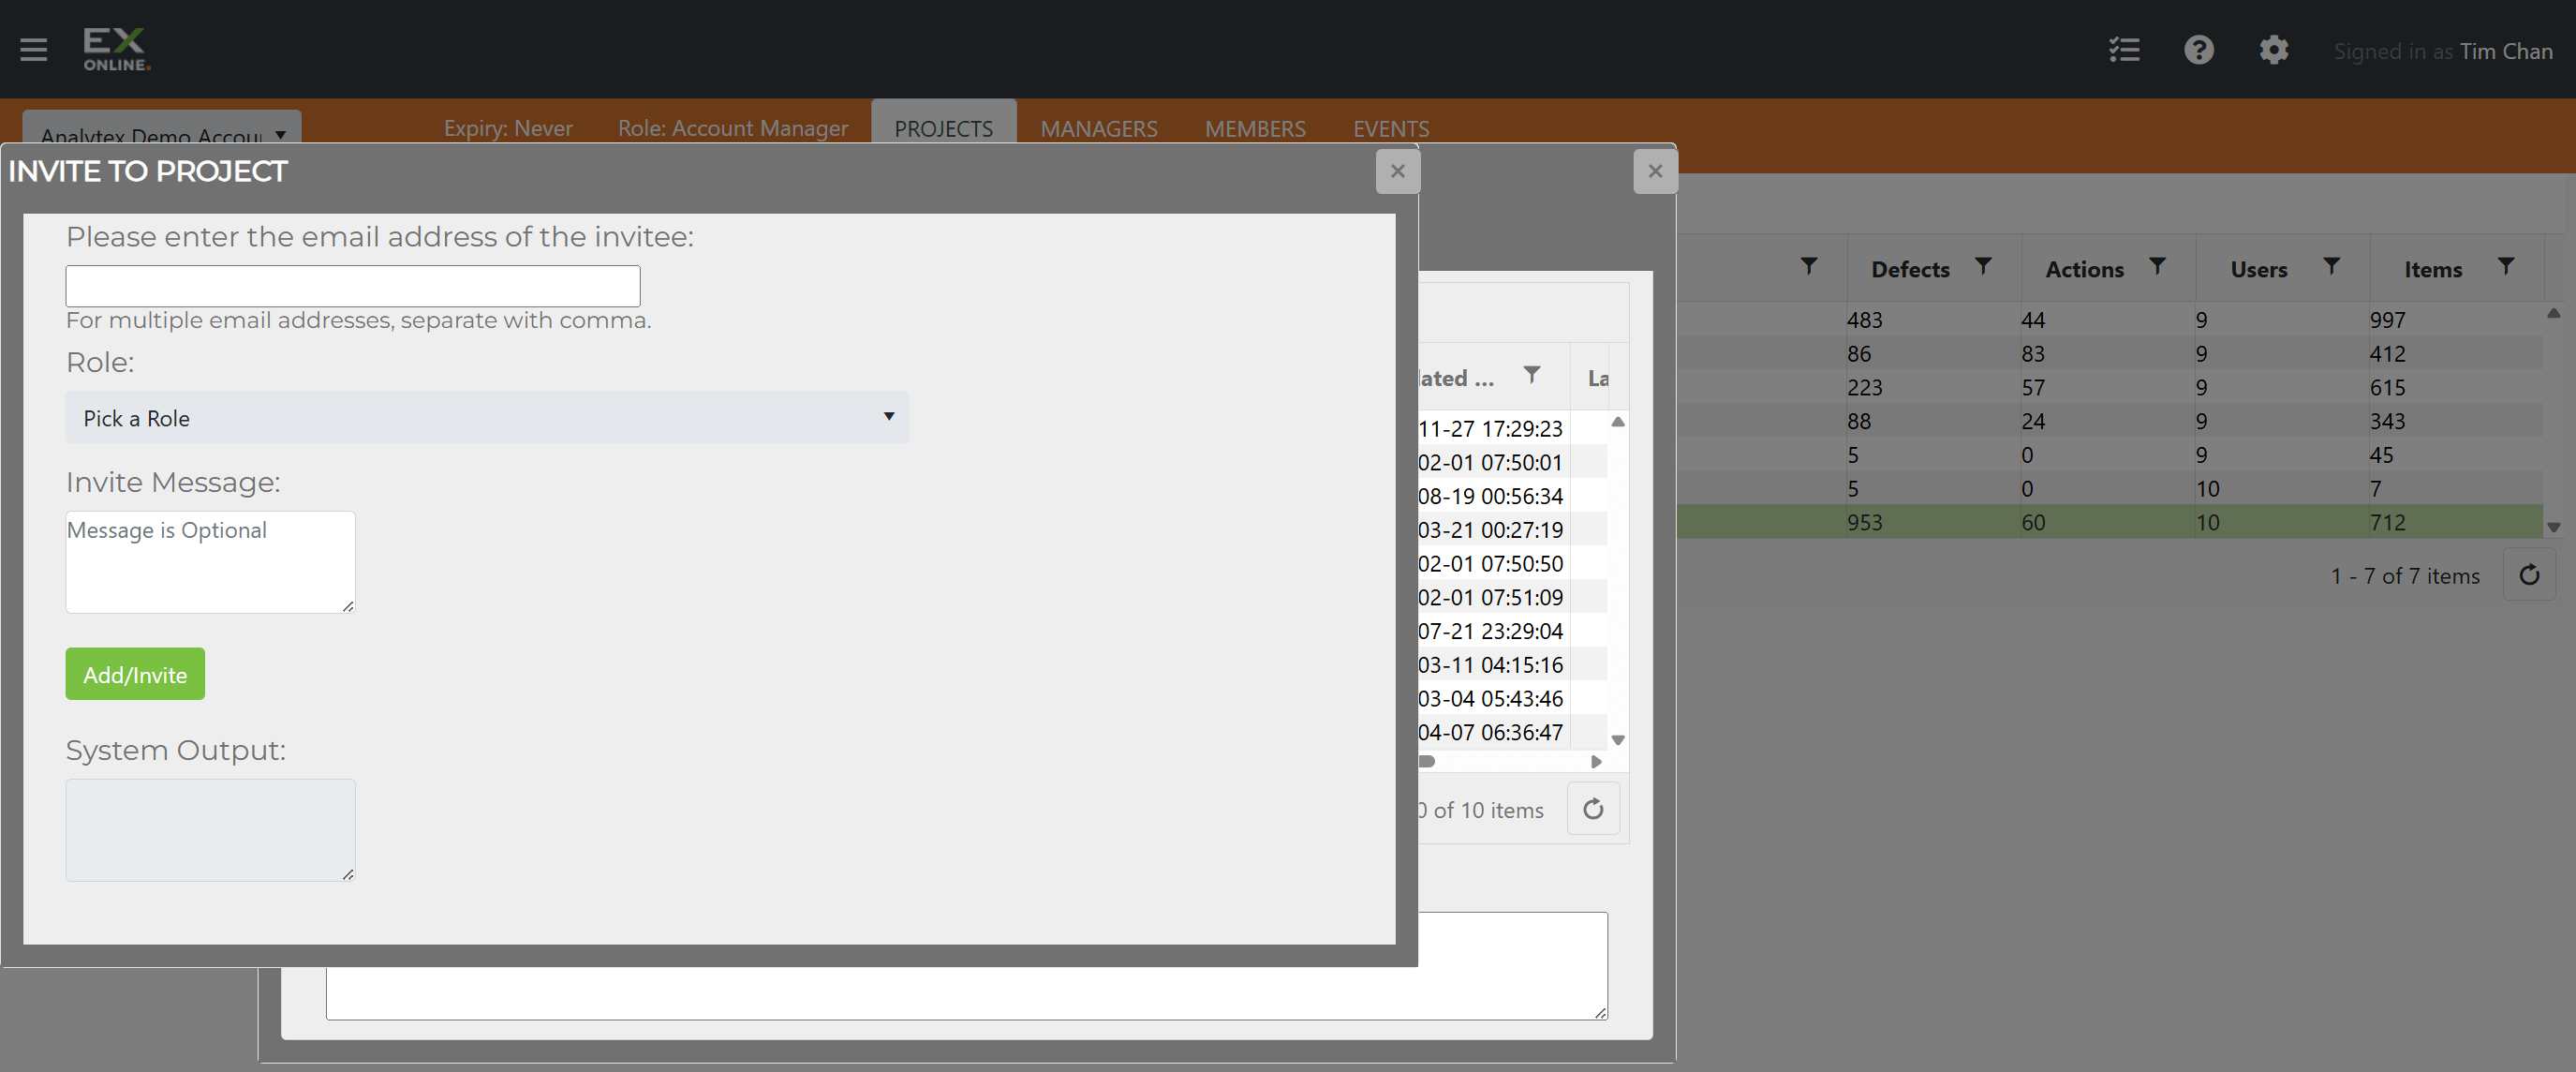
The System Output box shows the result — success, already exists, or error.
Adding Account Managers
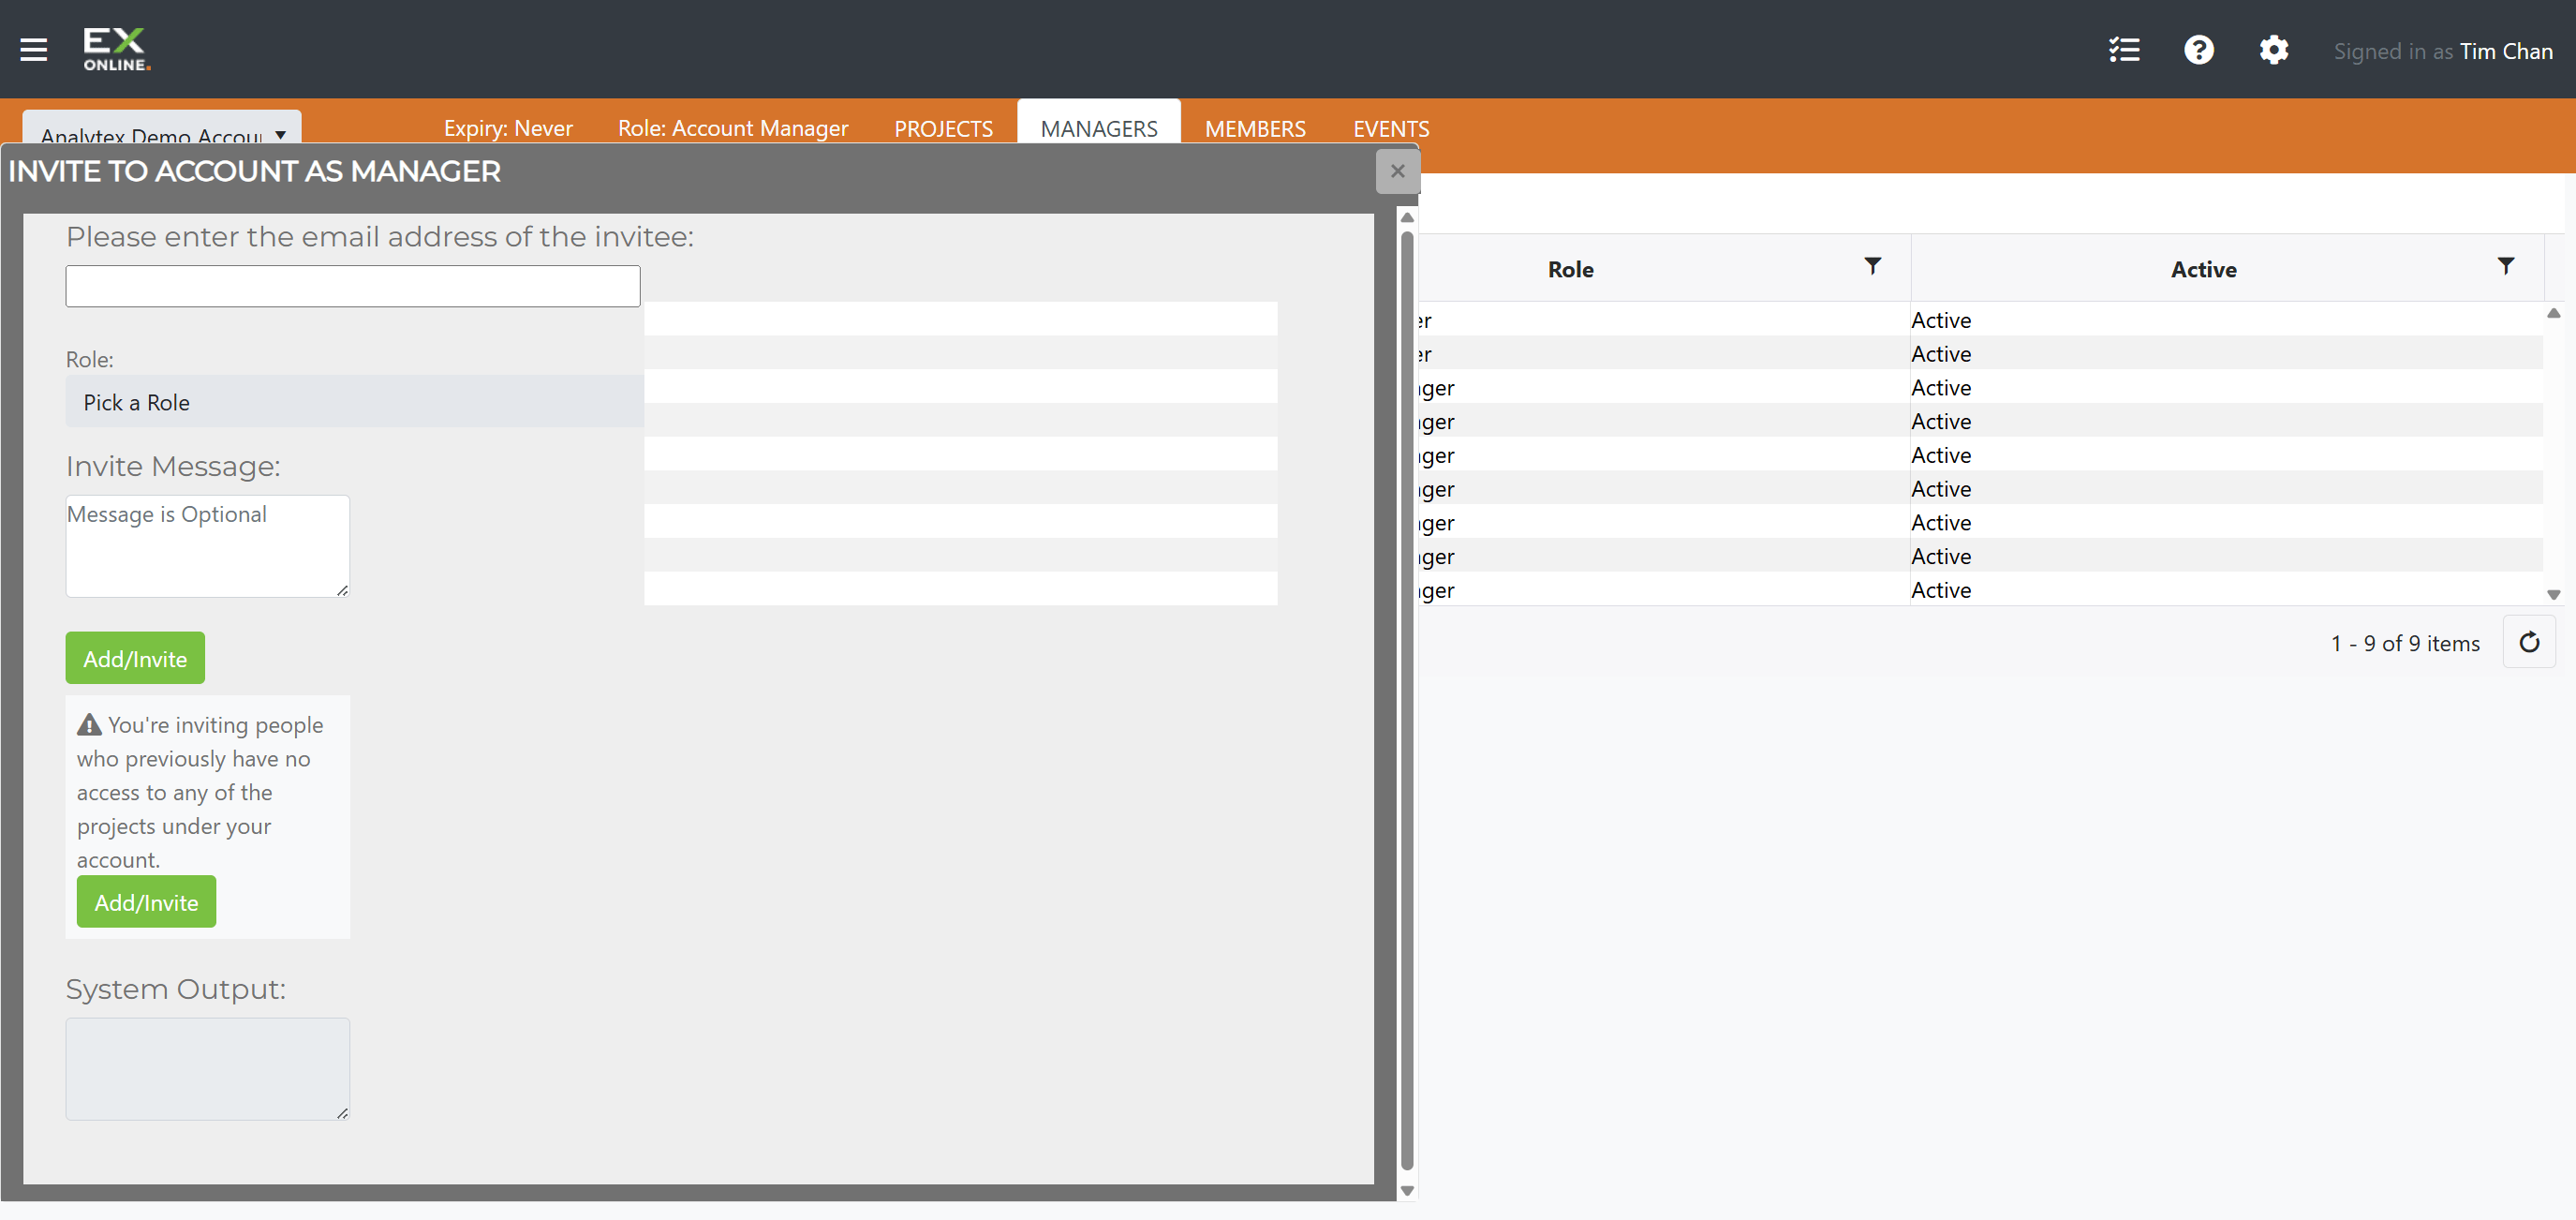
Section titled “Adding Account Managers”Account Managers have access to all projects and are automatically included in new projects.
-
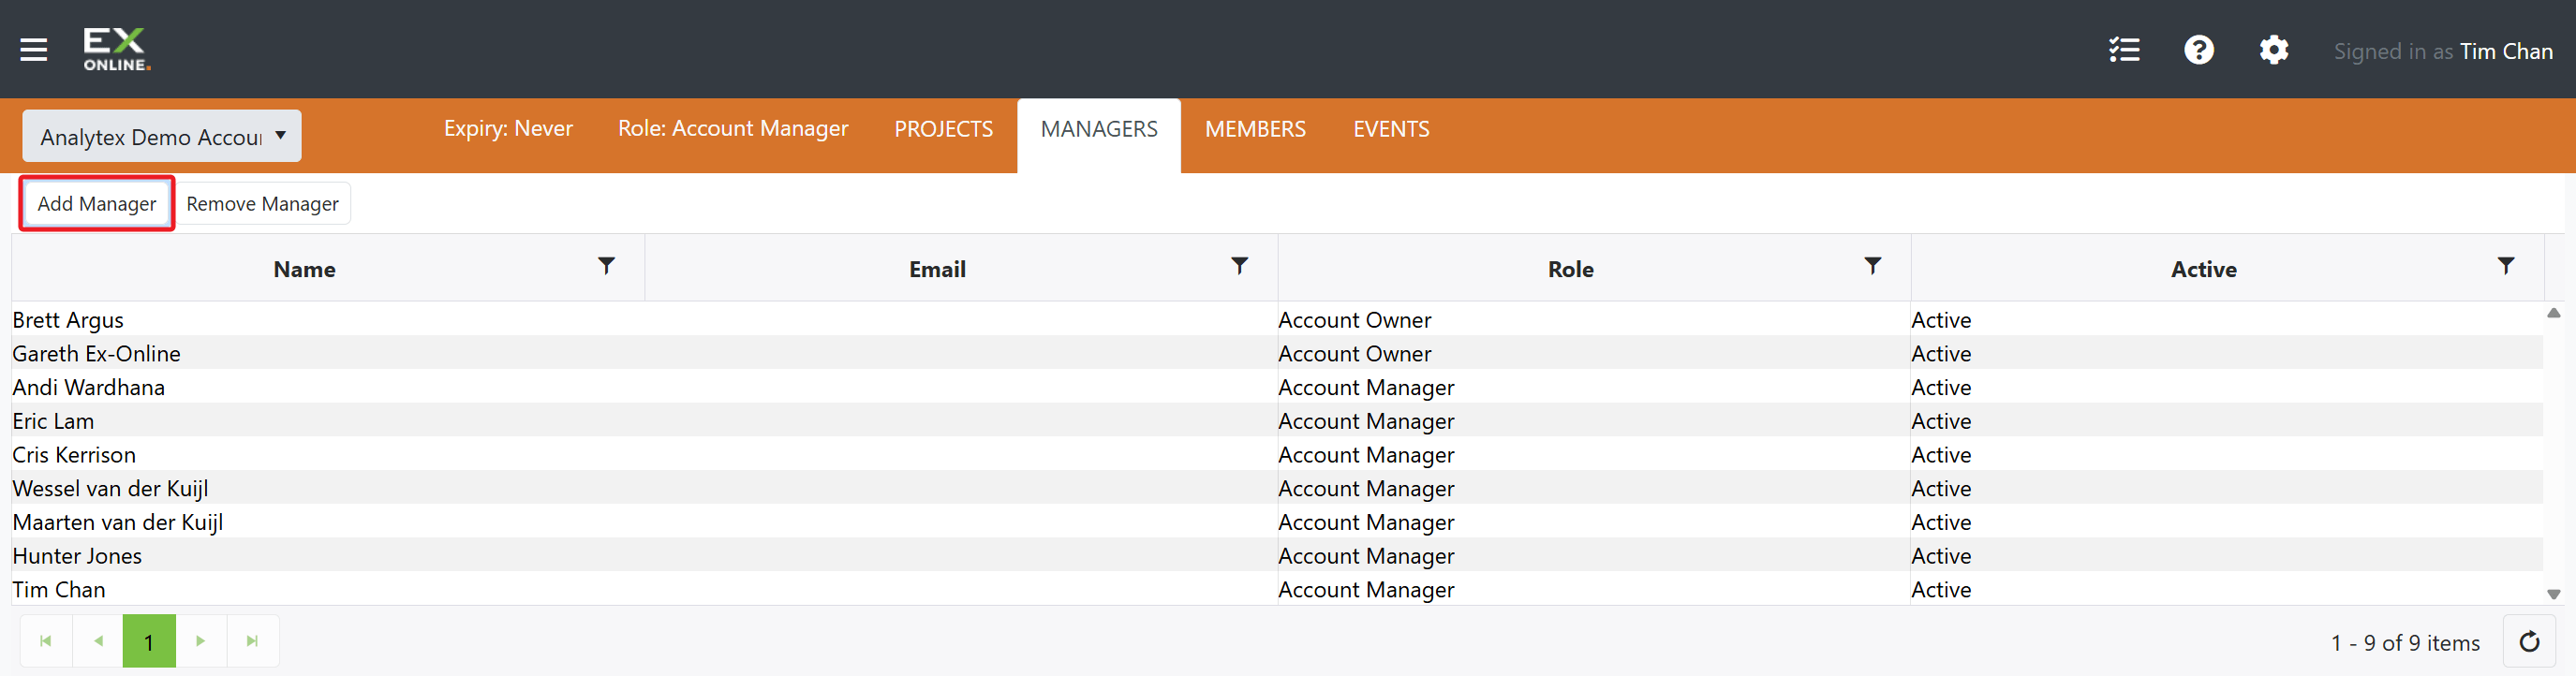
From the Accounts Page, click the MANAGERS tab.
-
Click Add Manager.
-
Enter the email address, select a role, and click Add/Invite.
For full details, see Managers.
Troubleshooting
Section titled “Troubleshooting”| Issue | Solution |
|---|---|
| User doesn’t see the project | Check the System Output to confirm the invitation succeeded; verify the correct email was used |
| User can’t edit | Confirm they have Editor or Project Manager role, not Viewer |
| Can’t find the invite form | Open the Project Info Panel from the Accounts Page (green circle icon), then click the USERS tab |
Related Topics
Section titled “Related Topics”- User Permissions — Detailed permission reference
- Managers — Managing Owners and Managers
- Members — Viewing all users with account access