
Managing Equipment
This guide covers everyday equipment management tasks: adding new items, editing fields, deleting equipment, and working with multiple items at once. For a full description of every field and feature, see the Equipment reference.
Adding Equipment
Section titled “Adding Equipment”To add a new equipment item to your project:
-
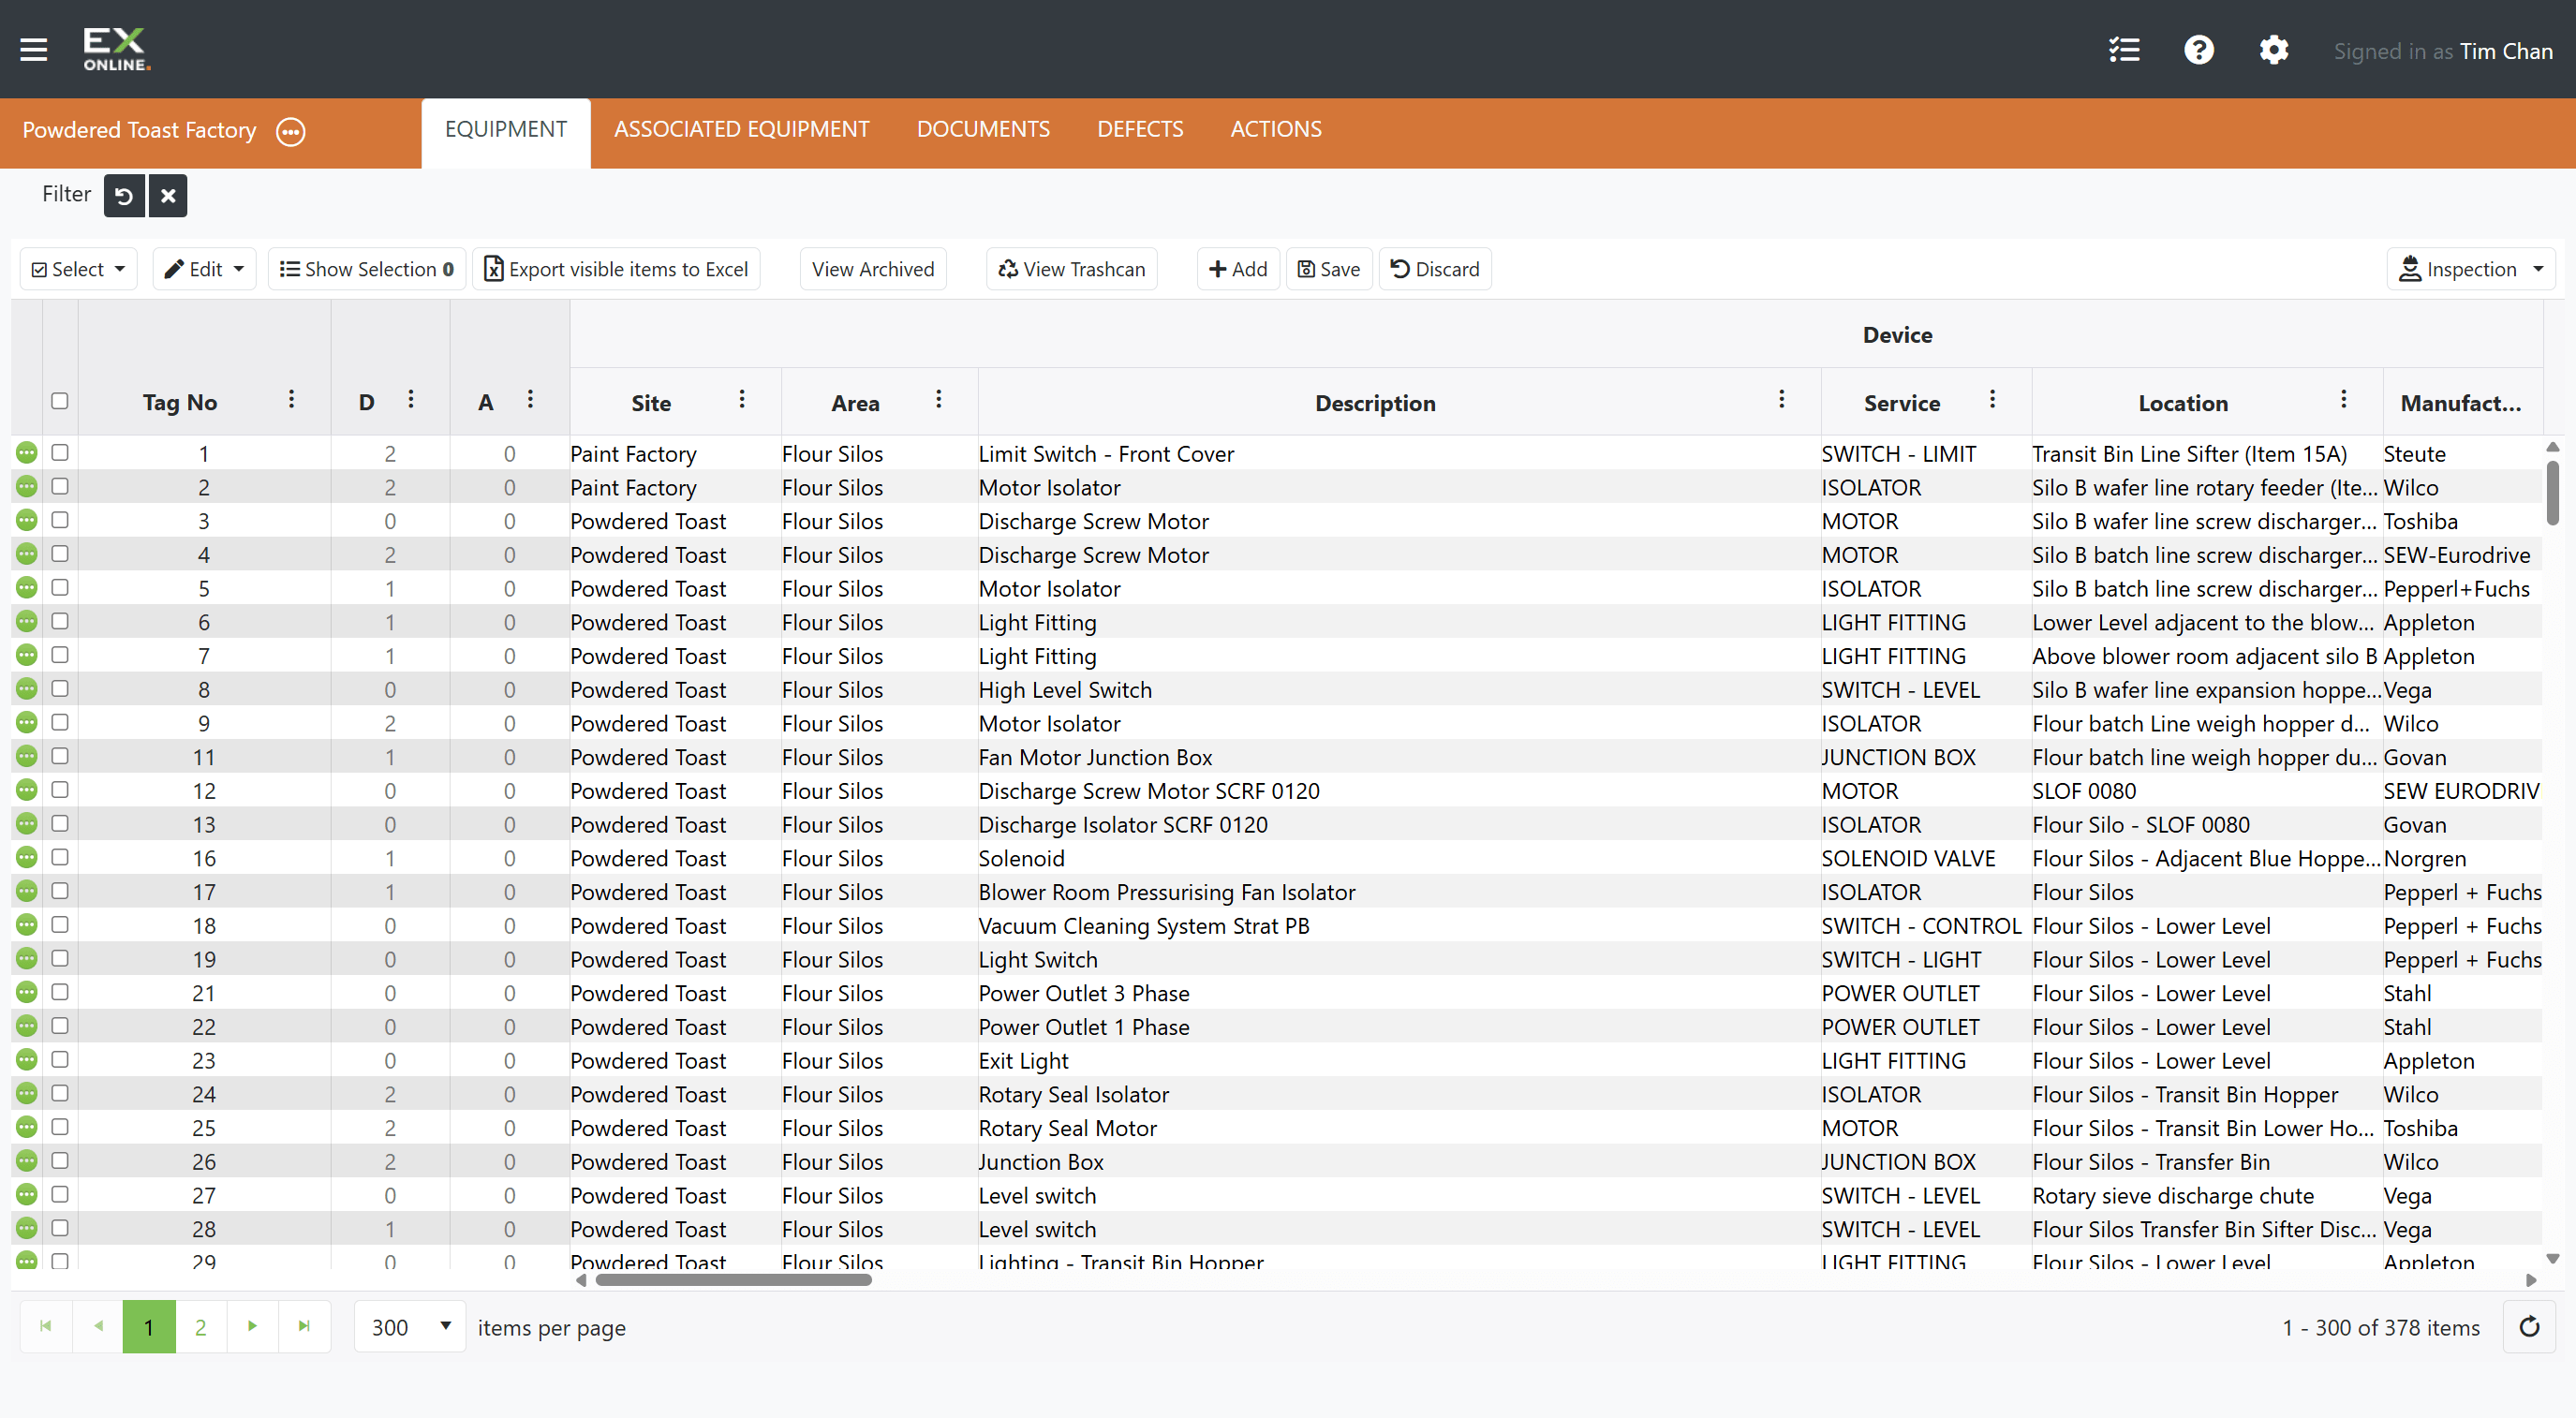
Go to the EQUIPMENT tab in the orange header bar.
-
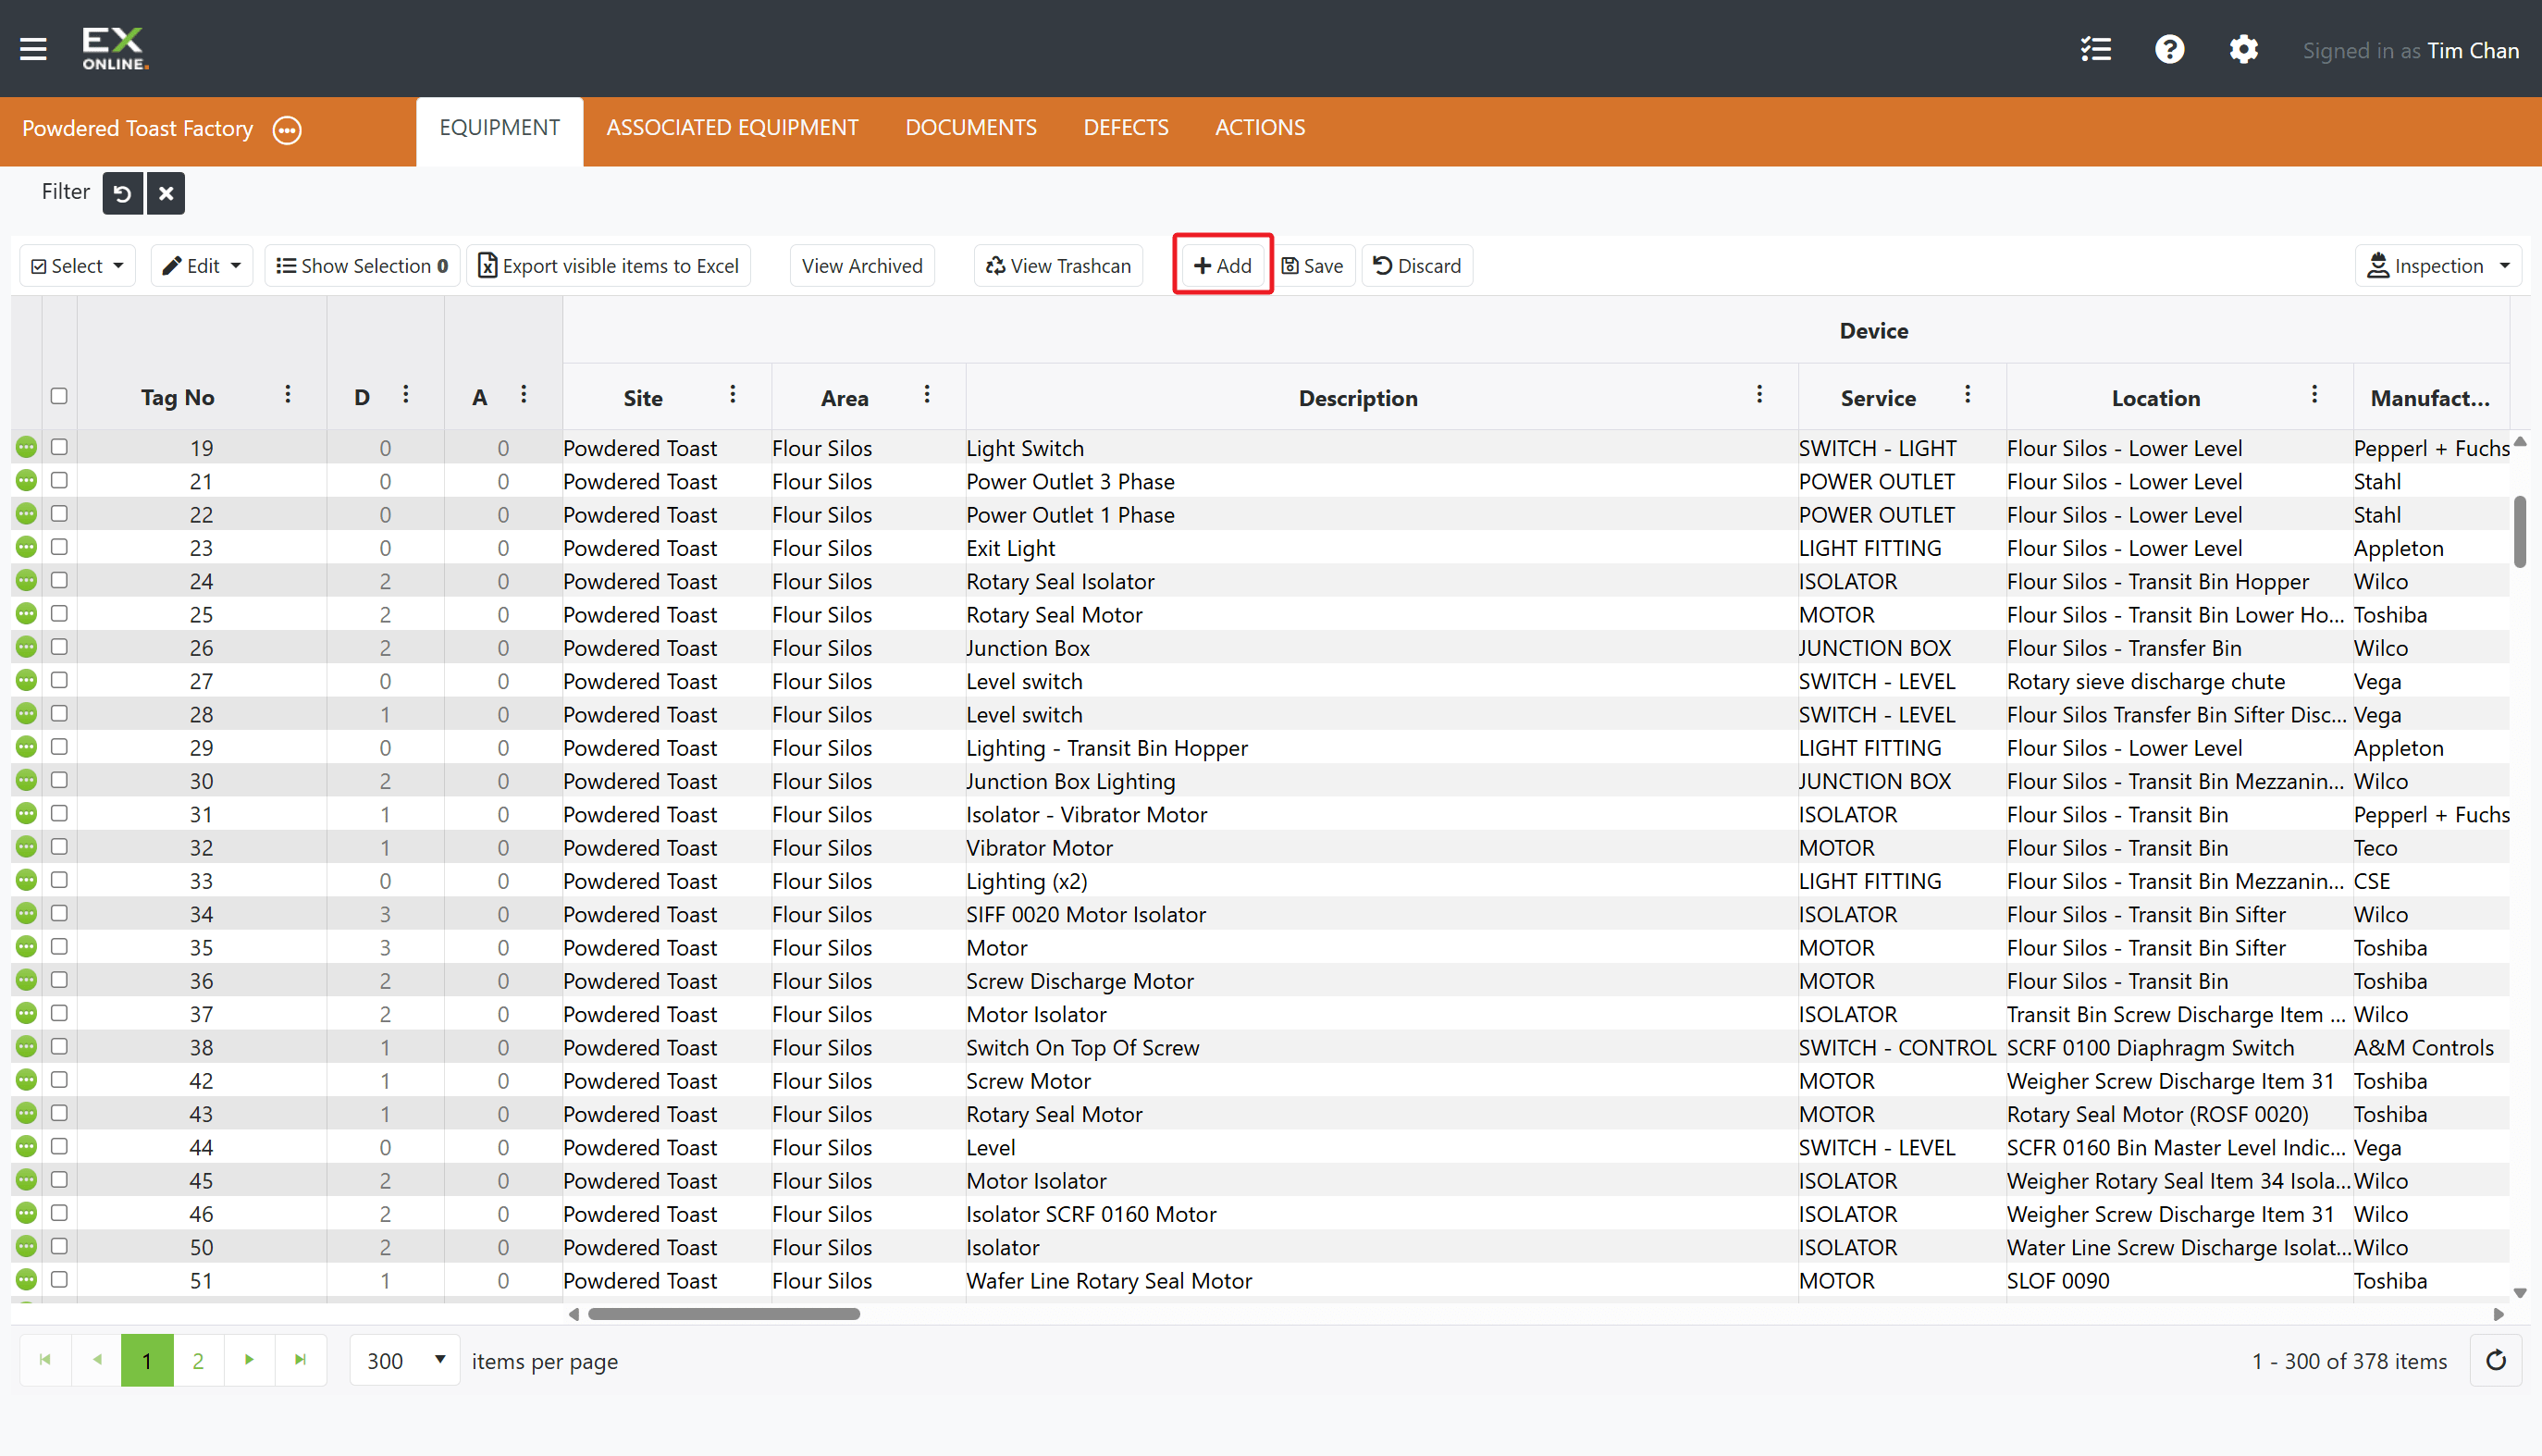
Click the + Add button in the toolbar
-
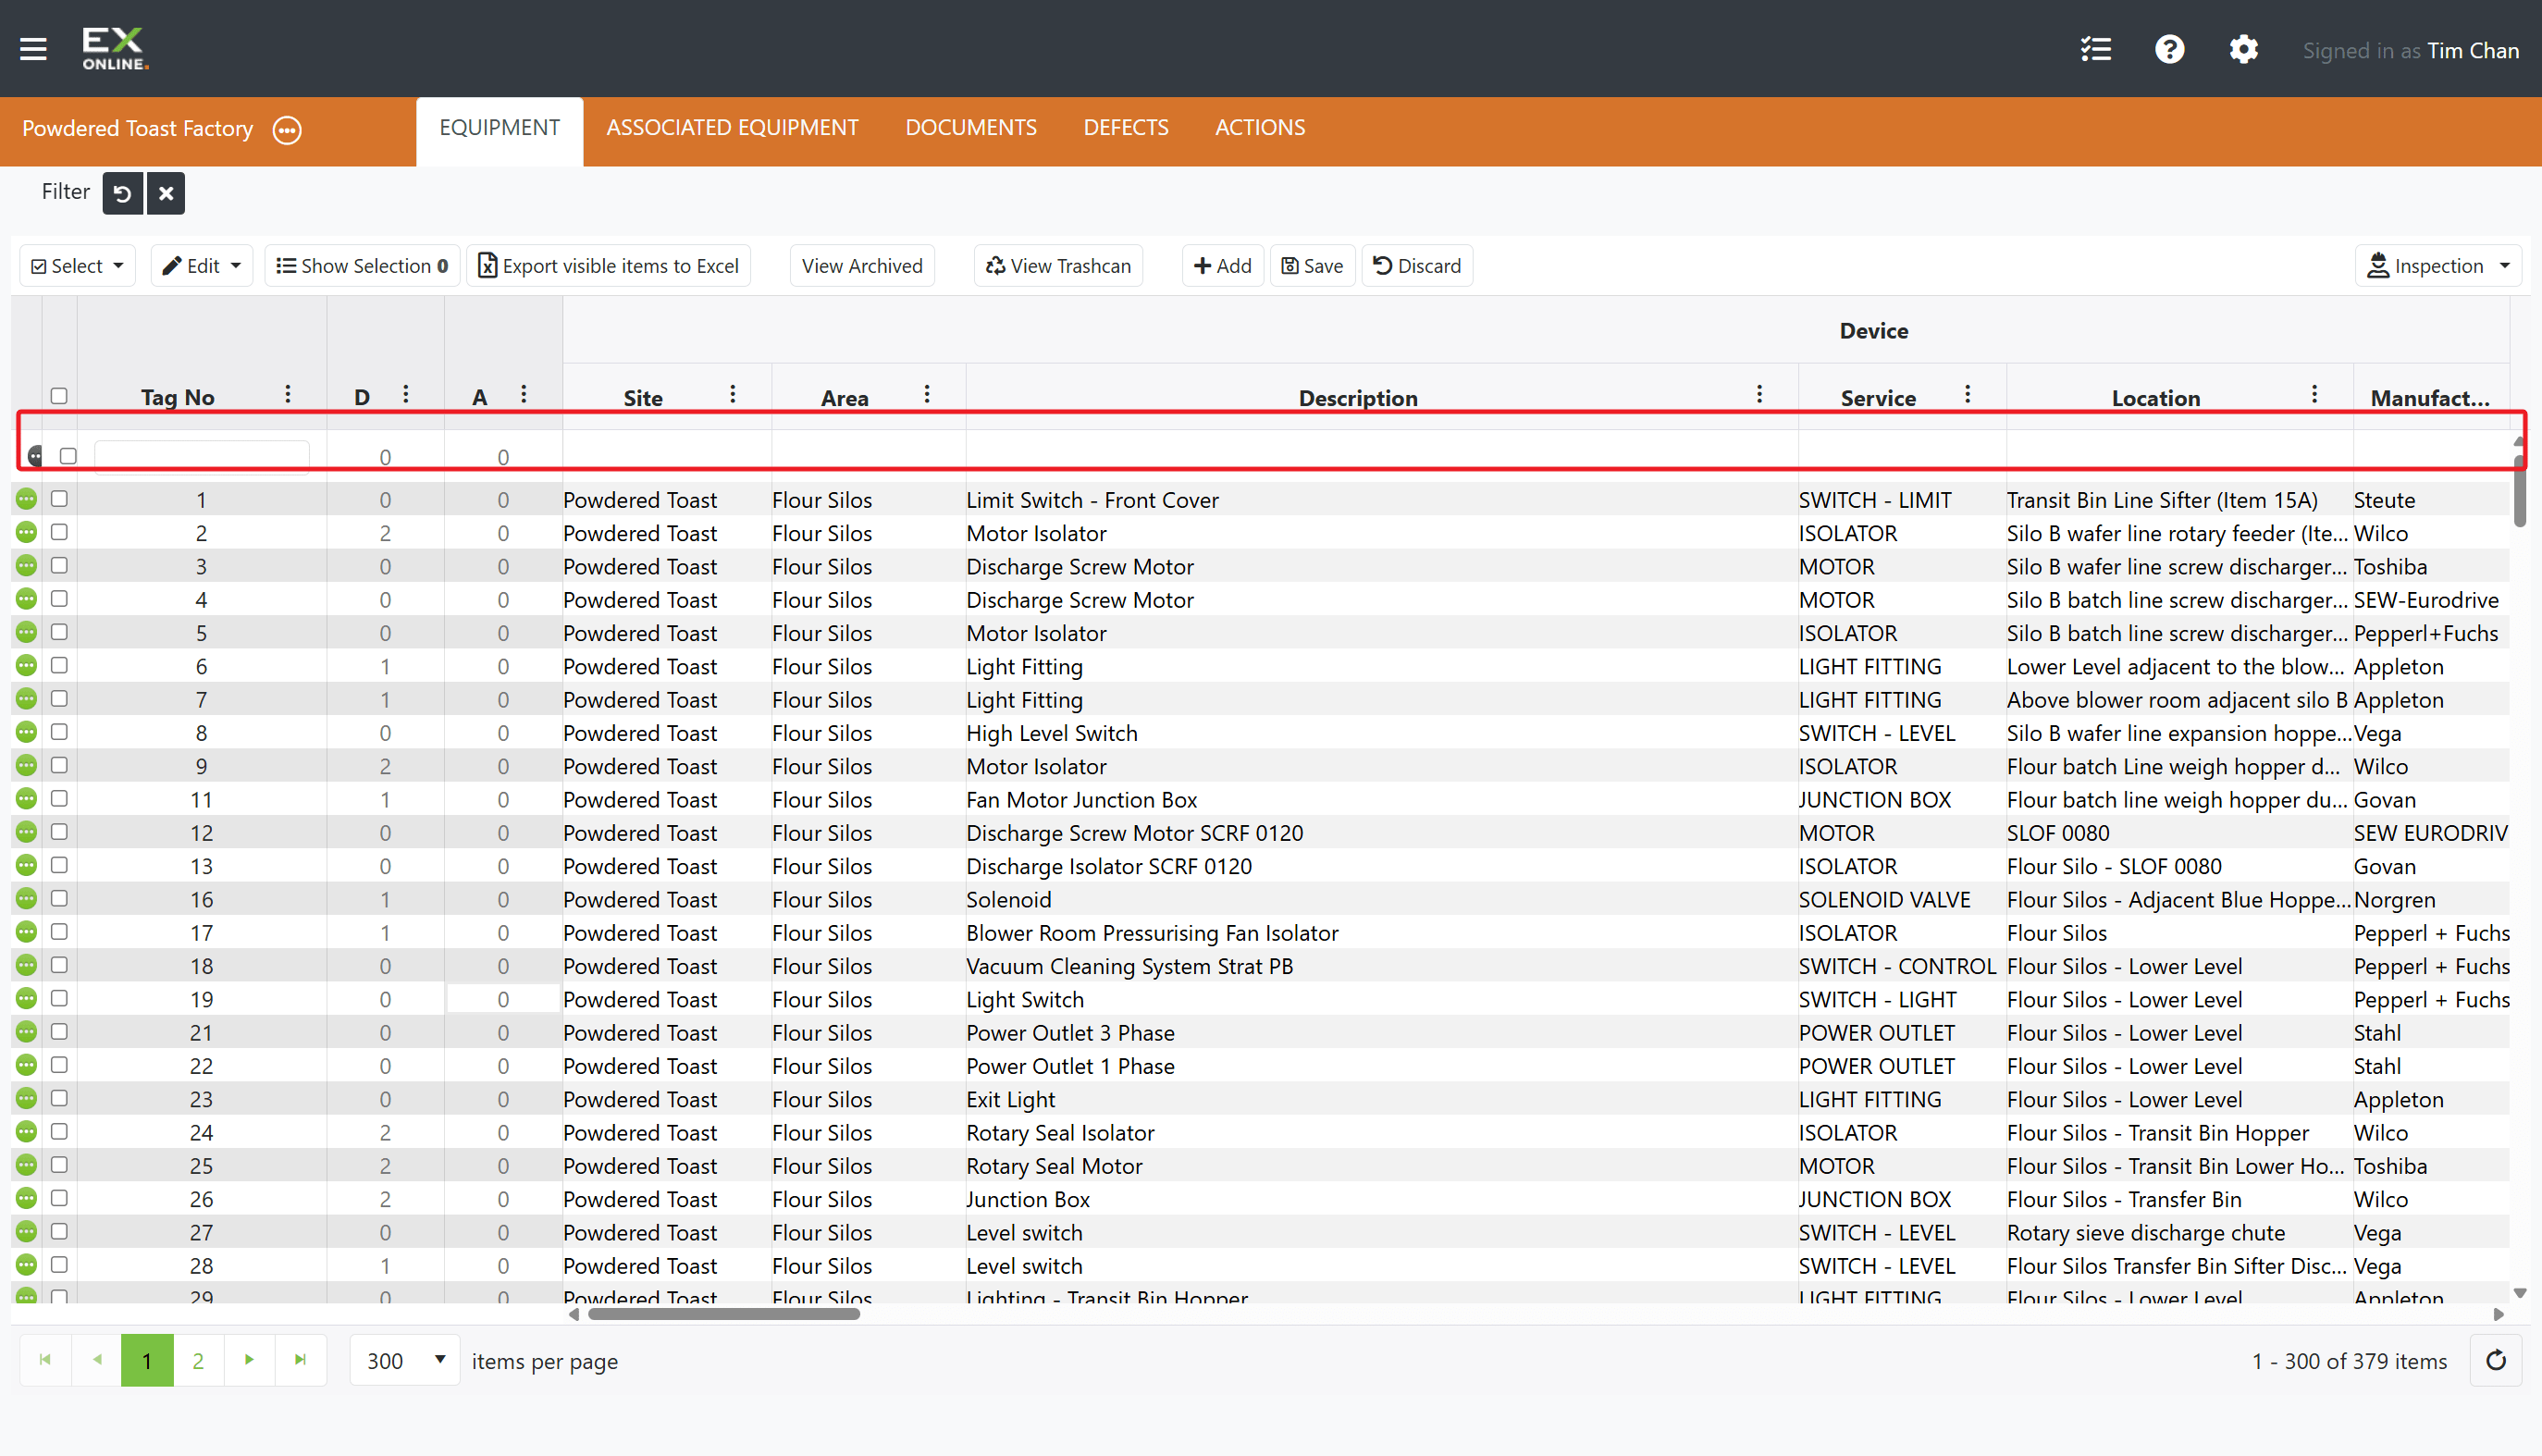
A new empty row appears at the top of the grid
-
Enter a unique Tag No (e.g., “P-001”, “M-101”).
-
Fill in key fields: Site, Area, Description.
-
Add optional details: Manufacturer, Model, Serial No, Service, Location.
-
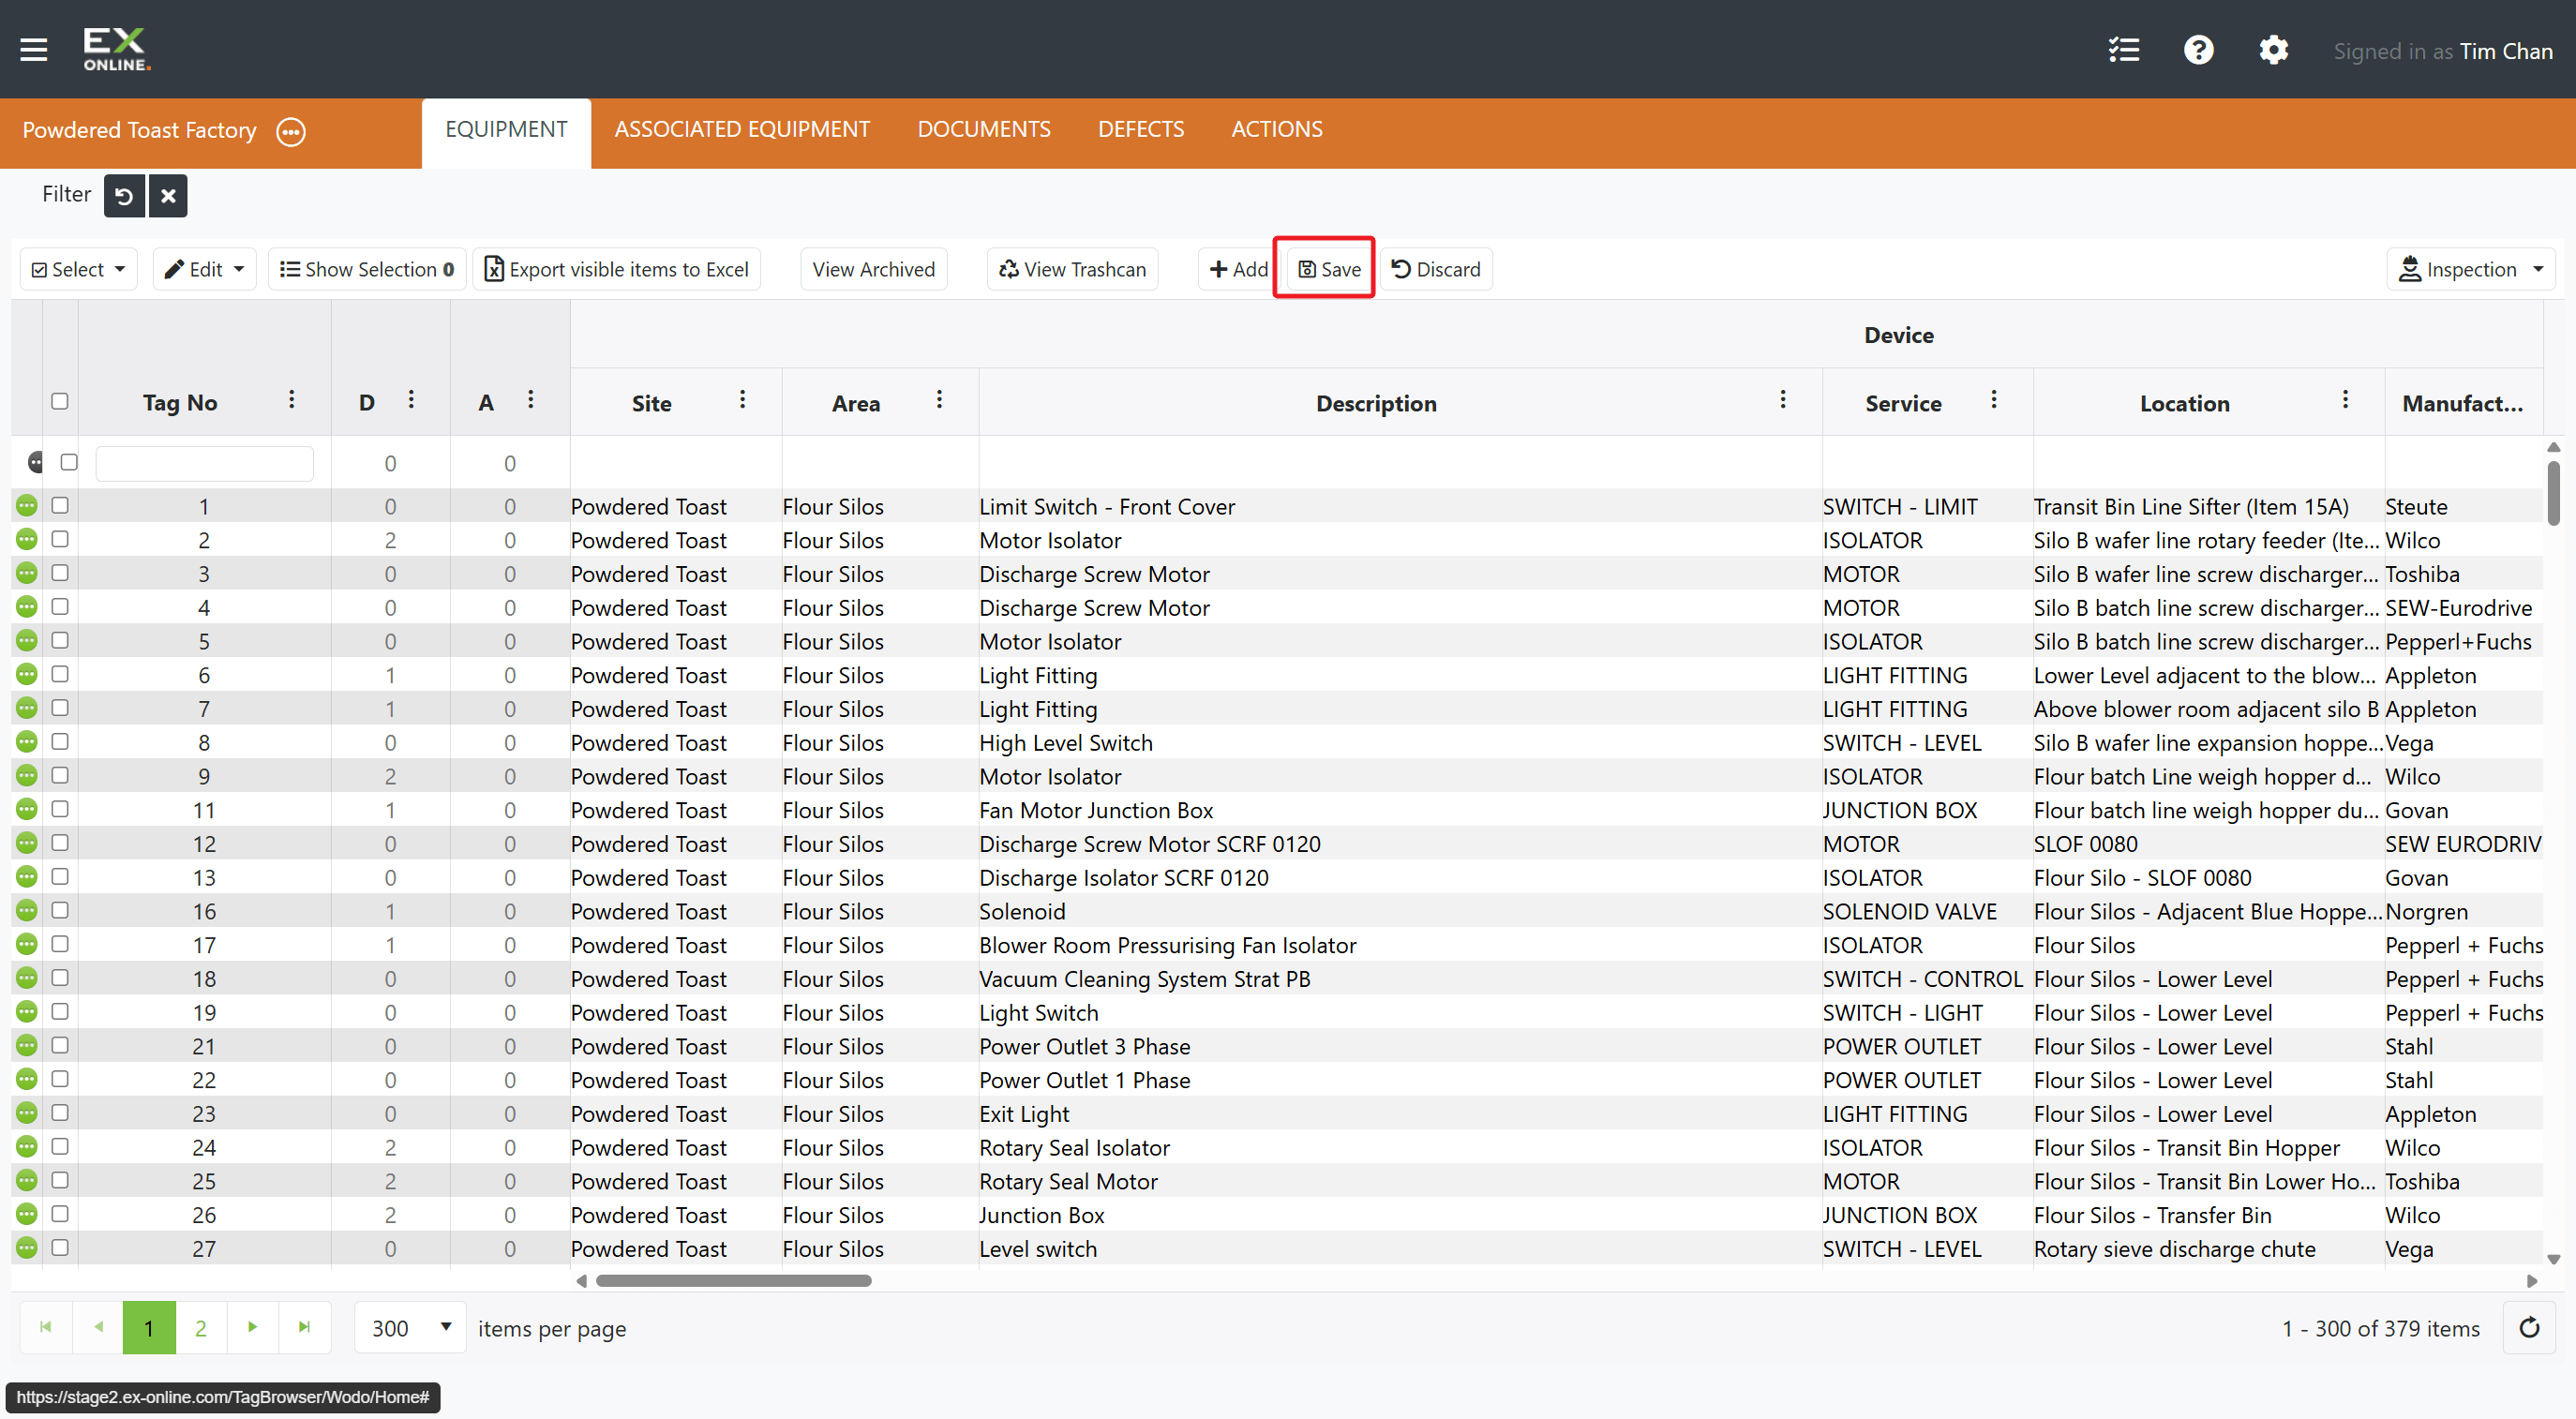
Click Save in the toolbar to commit the new item
Finding Equipment
Section titled “Finding Equipment”Use the column filters to narrow the grid to the items you need. Click the filter icon next to any column header to filter by that column’s values — for example, filter by Area to see only equipment in a specific location, or by Manufacturer to review a particular brand. Filters can be combined across columns. See Filtering and Sorting Data for step-by-step instructions.
Editing Equipment in the Grid
Section titled “Editing Equipment in the Grid”The quickest way to update a single field is to edit it directly in the grid.
-
Go to the EQUIPMENT tab in the orange header bar.
-
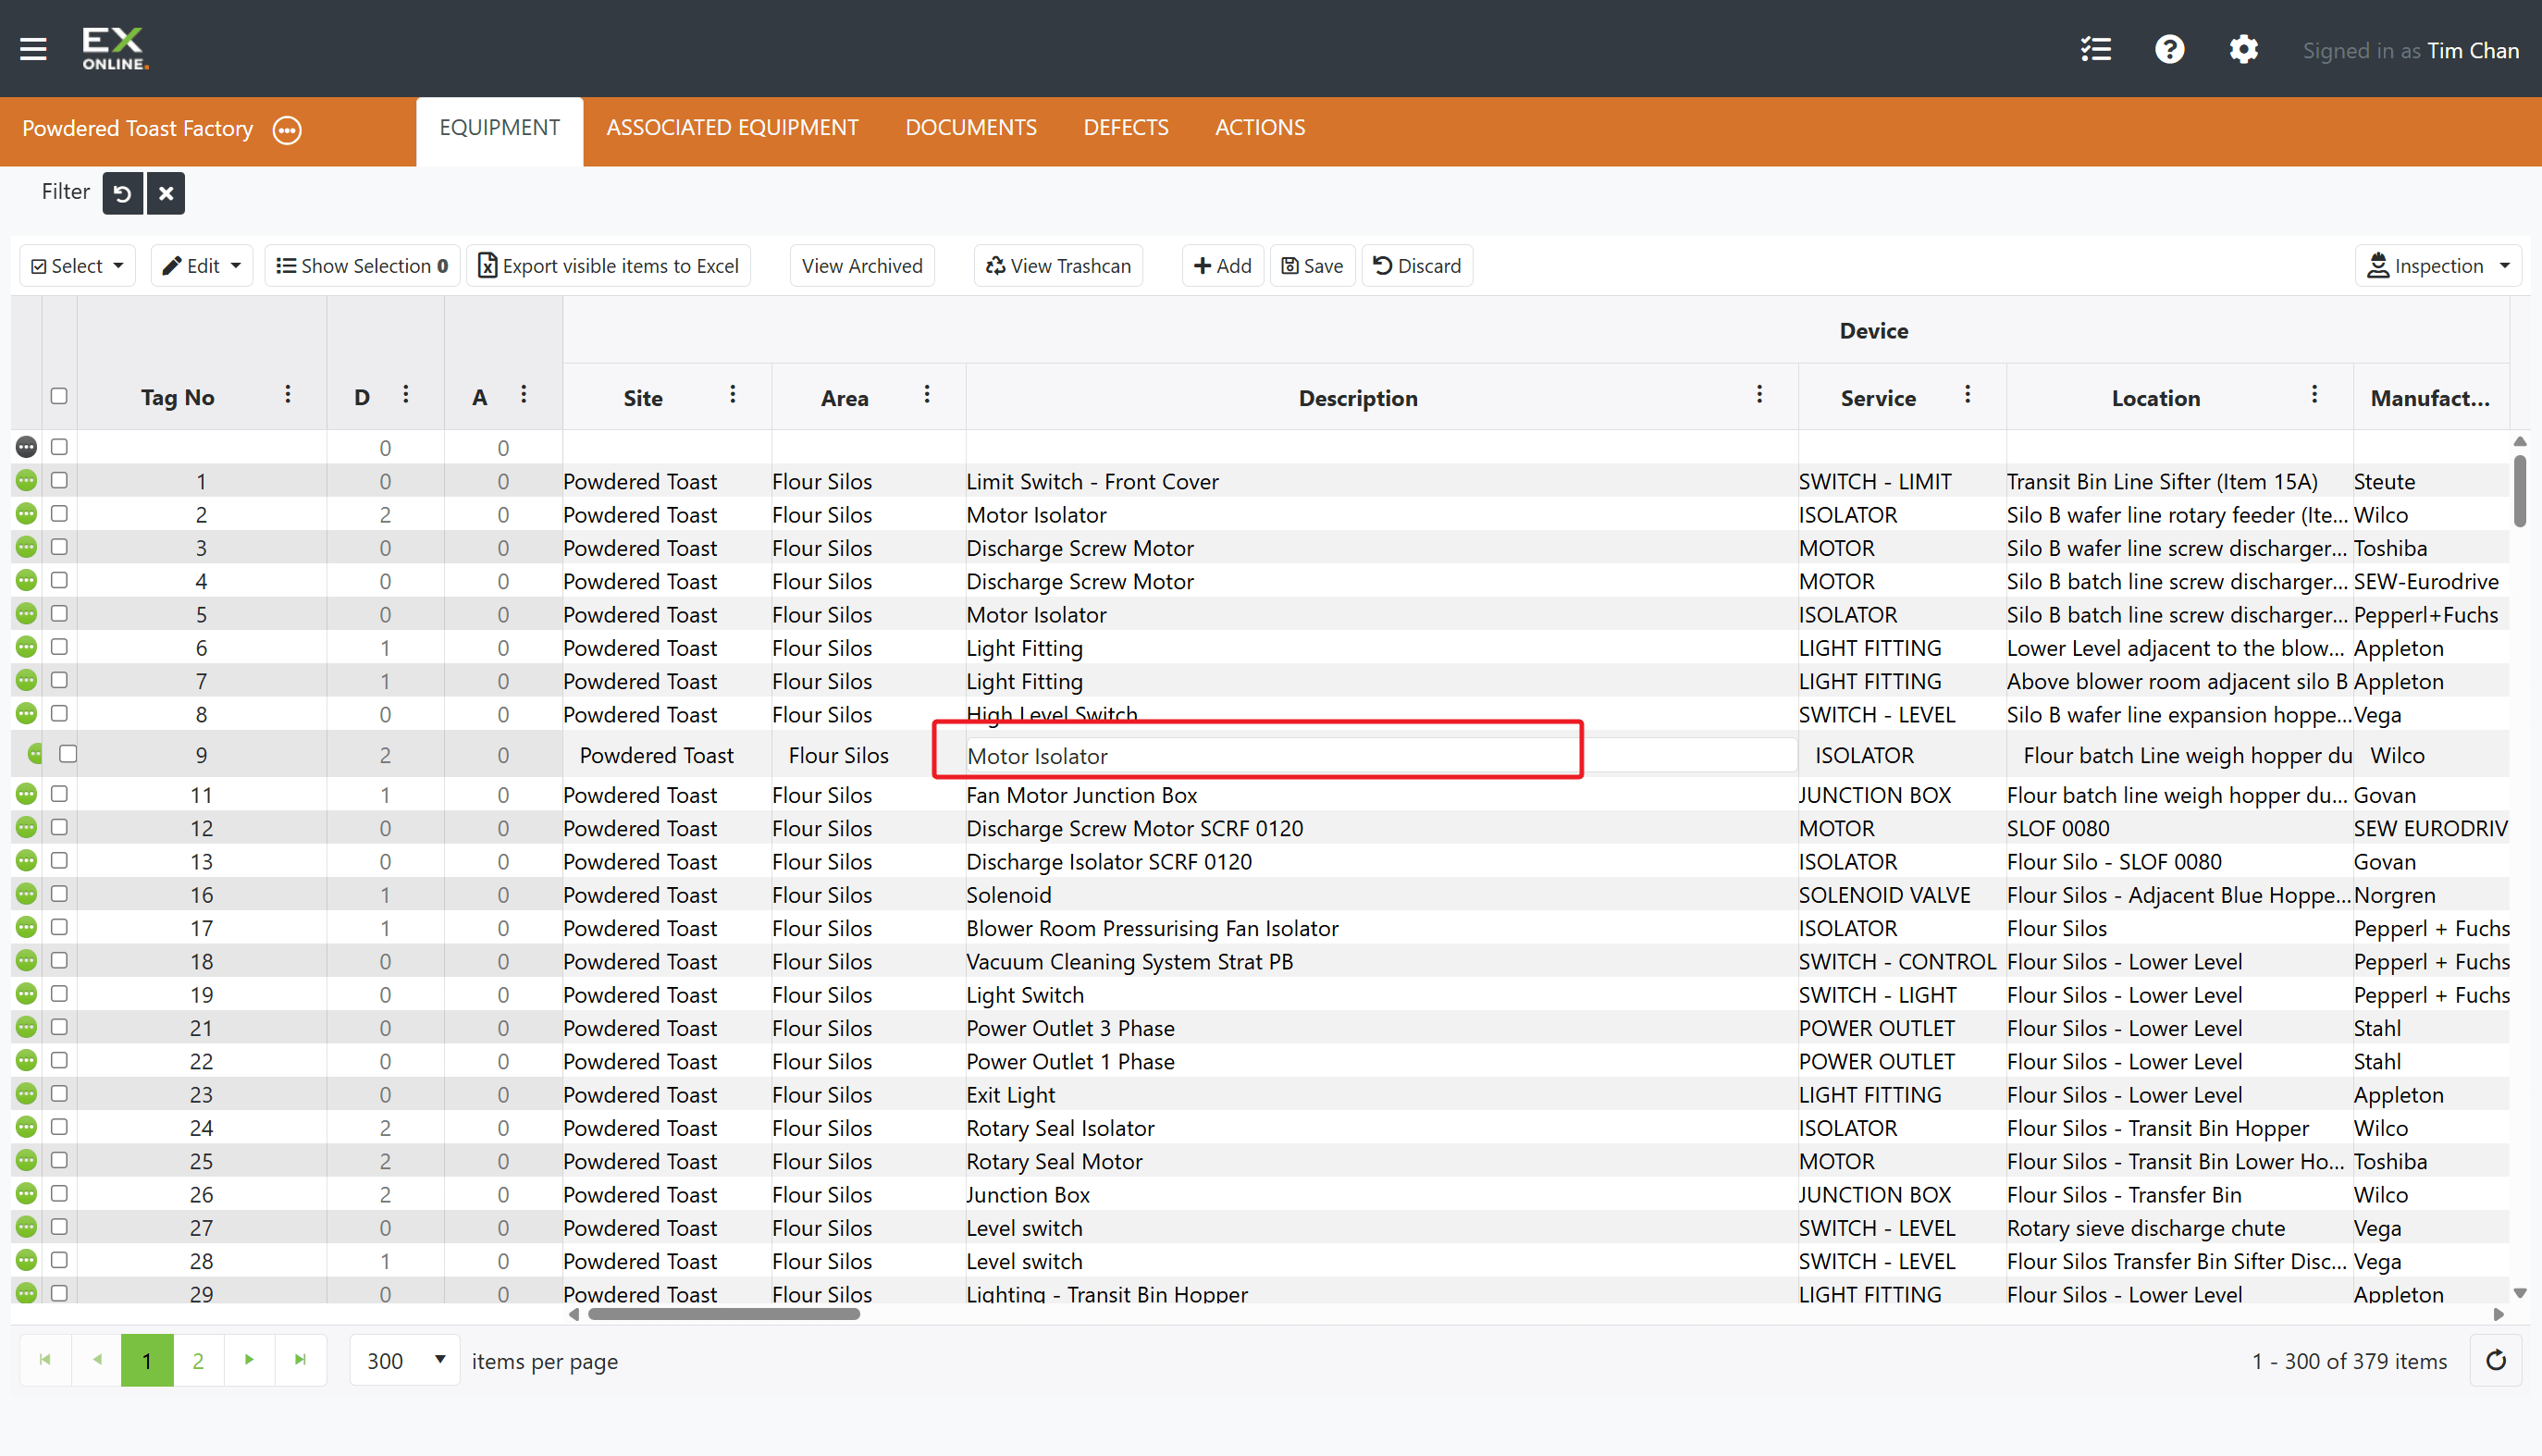
Click on any editable cell in the equipment row.
-
Modify the value
-
Click Save in the toolbar to commit, or Discard to cancel.
Editing Equipment in the Equipment Window
Section titled “Editing Equipment in the Equipment Window”The Equipment Window provides access to all fields and tabs for a single item.
-
Go to the EQUIPMENT tab in the orange header bar.
-
Click the green expand icon on the left of any equipment row.
-
The Equipment Window opens showing the Item Details tab
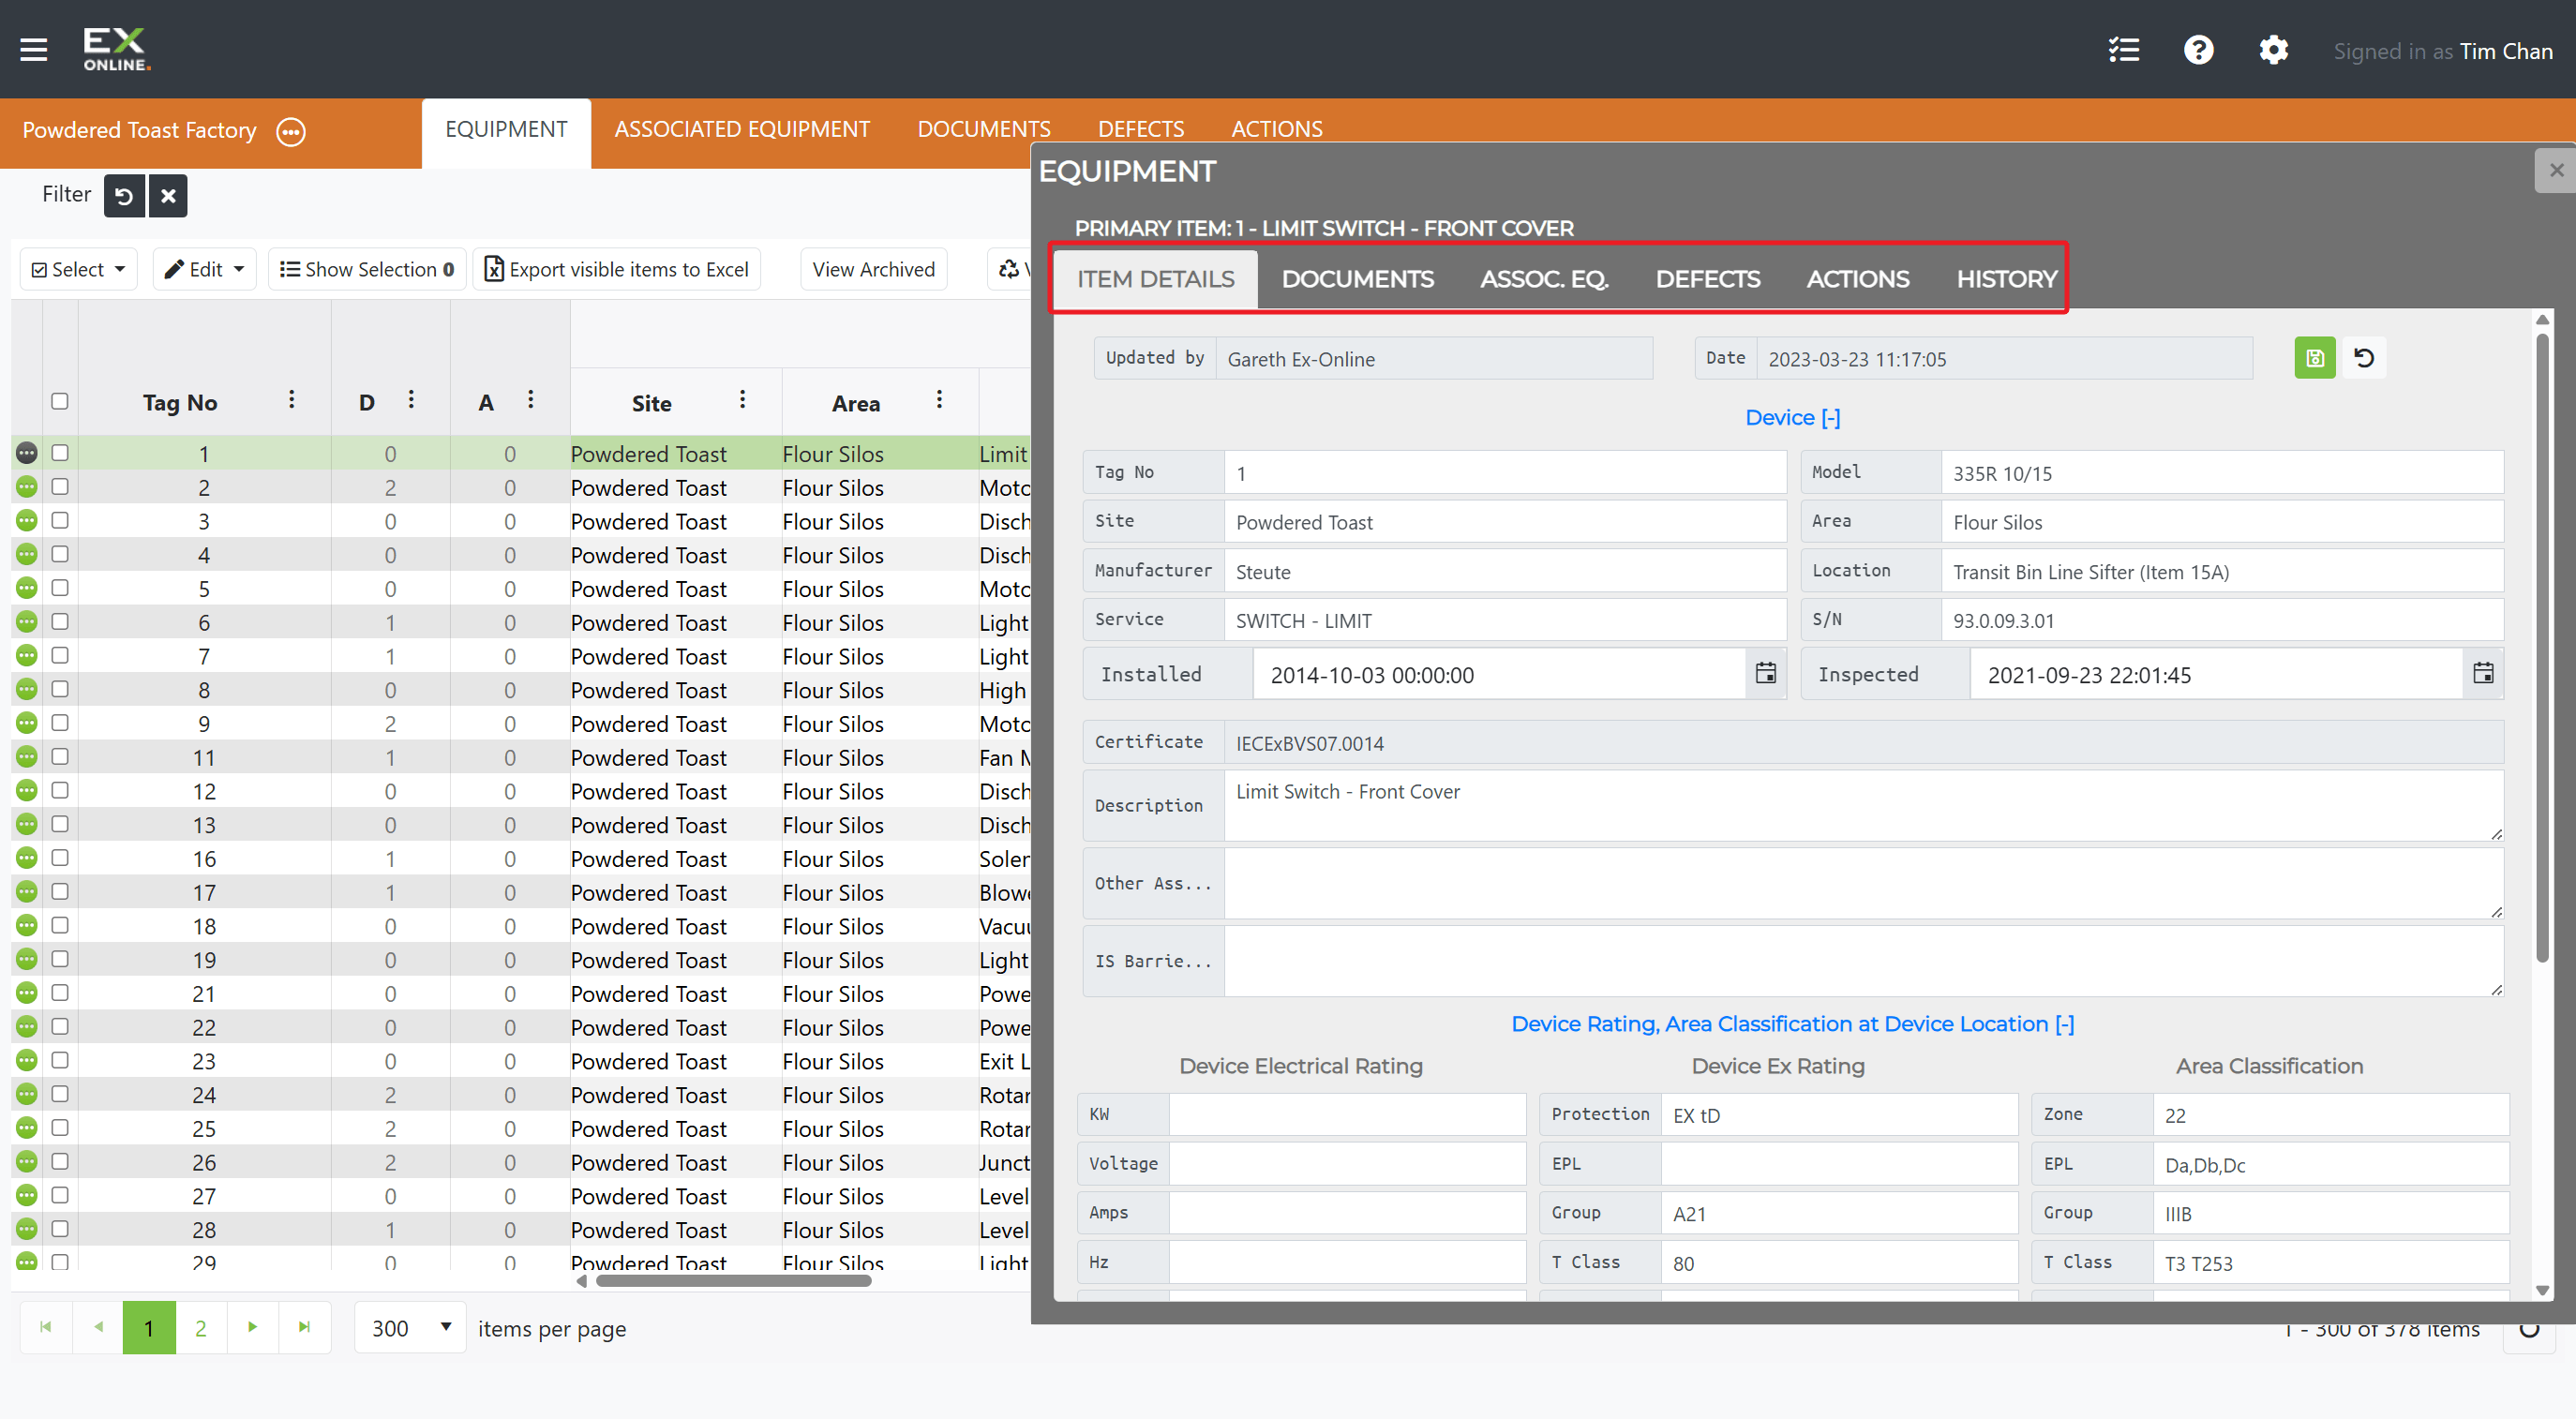
From here you can:
- Edit any field in the Item Details tab, then click Save
- Switch to Documents to manage linked files
- View Defects and Actions for this item
- Check Assoc. Eq. for linked associated equipment
- Review the History tab for all changes made to this item
Group Editing
Section titled “Group Editing”When you need to apply the same change to several items at once, select them first, then use the Edit dropdown in the toolbar.
- Go to the EQUIPMENT tab in the orange header bar.
- Use the Select dropdown to select all items, or check the boxes next to individual items — use the header checkbox to select all items on the current page.
- Click Edit in the toolbar and choose an operation (Delete, Search / Replace, Archive, Add Defect, etc.)
Not every Edit menu option is available for every selection. Some operations (such as Undo) only apply when a single item is selected.
Group Edit in the Equipment Window
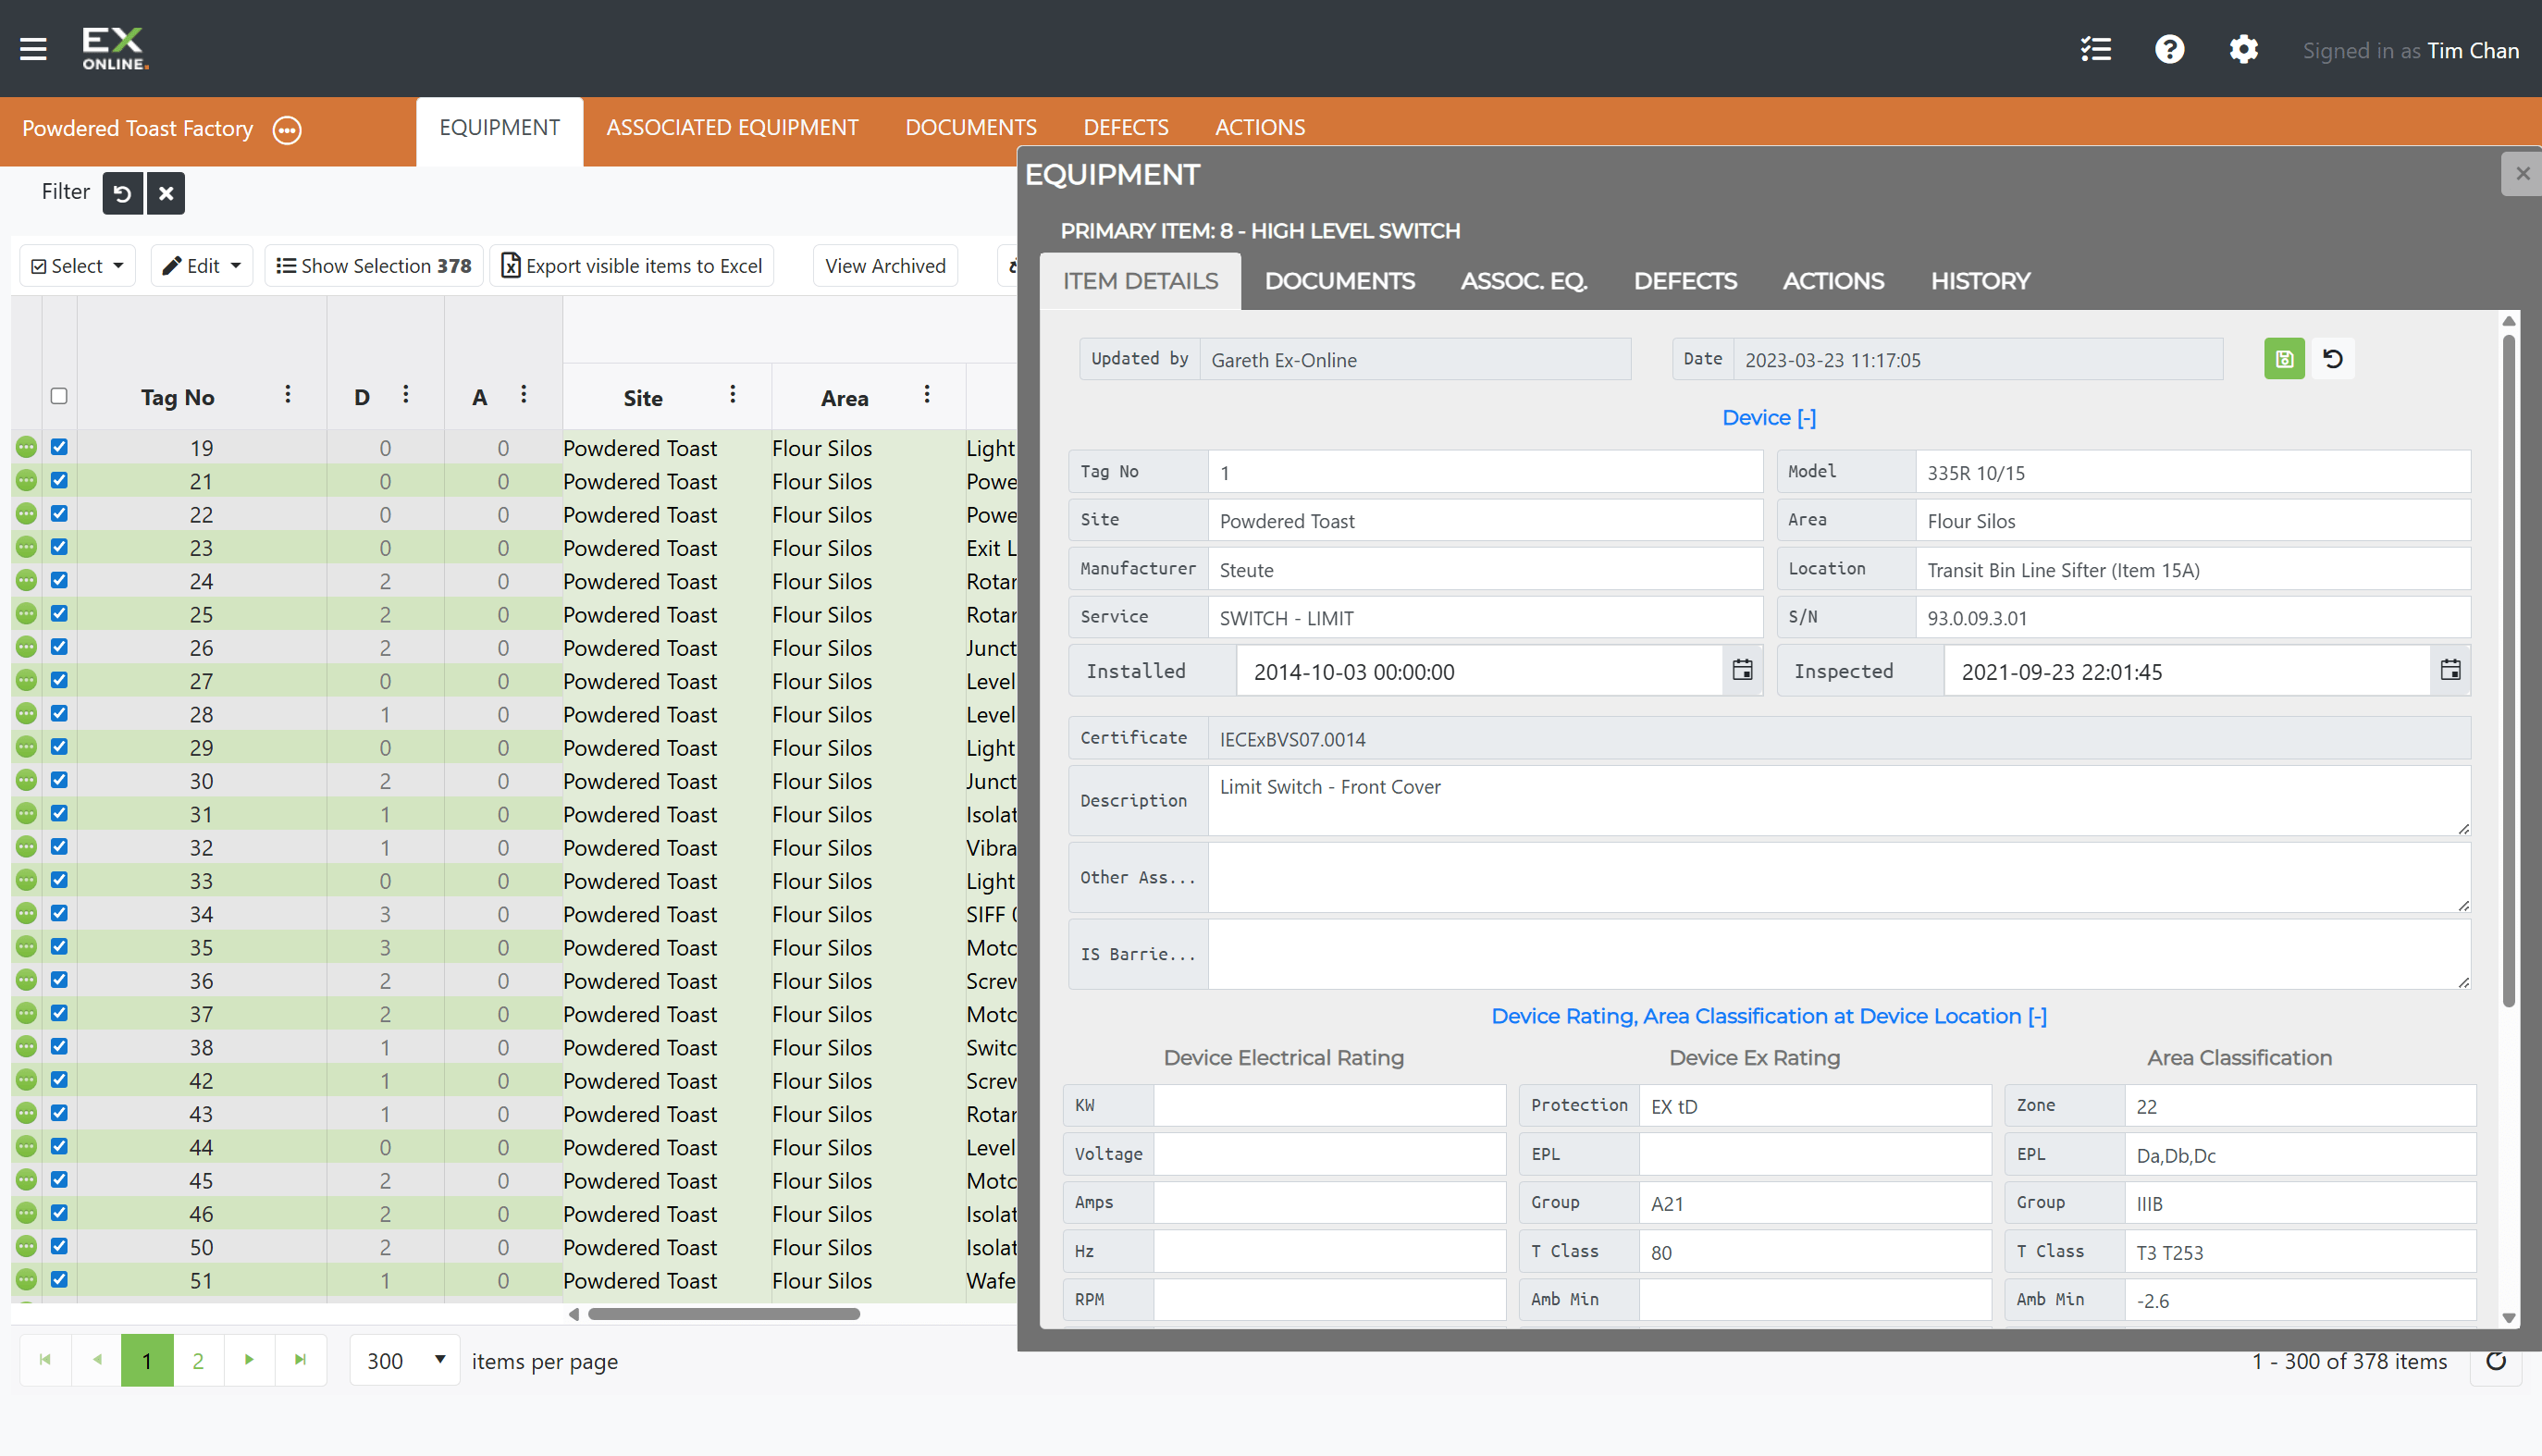
Section titled “Group Edit in the Equipment Window”If you open the Equipment Window while multiple items are selected, the window enters Group Edit mode — field changes you make and save apply to all selected items at once.
Search / Replace
Section titled “Search / Replace”To find and replace a value across multiple items at once:
-
Go to the EQUIPMENT tab in the orange header bar.
-
Select the items you want to update using the checkboxes.
-
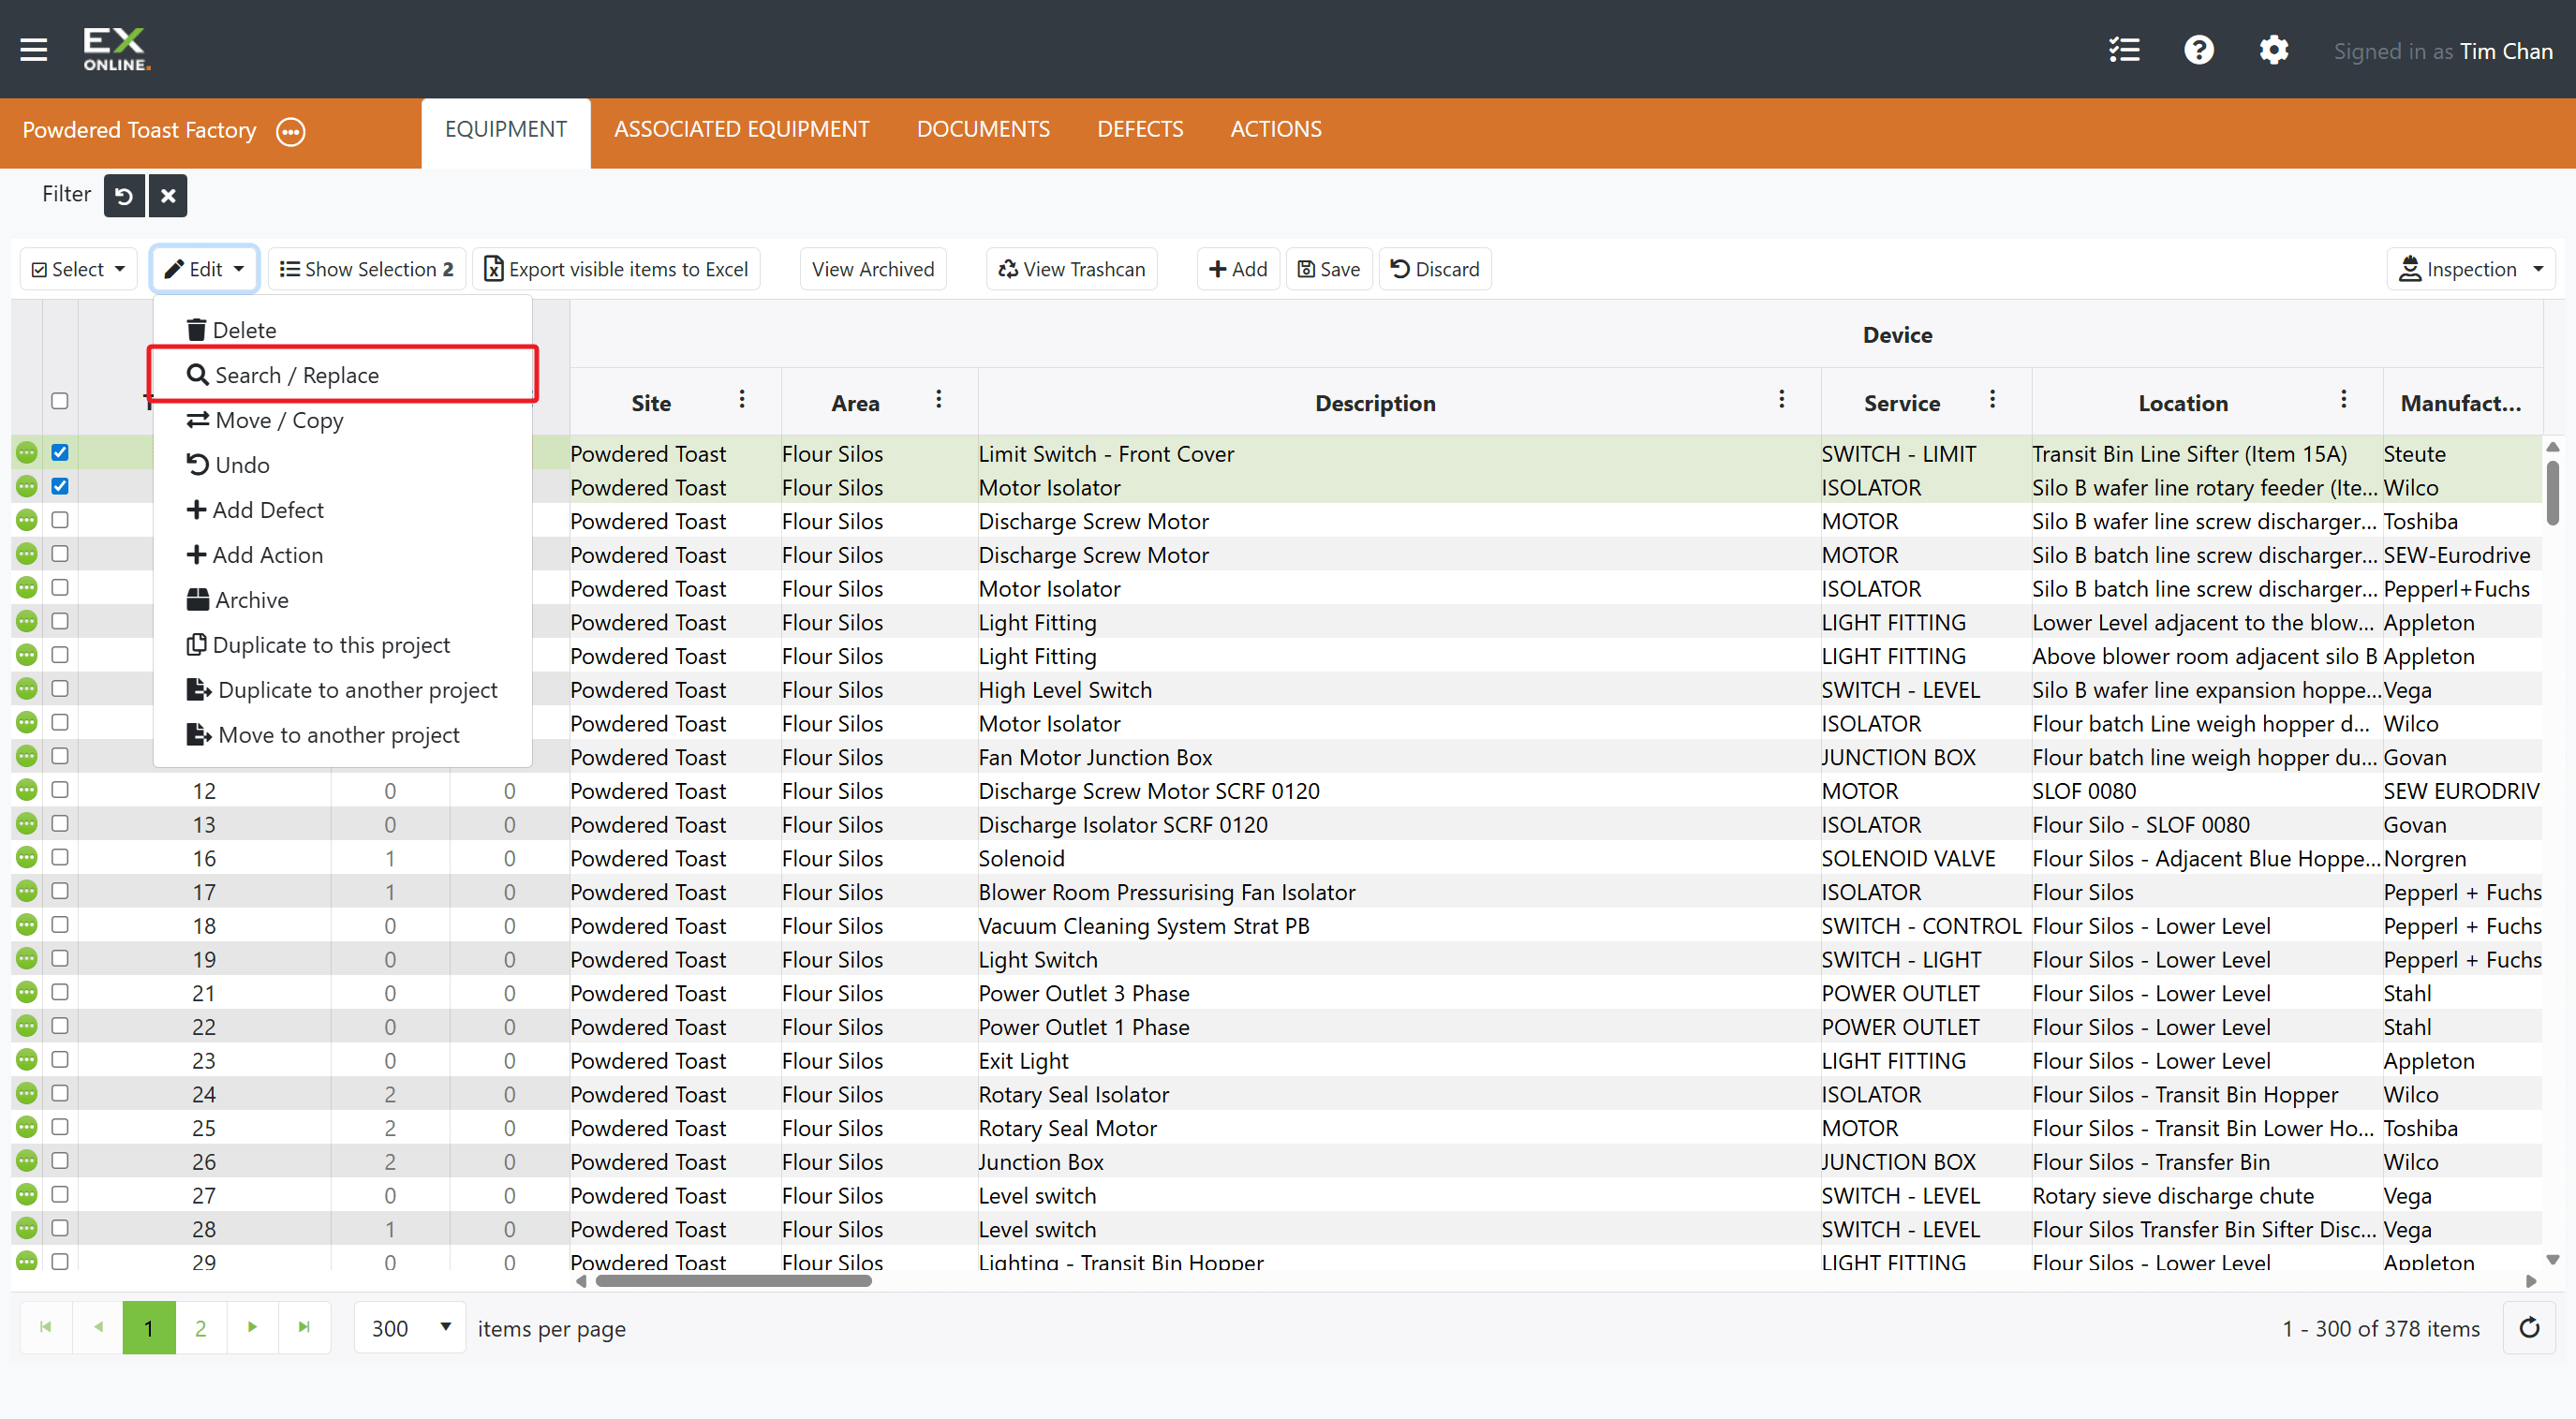
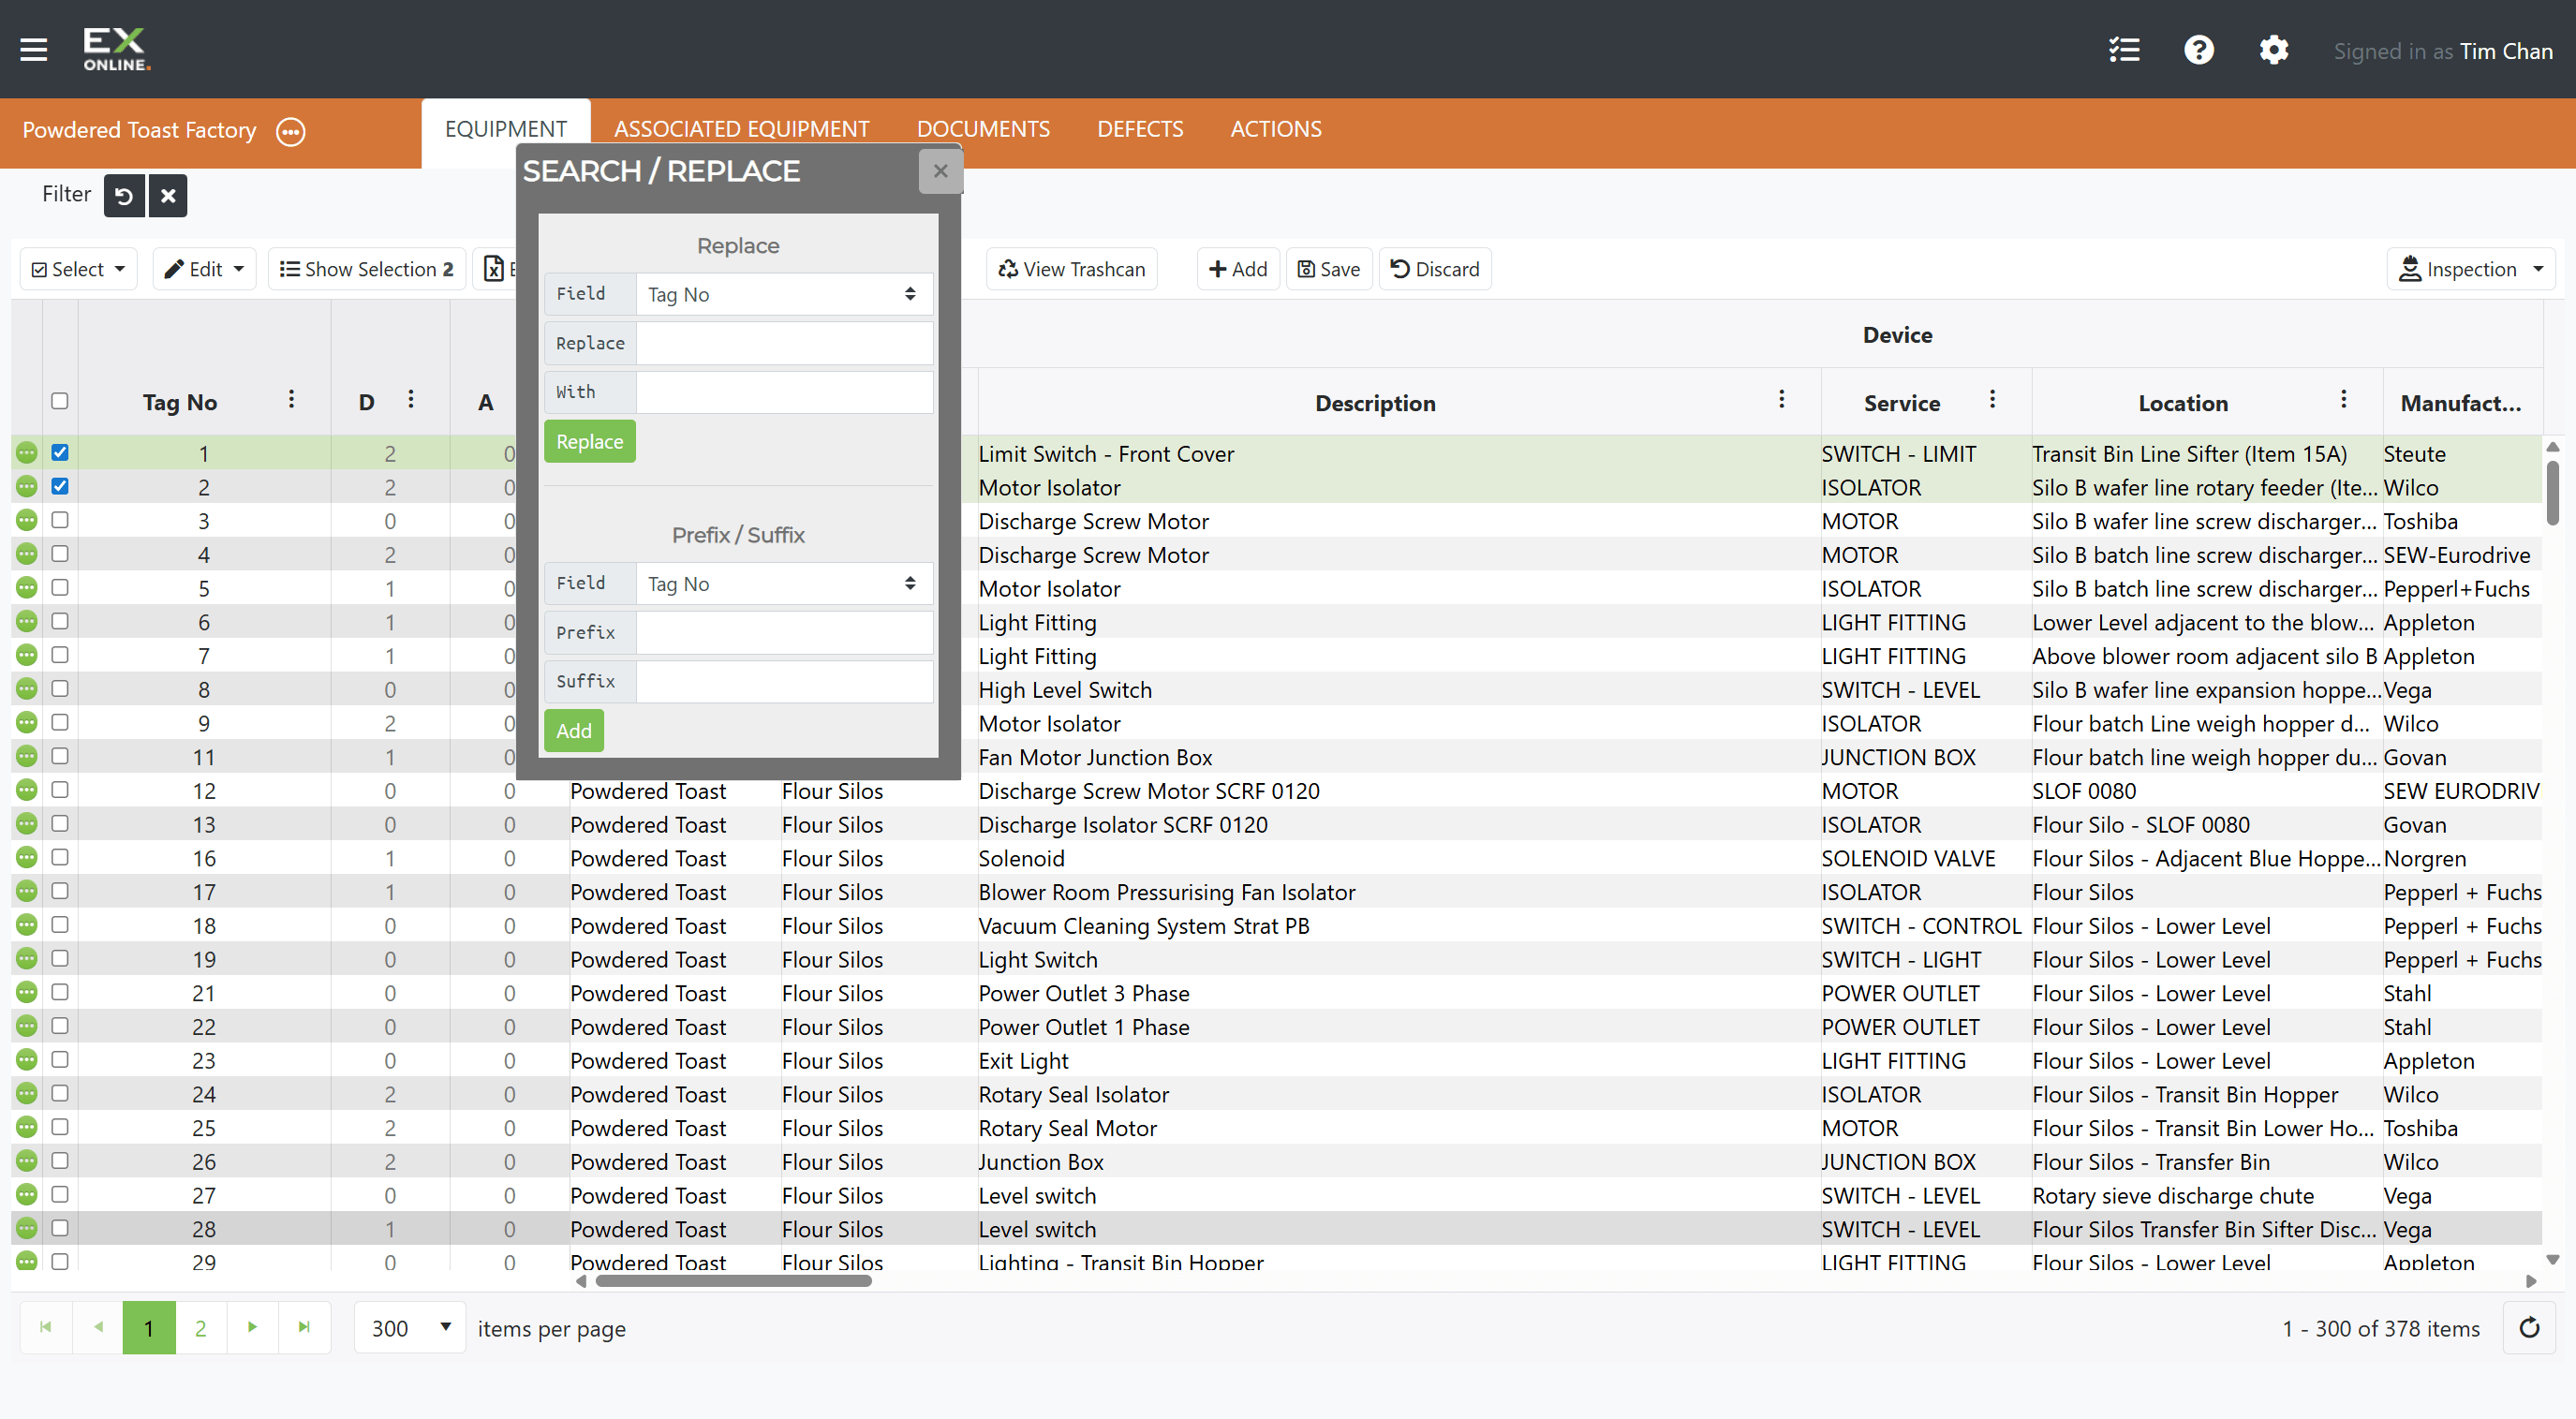
Click Edit in the toolbar > Search / Replace
-
The Search / Replace dialog opens — choose the field to search in, enter the value to find and the replacement value
-
Click Replace to apply.
This is useful for correcting a mistyped Area name, updating a Manufacturer after a rebrand, or standardising Location values across a batch of items.
Duplicating and Moving Equipment
Section titled “Duplicating and Moving Equipment”To copy or move existing equipment:
-
Go to the EQUIPMENT tab in the orange header bar.
-
Select the items you want to duplicate using the checkboxes.
-
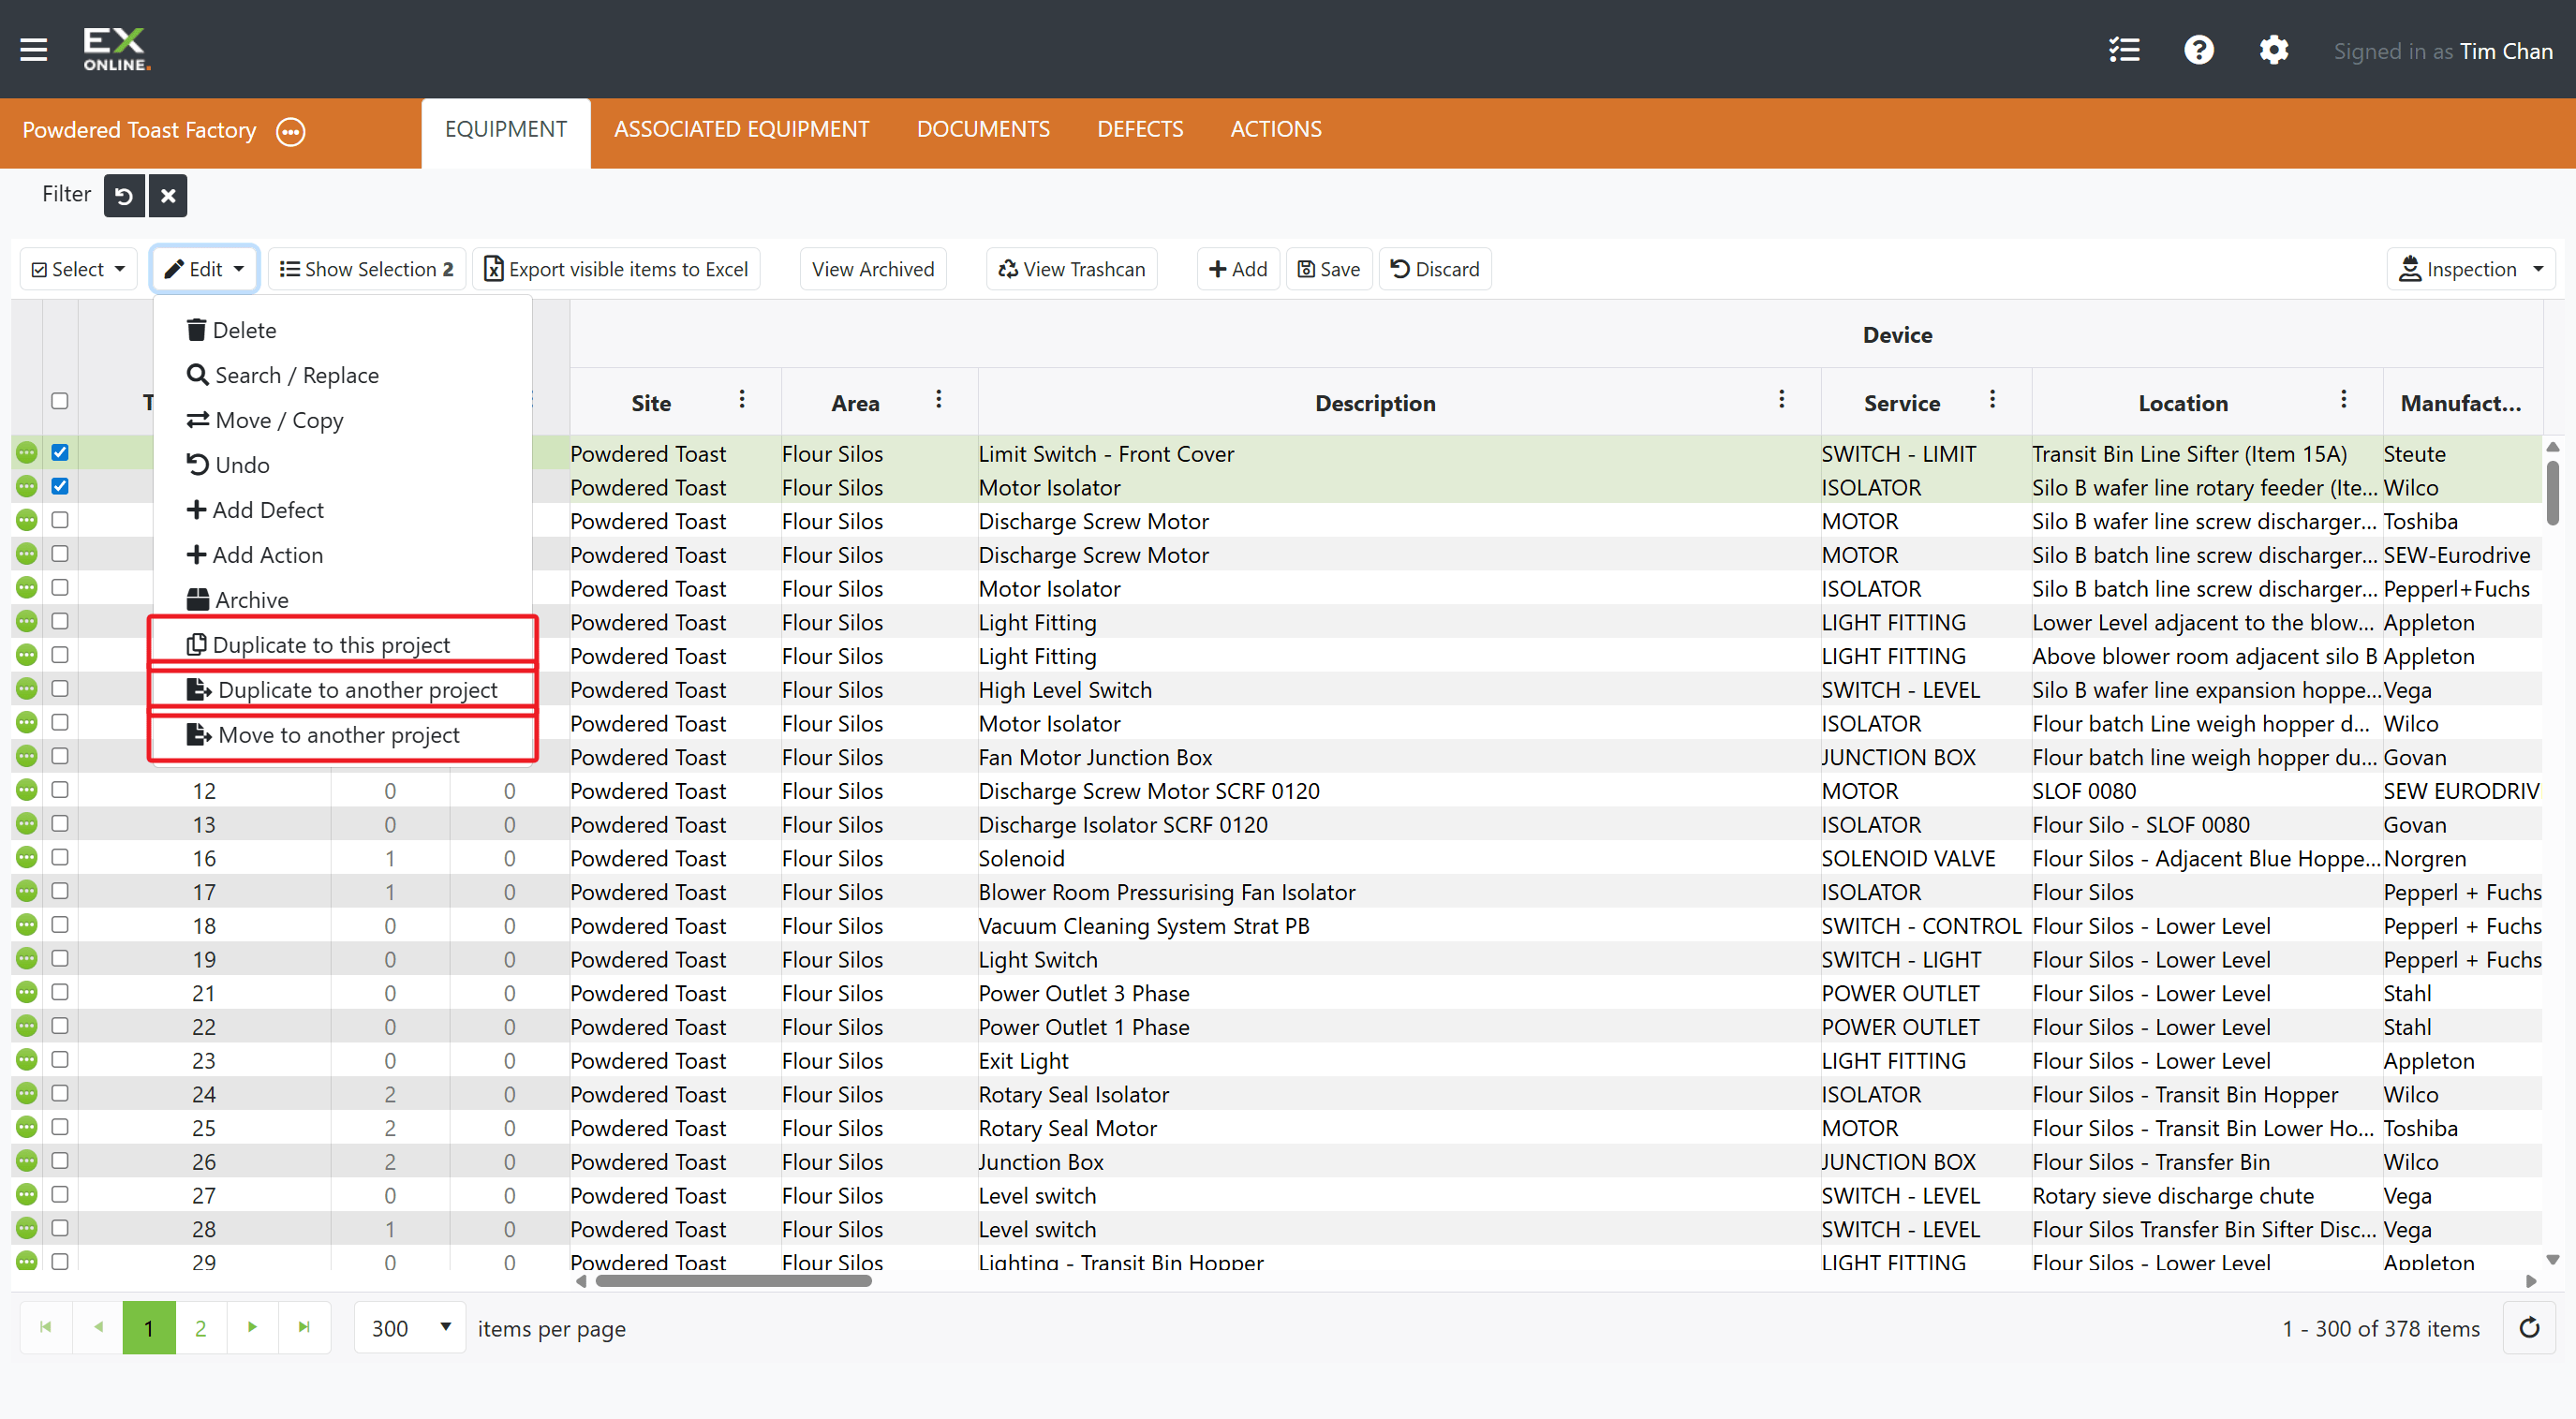
Click Edit in the toolbar to open the dropdown menu
-
Choose Duplicate to this project to copy items within the same project, or Duplicate to another project to copy them elsewhere.
Duplicated items can be edited independently of the originals.
To move items instead of copying, choose Move to another project from the same Edit menu. The items are transferred out of the current project entirely.
Undoing a Change
Section titled “Undoing a Change”If you need to revert a field to its previous value:
-
Go to the EQUIPMENT tab in the orange header bar.
-
Find the equipment item you want to revert.
-
Click the green expand icon on the left of the equipment row to open the Equipment Window.
-
Switch to the HISTORY tab in the grey Equipment Window header.
-
Select the change you want to undo.
-
Click Undo Selected Change
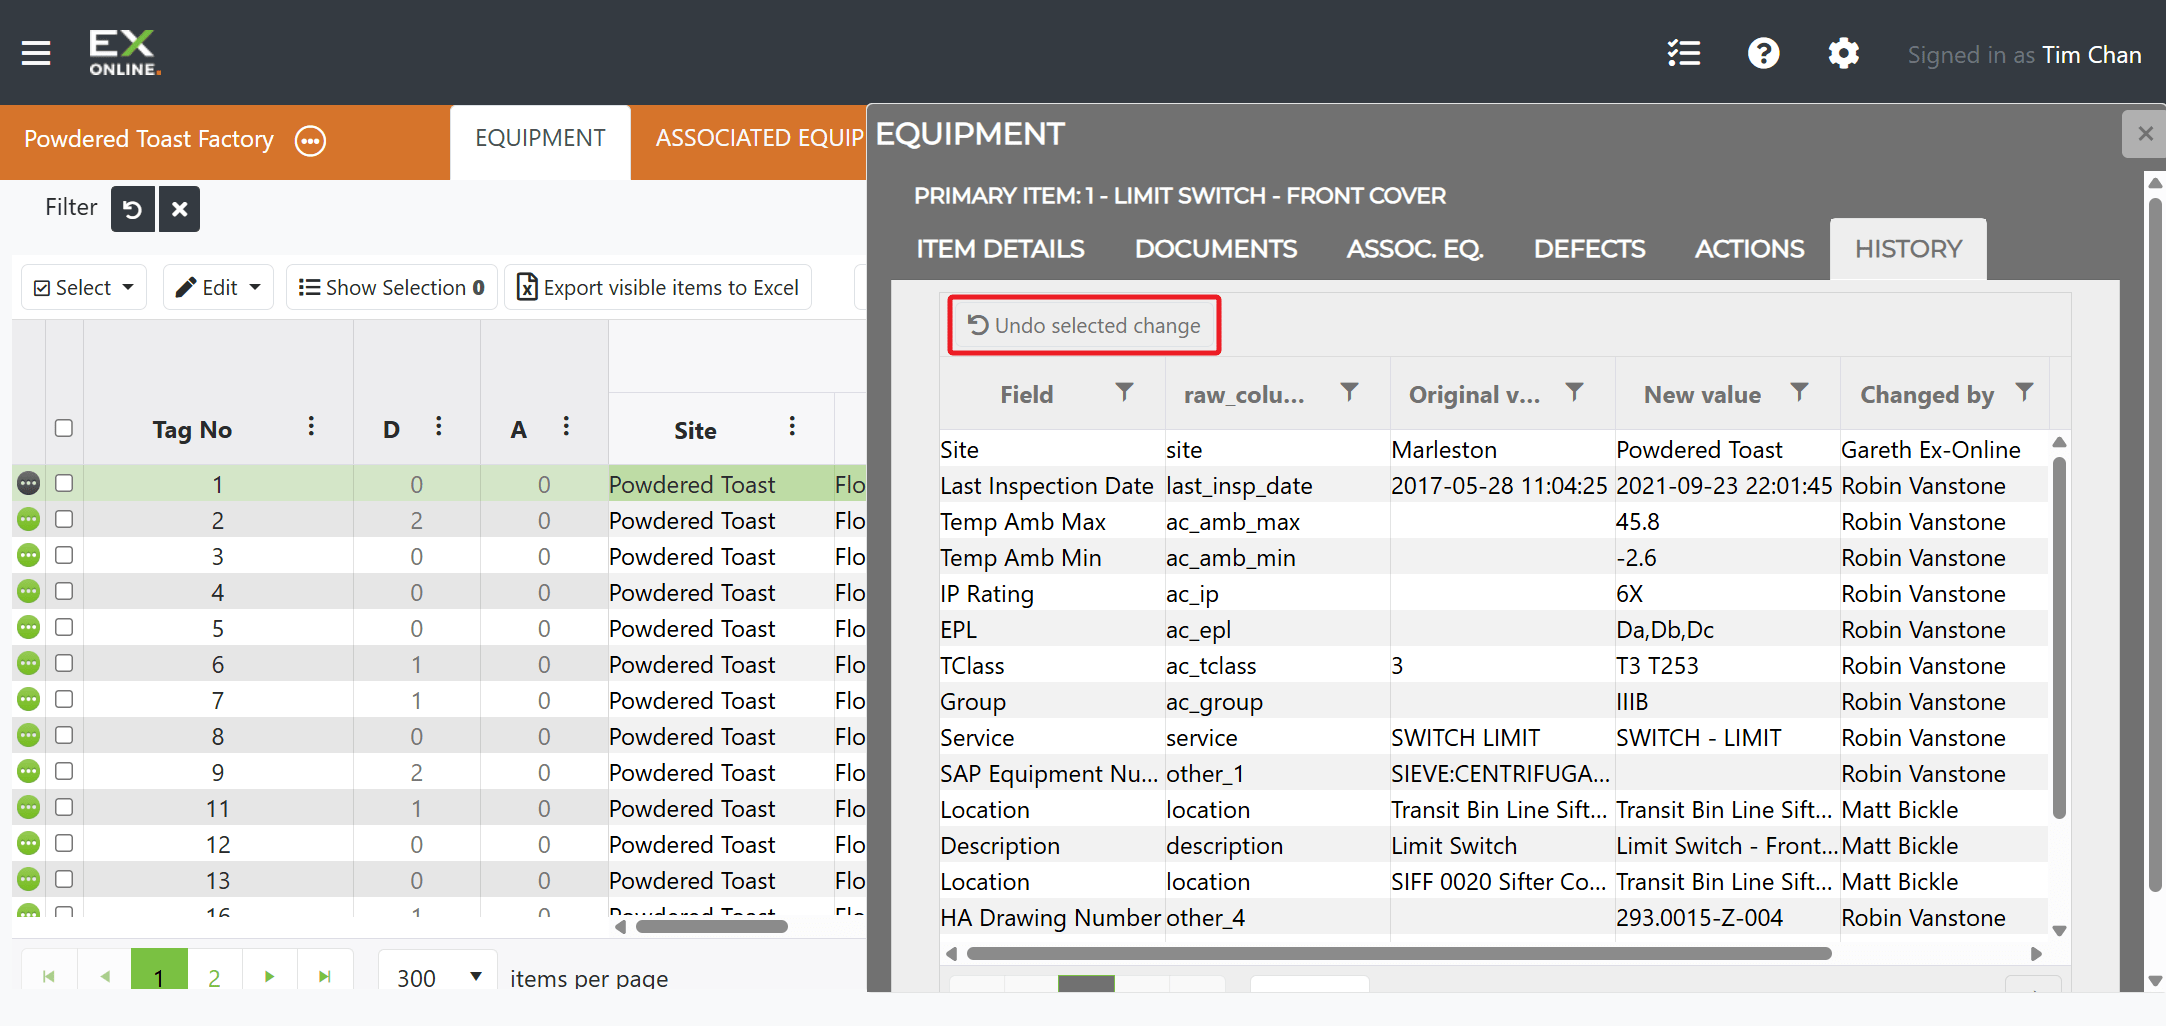
A new history entry is recorded for the revert.
Archiving Equipment
Section titled “Archiving Equipment”To move equipment out of the active grid without deleting it:
-
Go to the EQUIPMENT tab in the orange header bar.
-
Select the items to archive using the checkboxes.
-
Click Edit in the toolbar > Archive
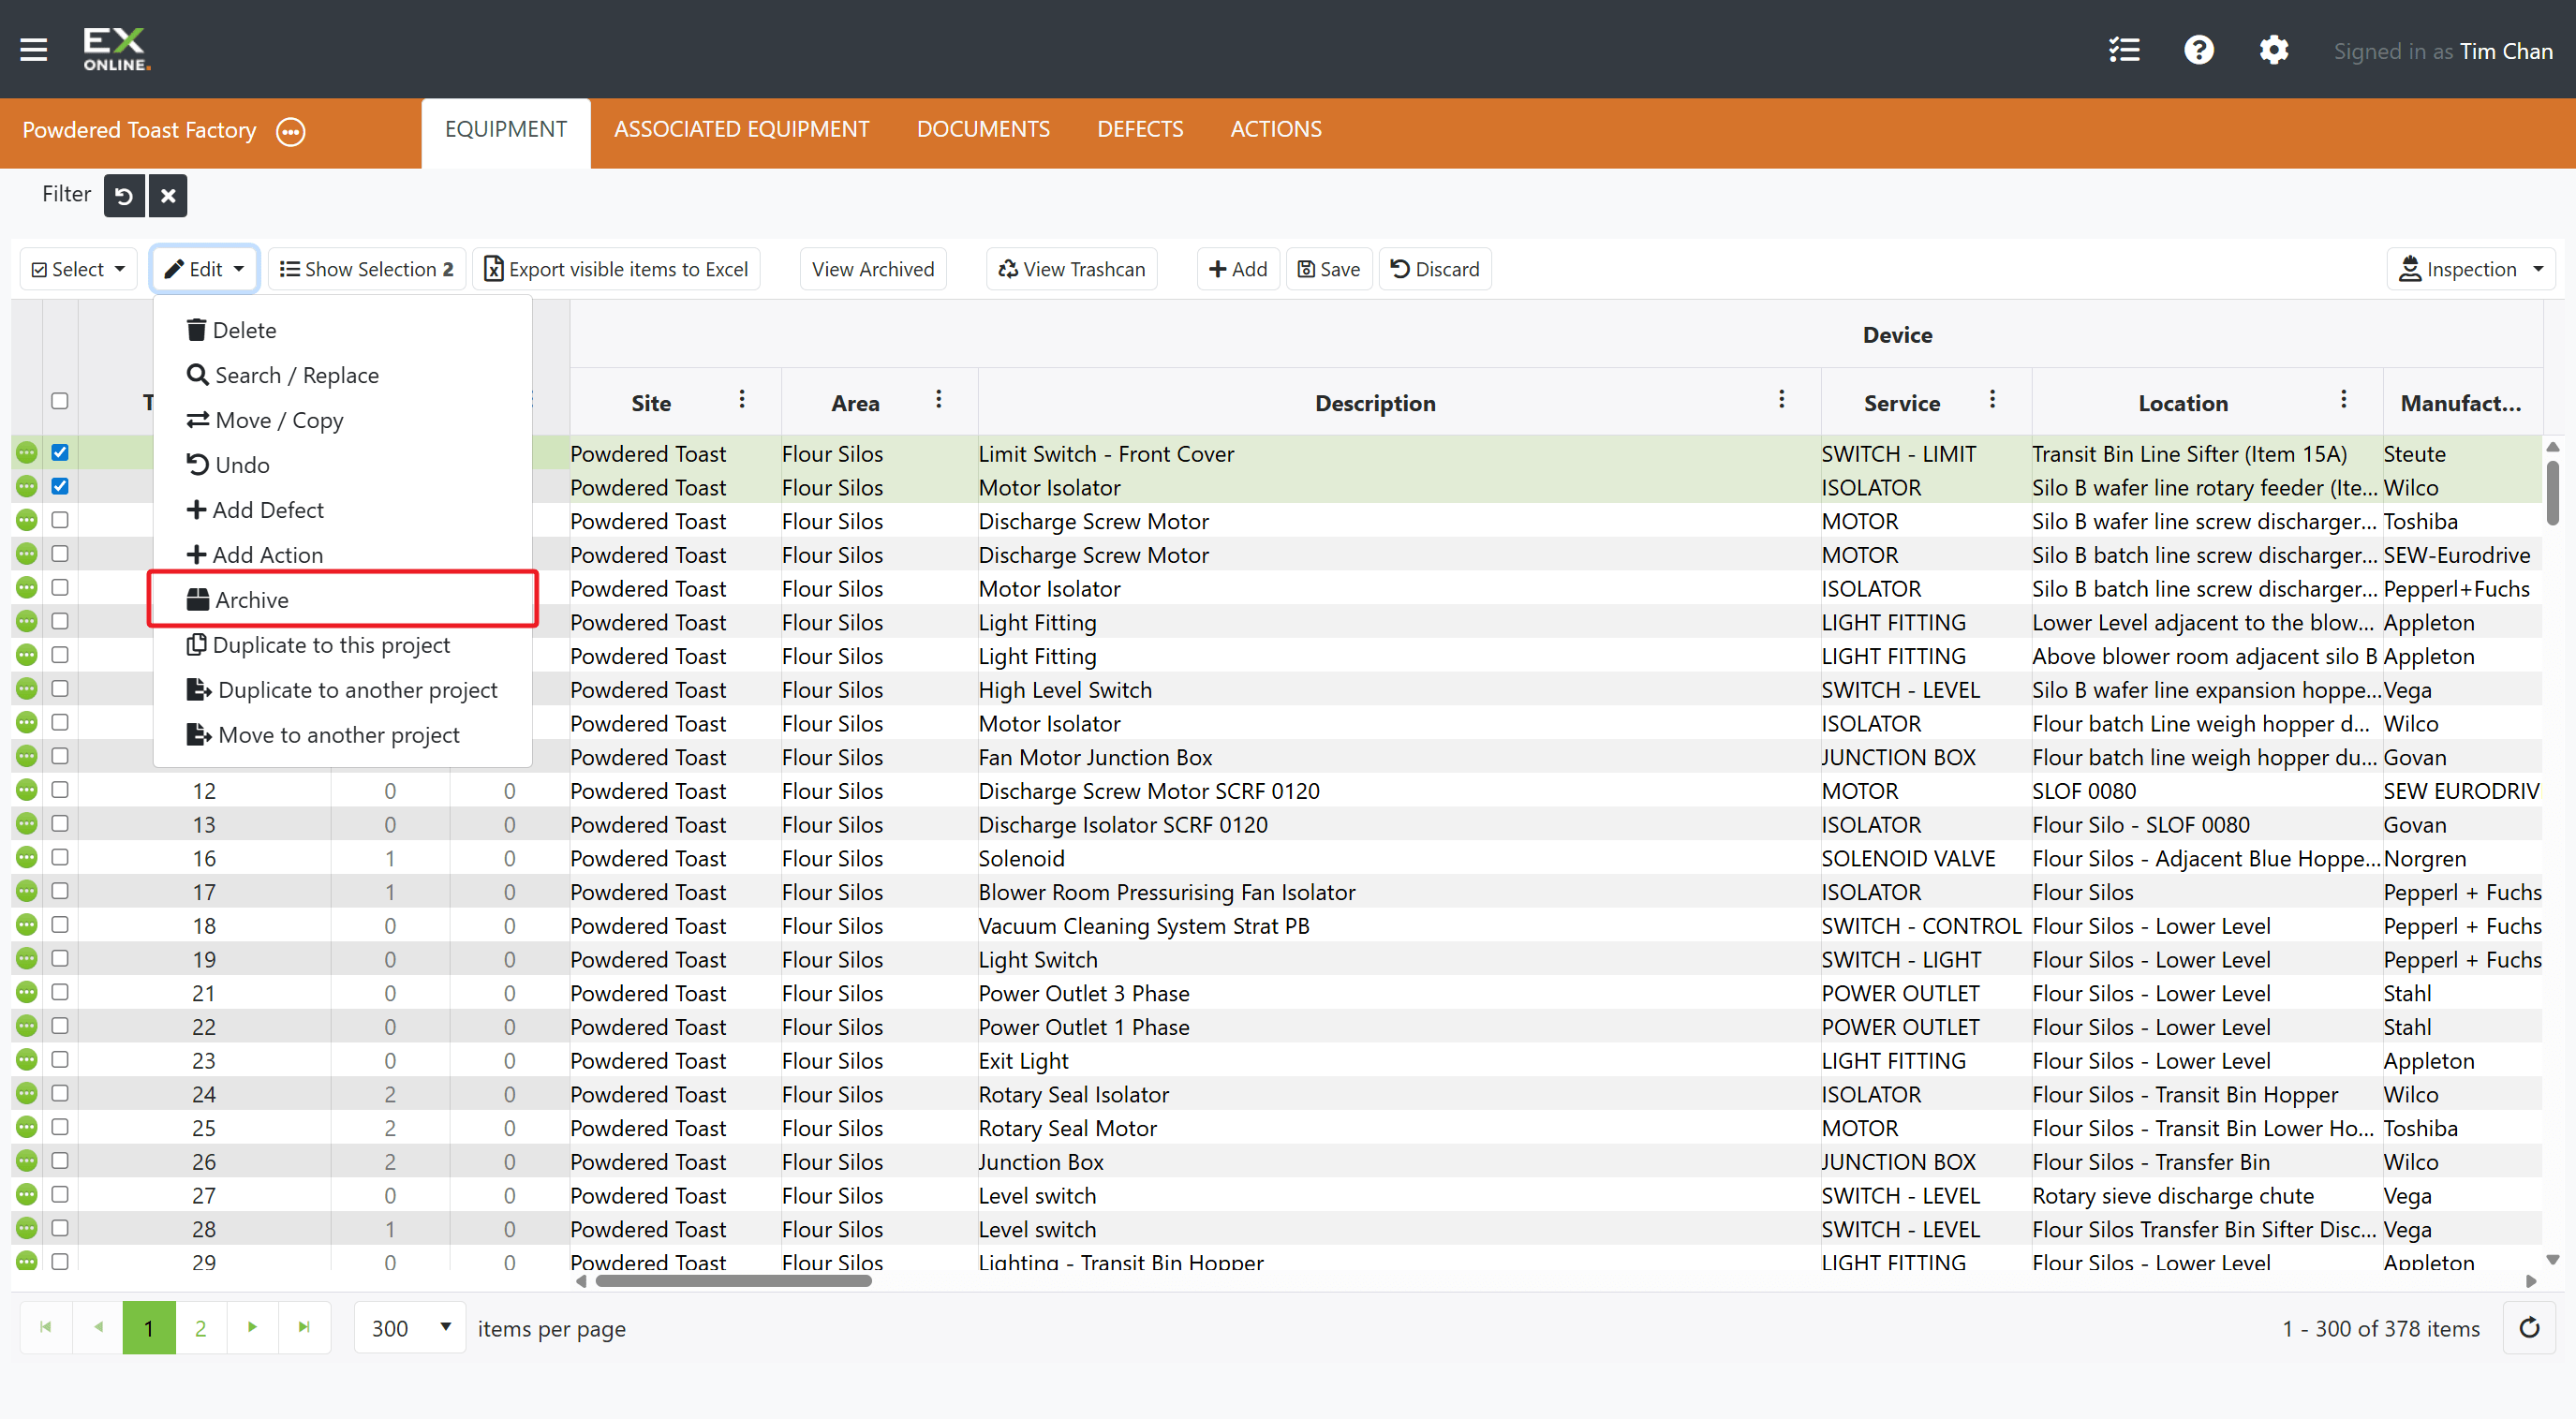
Archived items are hidden from the default view. Click View Archived in the toolbar to see them and restore items if needed.
Deleting Equipment
Section titled “Deleting Equipment”To remove equipment from your project:
-
Go to the EQUIPMENT tab in the orange header bar.
-
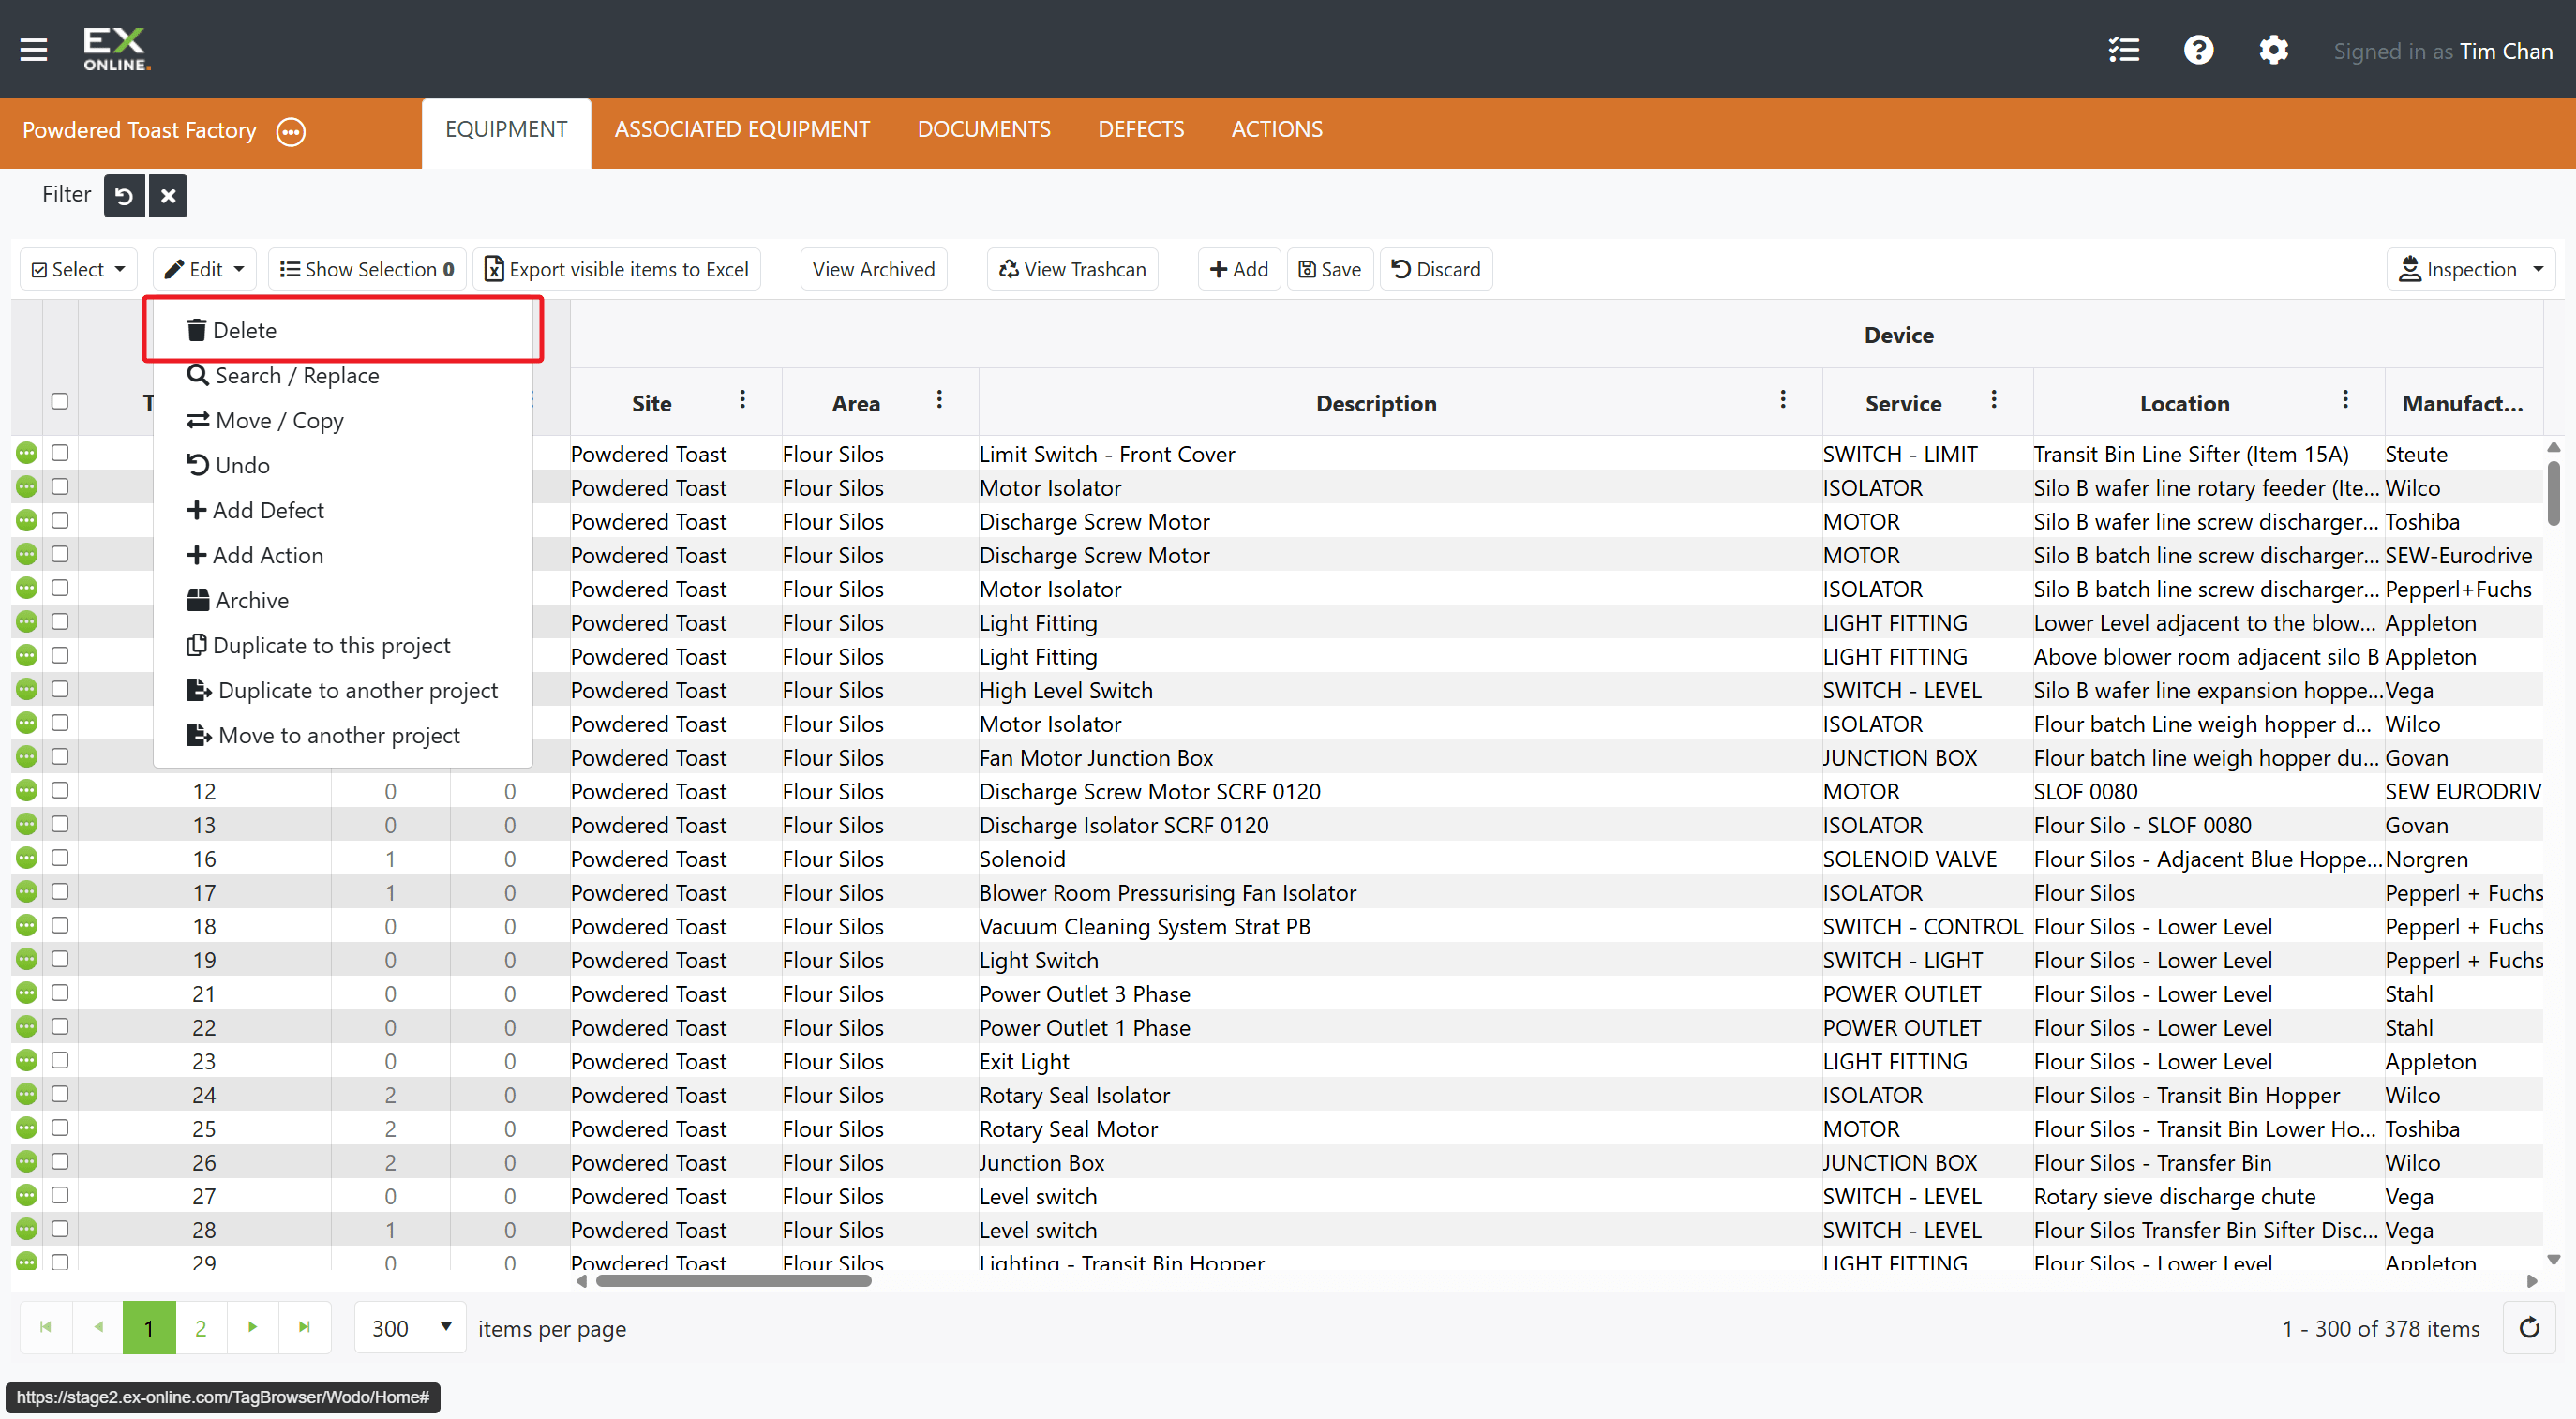
Select the items you want to delete using the checkboxes.
-
Click Edit in the toolbar to open the dropdown menu
-
Click Delete.
-
Confirm the deletion.
Troubleshooting
Section titled “Troubleshooting”| Issue | Solution |
|---|---|
| Can’t edit a cell | Check that the cell is editable — some fields are read-only. Close the Equipment Window if it’s open |
| Changes not saving | Click Save in the toolbar to commit your changes |
| Equipment Window won’t open | Click the green expand icon on the left of the row |
| Group Edit applied to wrong items | Verify your selection before saving |
Related Topics
Section titled “Related Topics”- Equipment Reference — Full field descriptions, toolbar options, and edit modes
- Equipment Window Reference — Tabs, primary items, and edit modes