
Uploading Inspection Results
Transfer completed inspection results back to Tag Browser via QR code or .iwt file.
Selecting Items to Transfer
Section titled “Selecting Items to Transfer”-
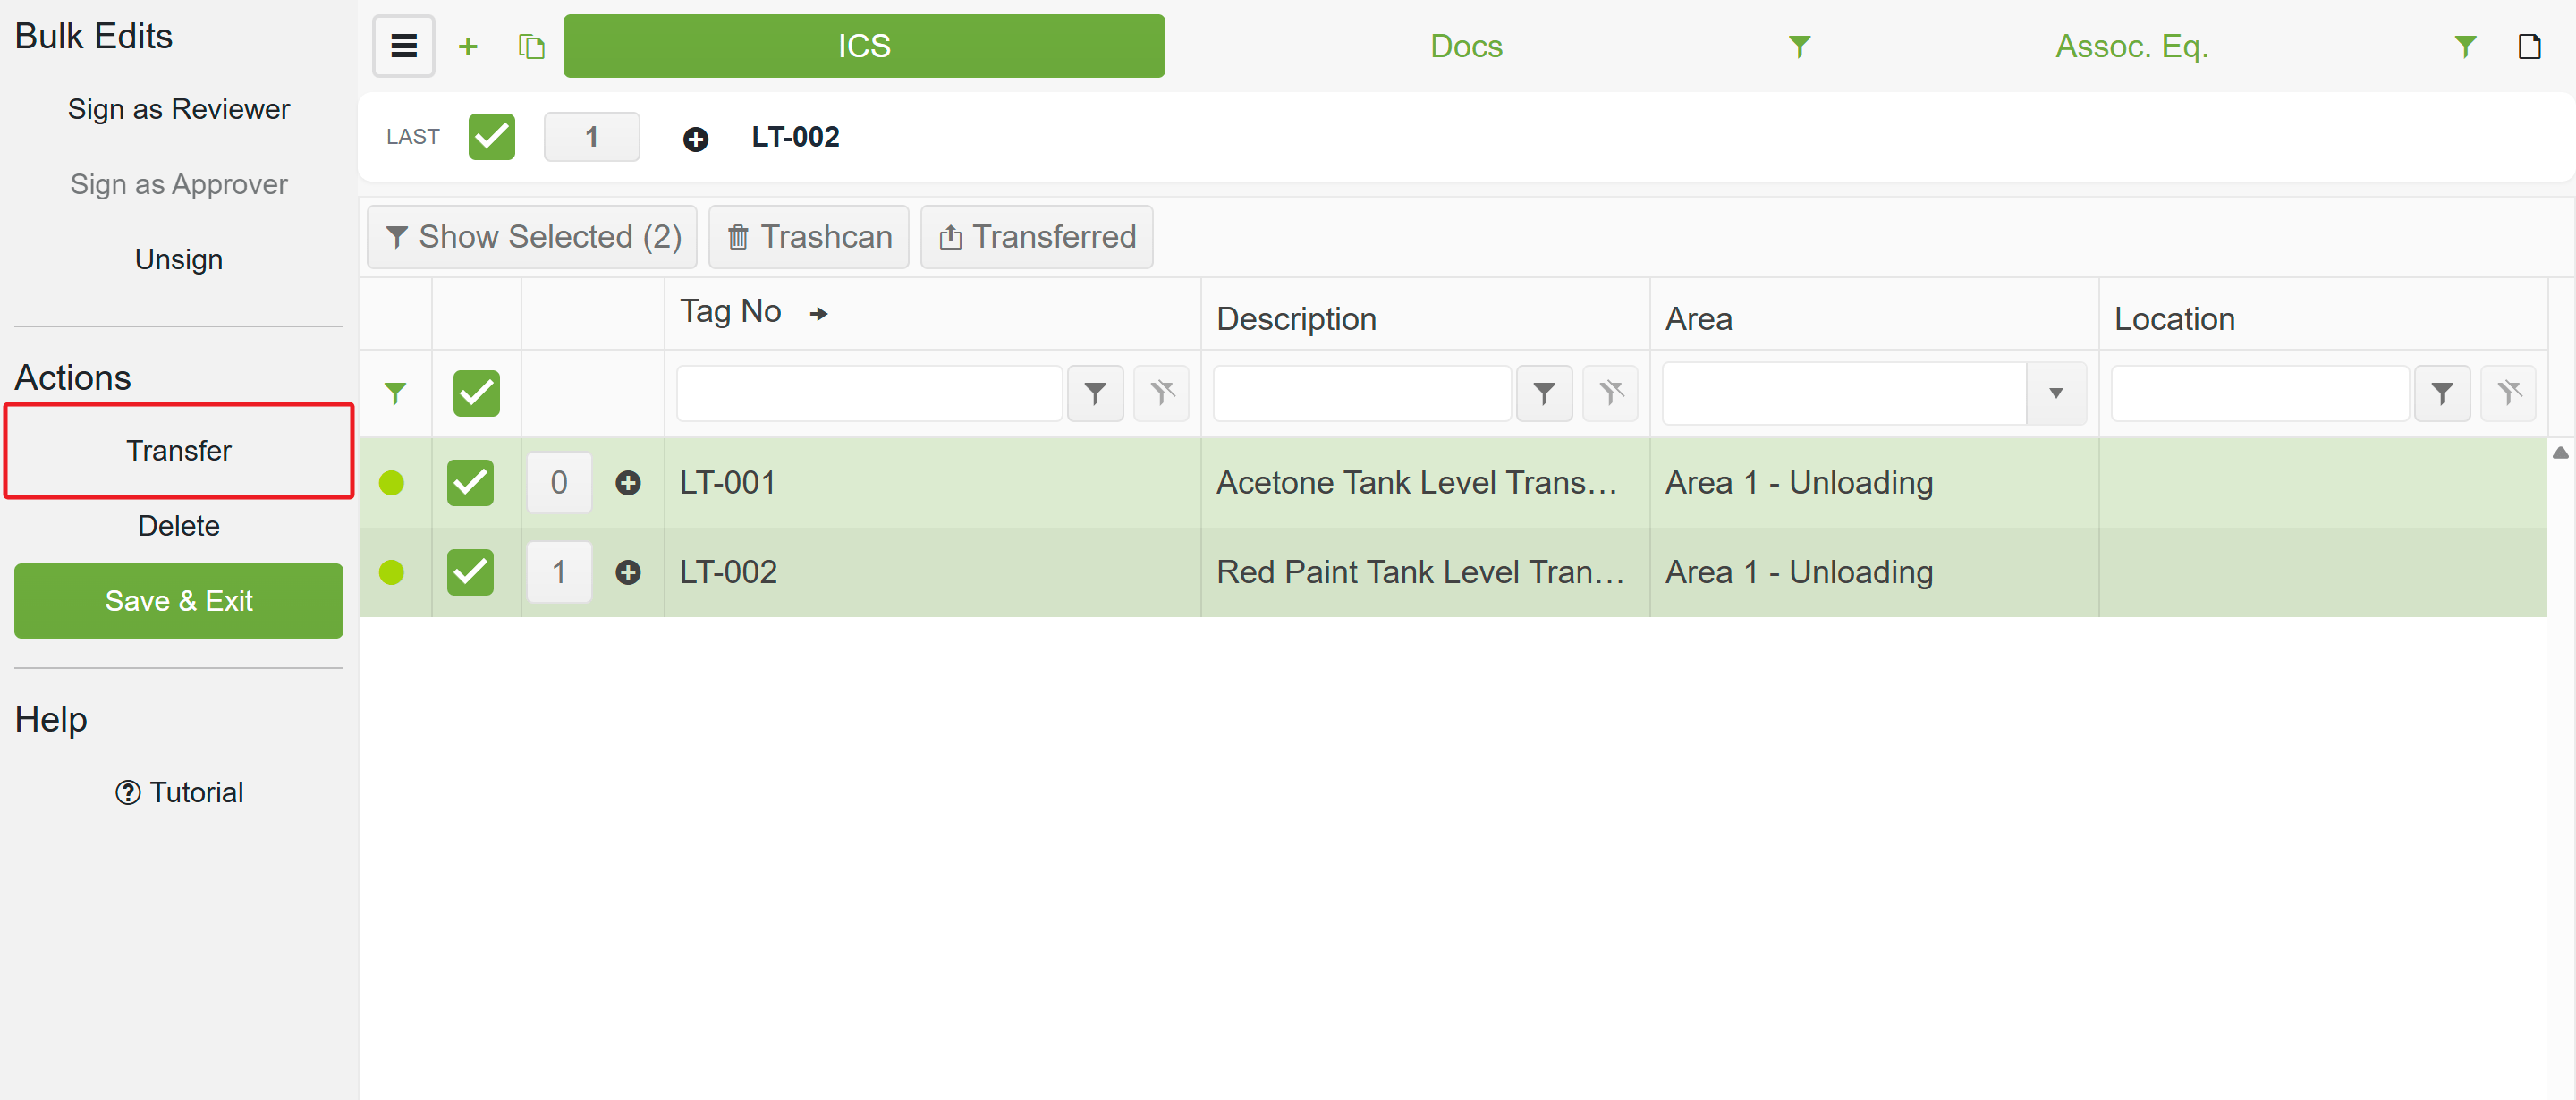
In the Equipment Browser, select the items you want to transfer — typically Select All to include every completed item, or check individual rows if you only need a subset.
-
Open the Sidebar Menu (hamburger icon, top-left) and click Transfer under Actions.
-
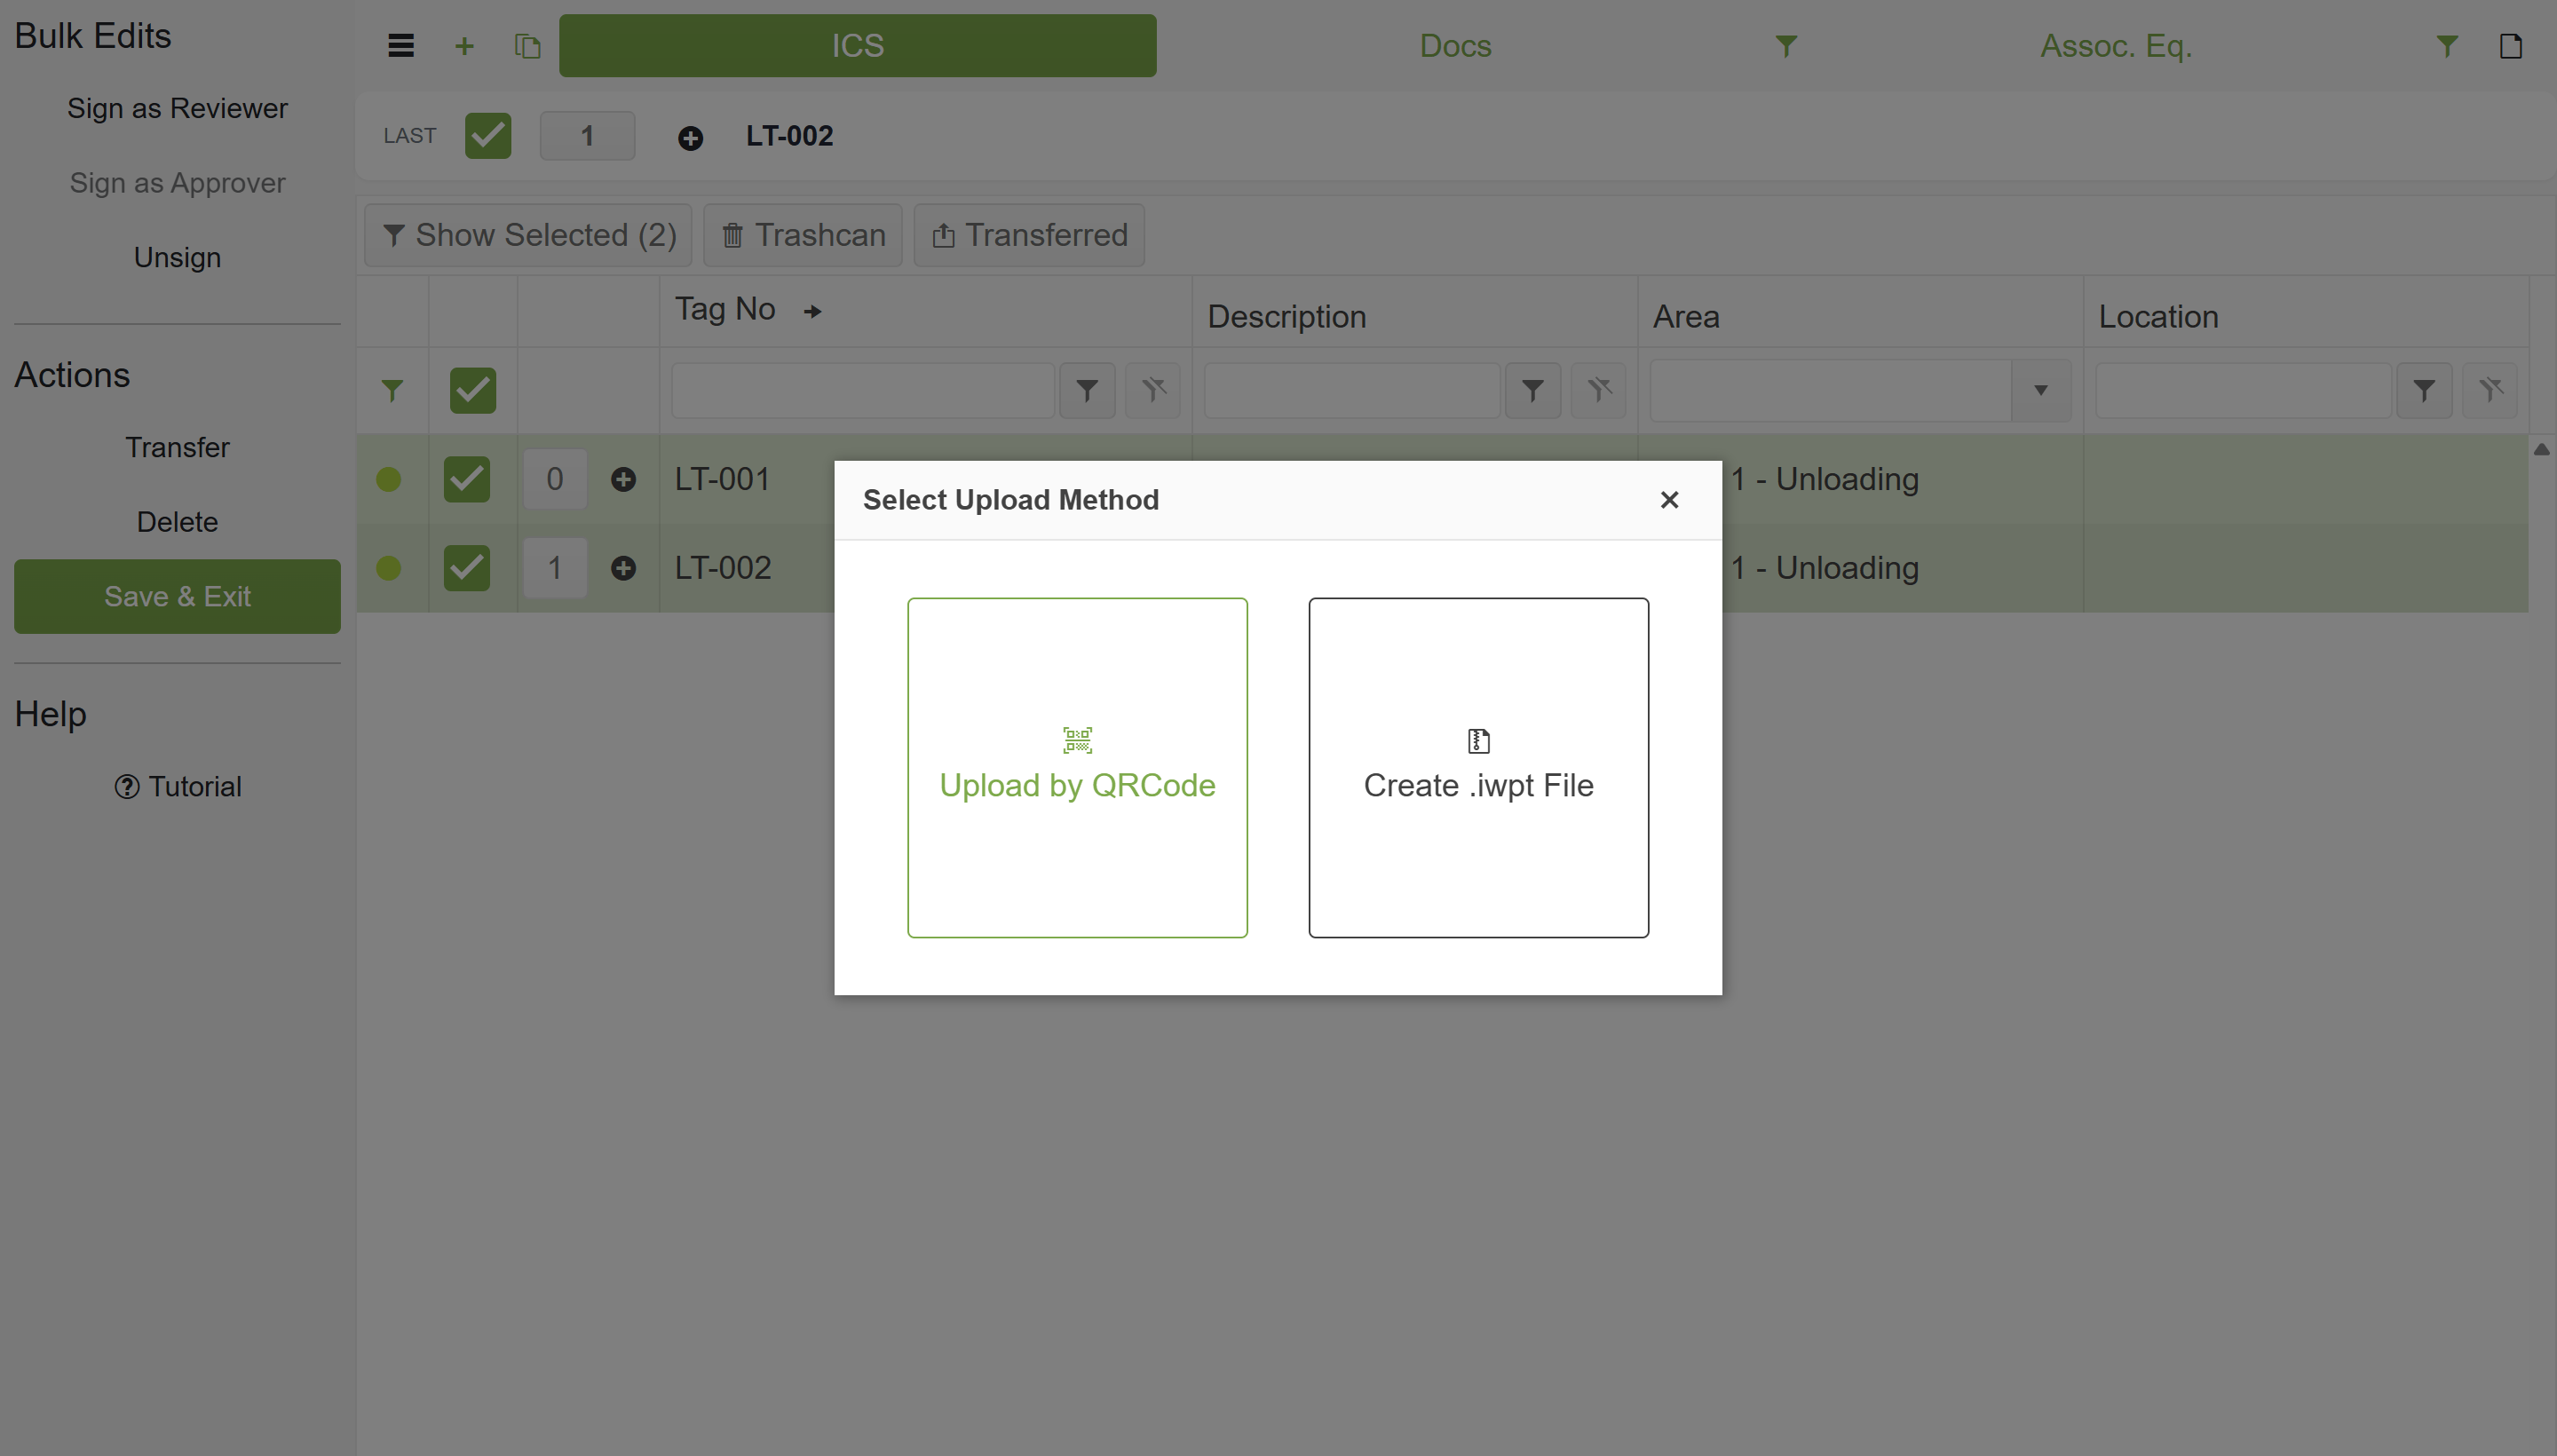
Choose a transfer method from the Select Upload Method dialog.
Creating an .iwt File
Section titled “Creating an .iwt File”Use this method when the inspection device does not have internet access. You create a file and transfer it manually.
-
In the Select Upload Method dialog, choose Create .iwt File.
-
Save the file — keep the default filename for traceability.
-
Transfer the
.iwtfile to a device with internet access (e.g. via USB or network share). -
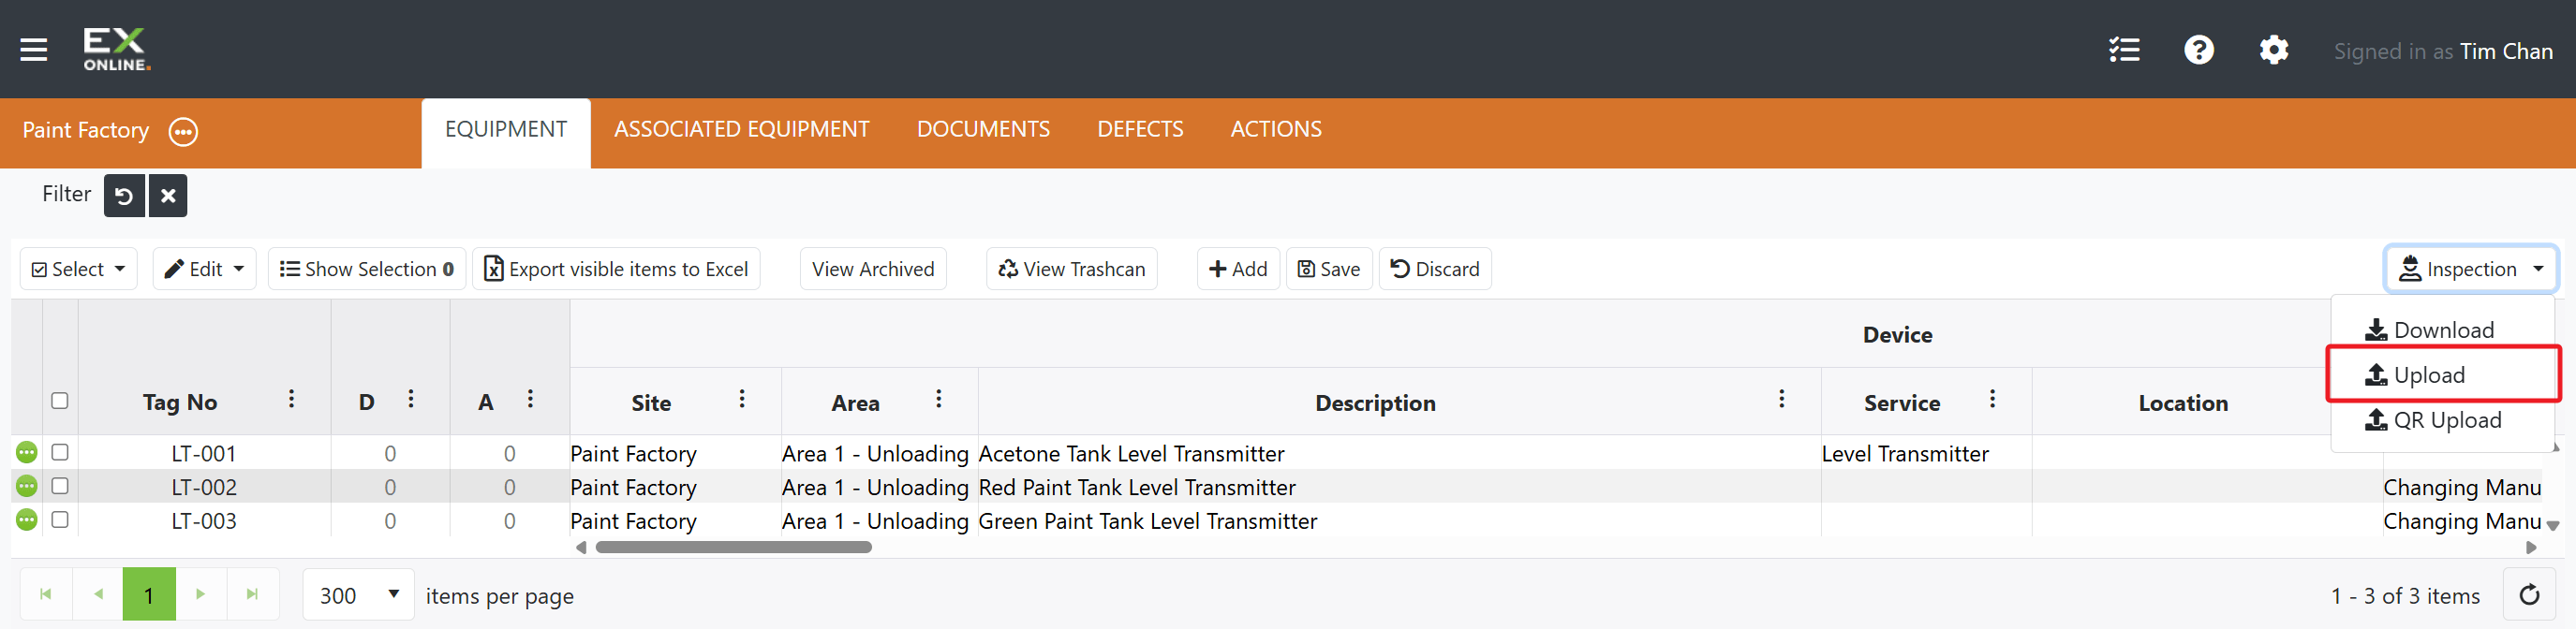
In the Tag Browser, click the Inspection dropdown and choose Upload.
-
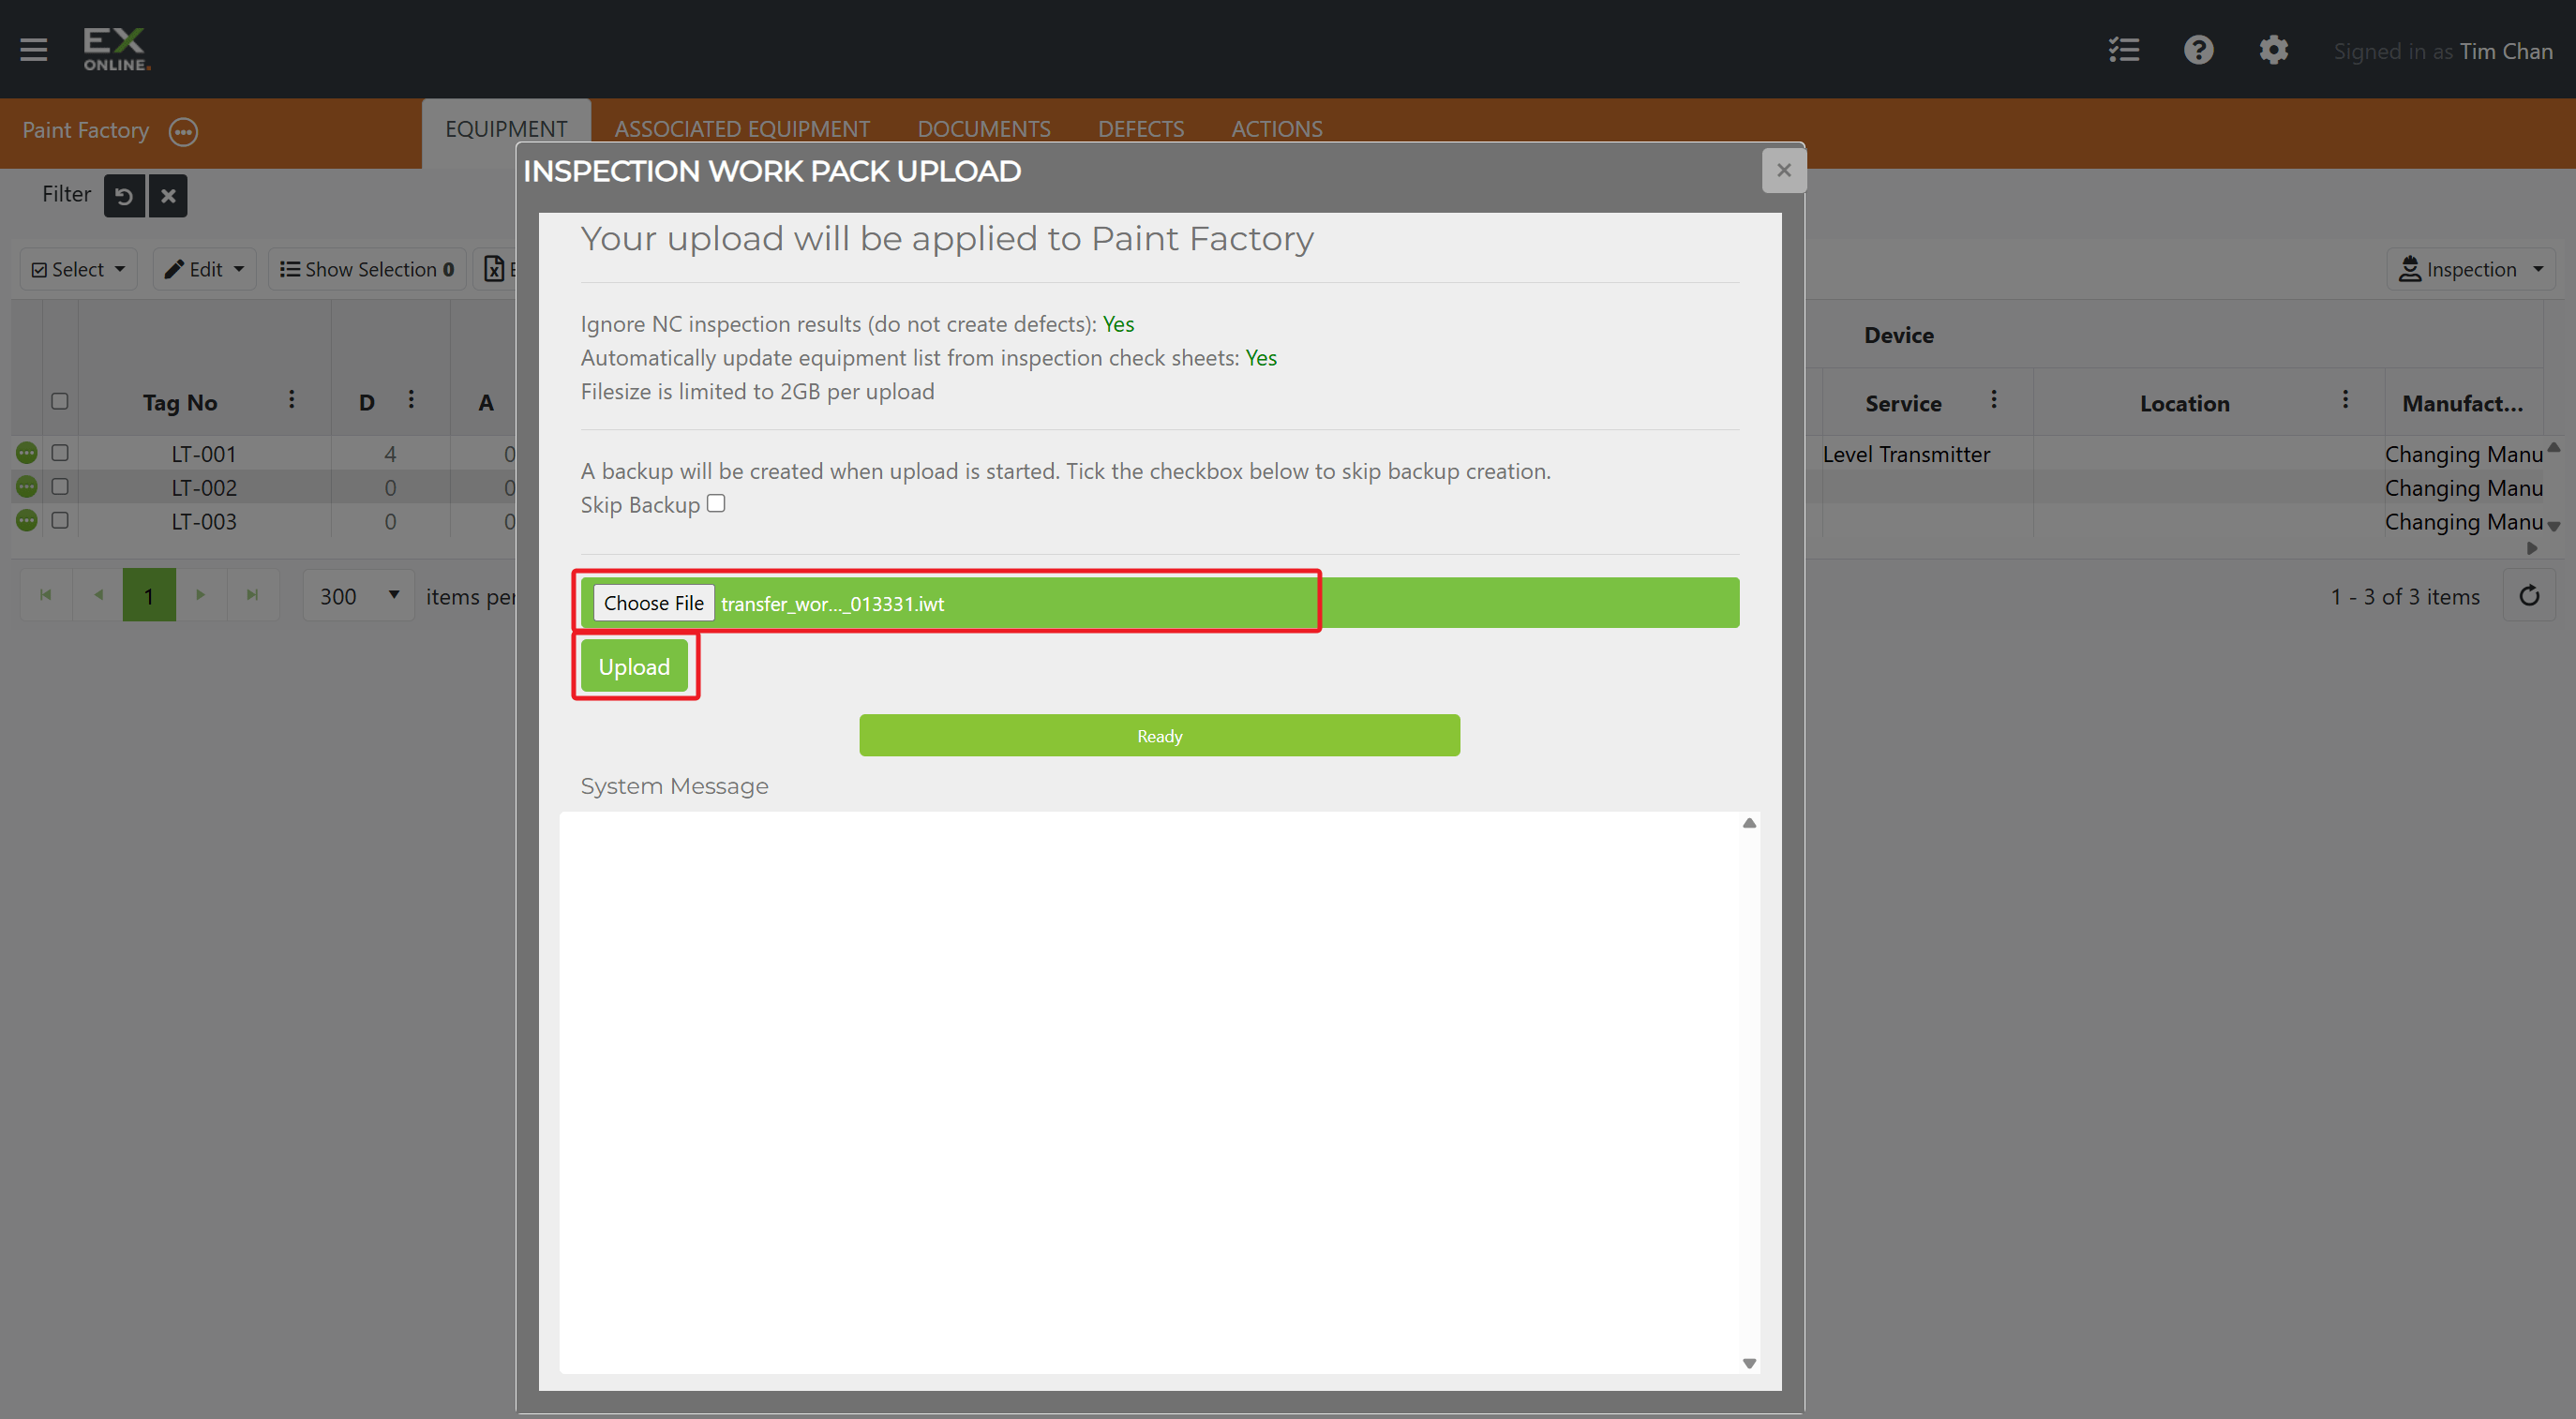
The Inspection Work Pack Upload dialog opens.
-
Configure the upload options and leave Skip Backup unchecked — see Upload Dialog for a full breakdown of every setting.
-
Click Choose File and select the
.iwtfile. -
Click Upload and monitor the System Message area for progress.
QR Code Upload
Section titled “QR Code Upload”Use this method when both your inspection device and a computer with Tag Browser have internet access. Results upload directly — no .iwt file needed.
-
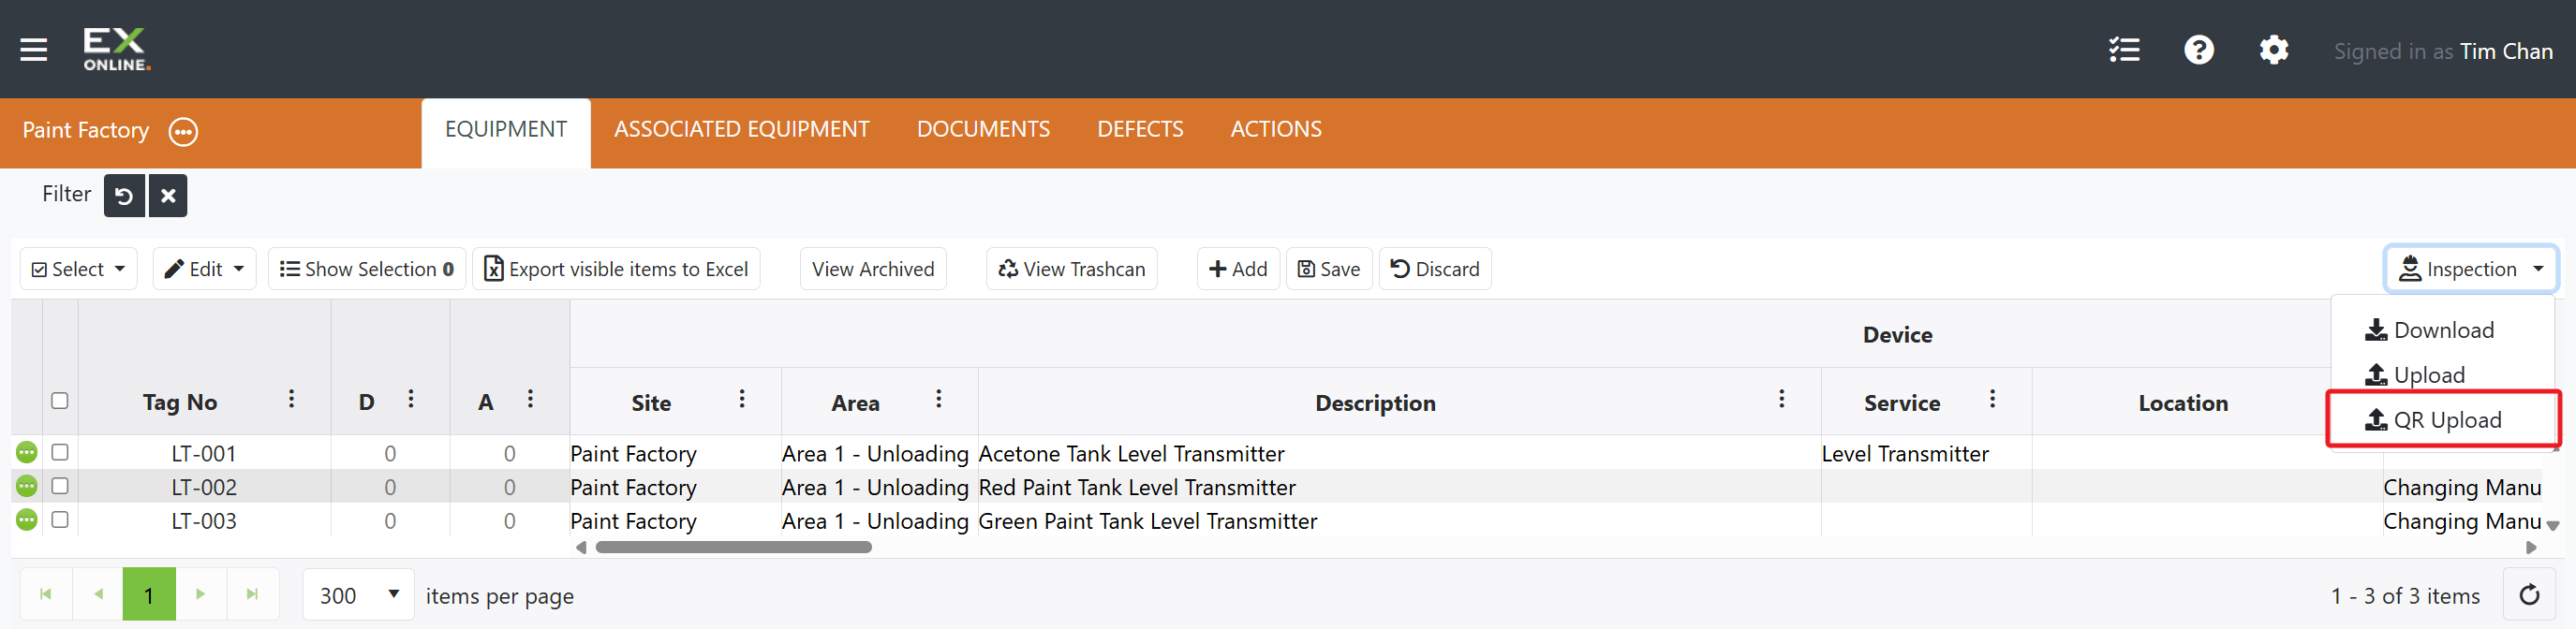
In the Tag Browser, click the Inspection dropdown and choose QR Upload.
-
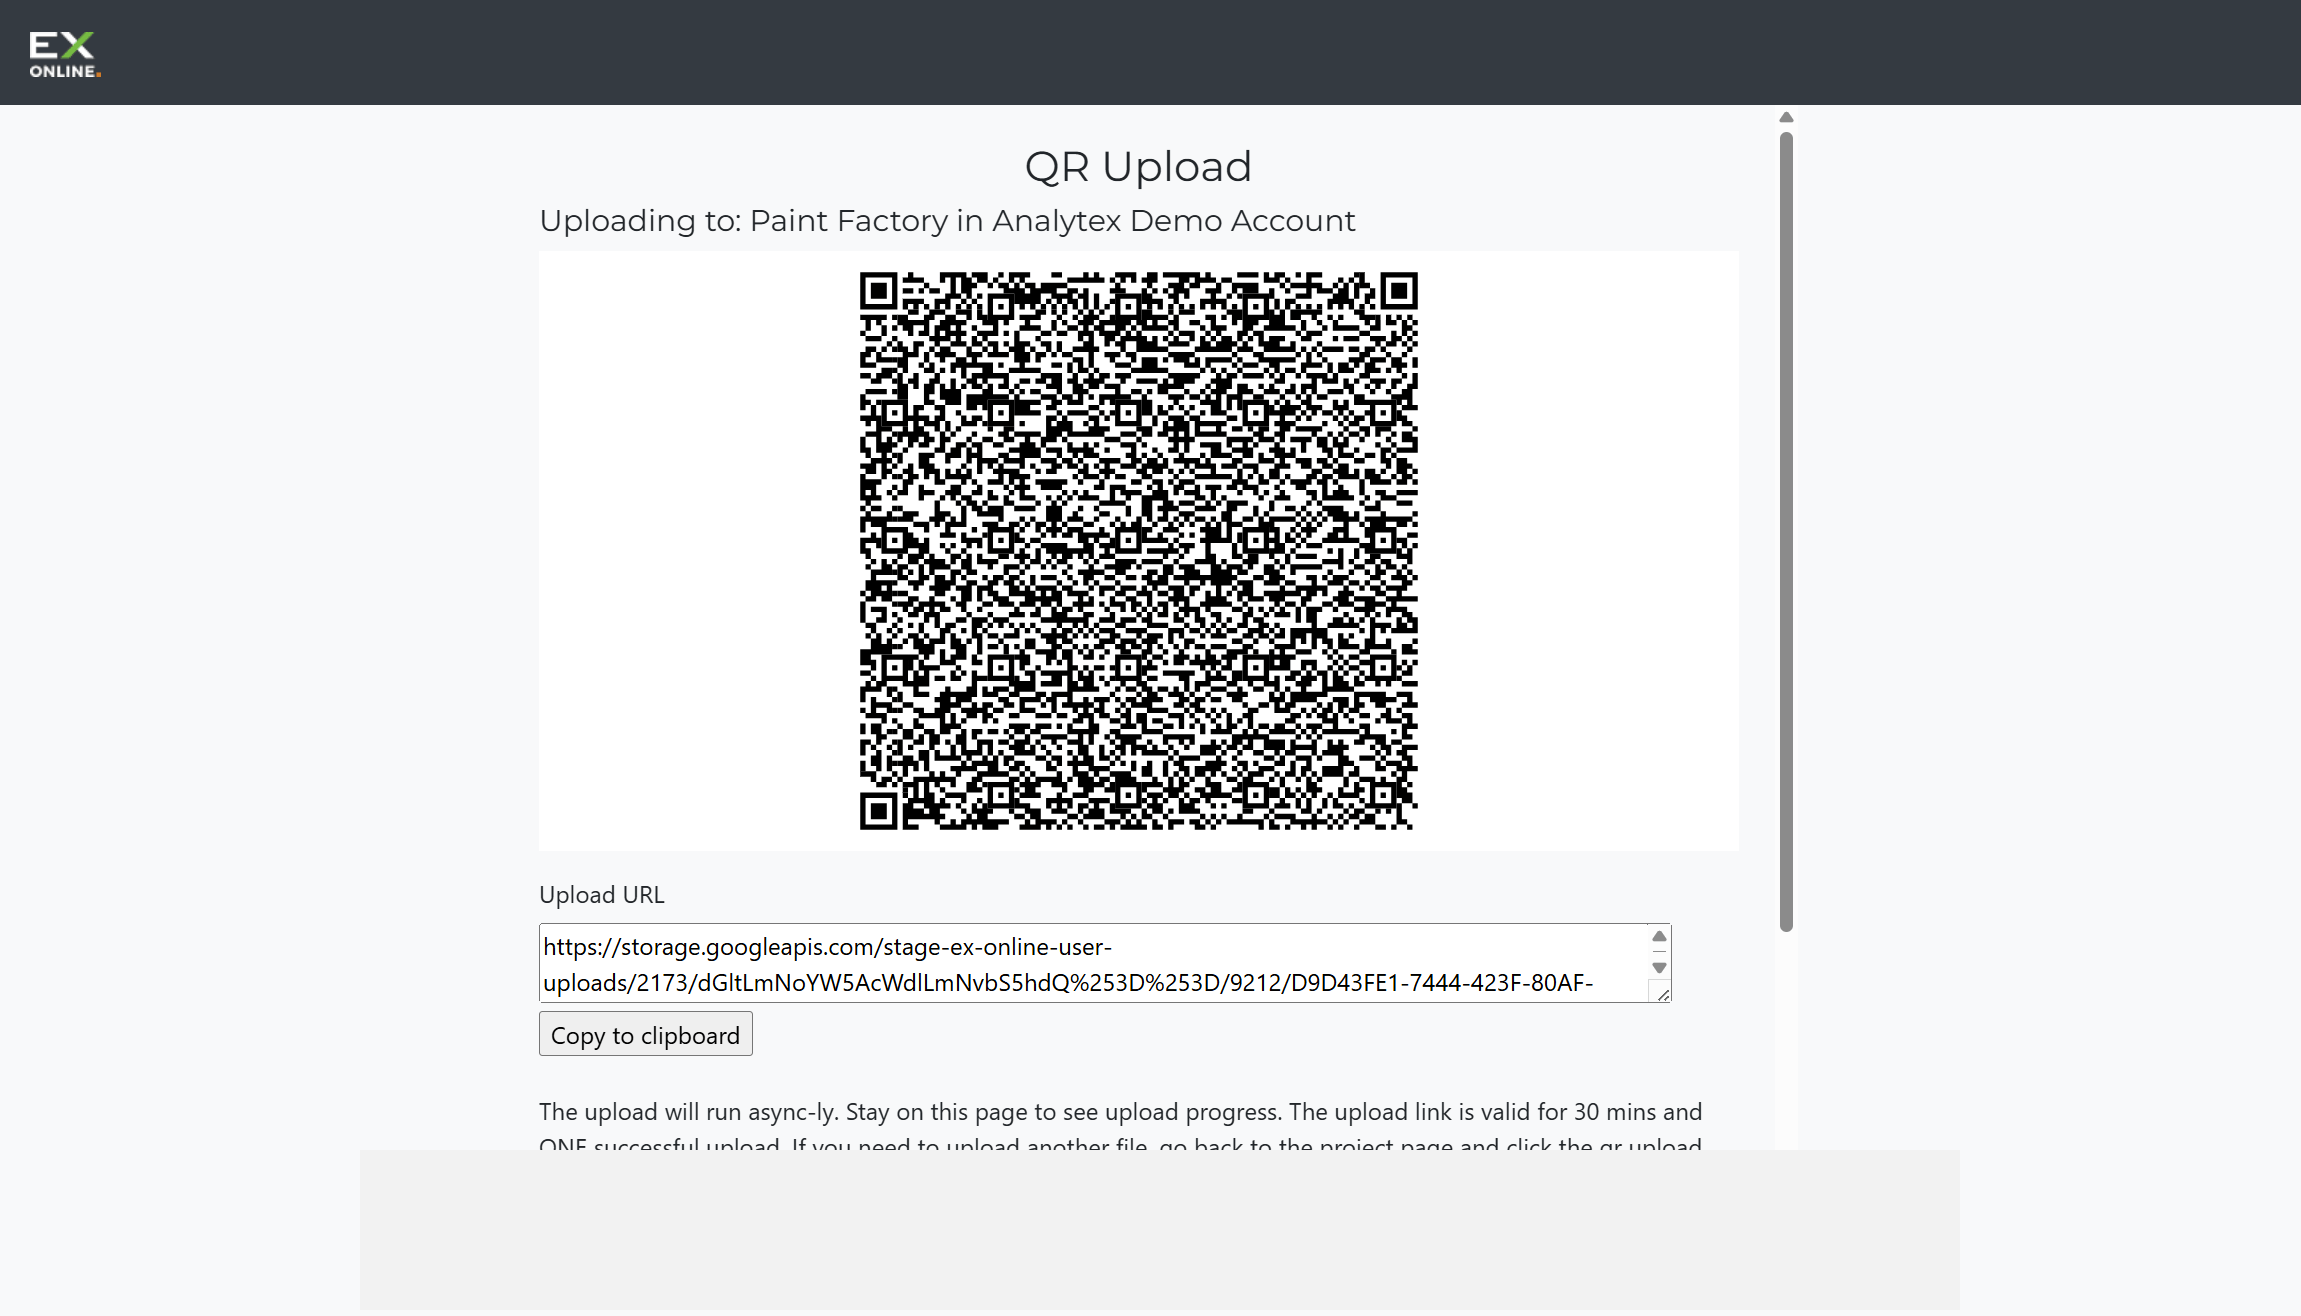
A page appears with a QR code and an upload URL tied to your project.
-
In the Inspection App, choose Upload by QR Code in the Select Upload Method dialog.
-
Scan the QR code displayed in Tag Browser — the app pairs with the project and uploads your inspection data directly.
-
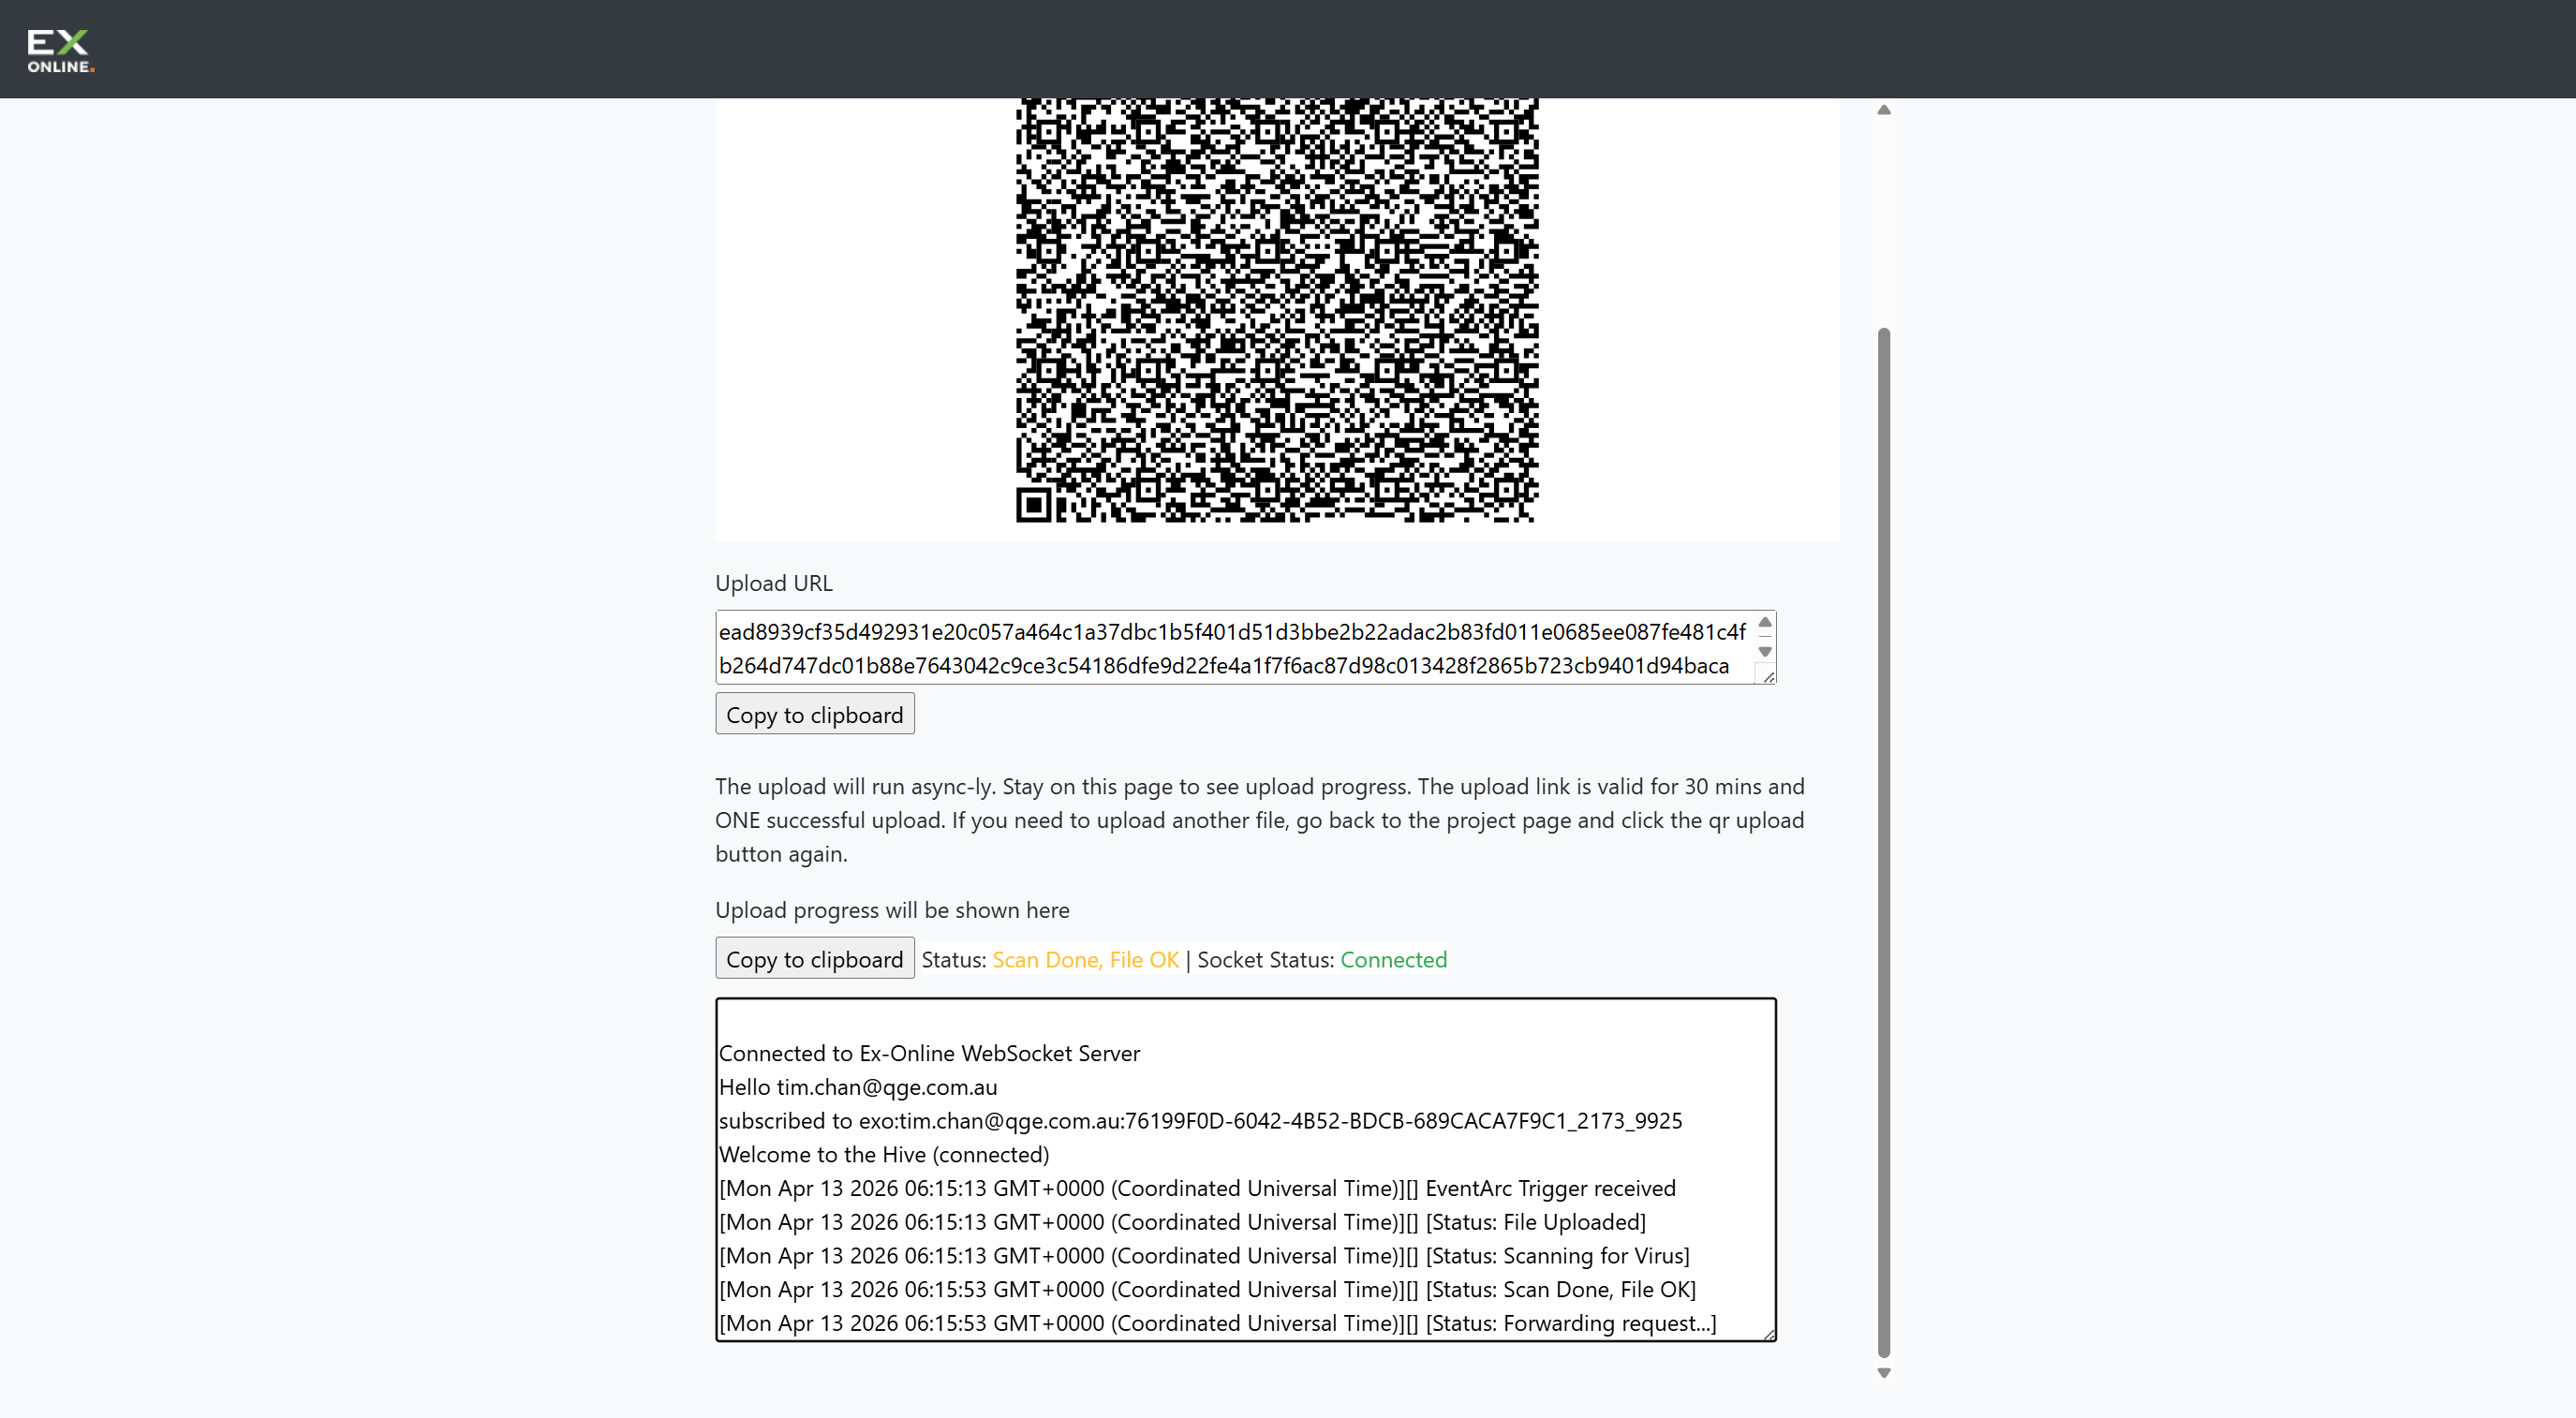
Watch the Status line on the QR Upload page — it confirms when the upload is complete.
What Happens After Upload
Section titled “What Happens After Upload”- The Inspection Date, IWP Upload Date, and Grade columns in the equipment grid update to show the most recent inspection for each item
- Non-Conformity (N) findings create new defects automatically
- The D (Defects) column in the equipment grid reflects new findings
- The Events log (managers only) and the equipment HISTORY tab record the IWP import
Troubleshooting
Section titled “Troubleshooting”| Issue | Solution |
|---|---|
| Upload fails | Check that you are selecting an .iwt file (not .iwp). If the file is 0 KB or the upload still fails, transfer it from the device again |
| Defects not created after upload | Check that Ignore NC inspection results is set to No in the upload options |
| Equipment data not updated | Ensure Automatically update equipment list is set to Yes in the upload options |
| Can’t find uploaded results | Check the Inspection Date column in the equipment grid. For a full audit trail, open the Equipment Window and check the HISTORY tab |
Related Topics
Section titled “Related Topics”- Filling in the Check Sheet — Complete inspections in the Inspection App
- Merging Work Packs — Combine results from multiple inspectors before uploading
- Inspections Reference — Full description of the IWP system, upload options, and inspection history