
Managing Documents
This guide covers everyday document tasks: uploading, linking documents to equipment, updating metadata and files, bulk updating, and archiving. For field descriptions and toolbar options, see the Documents reference.
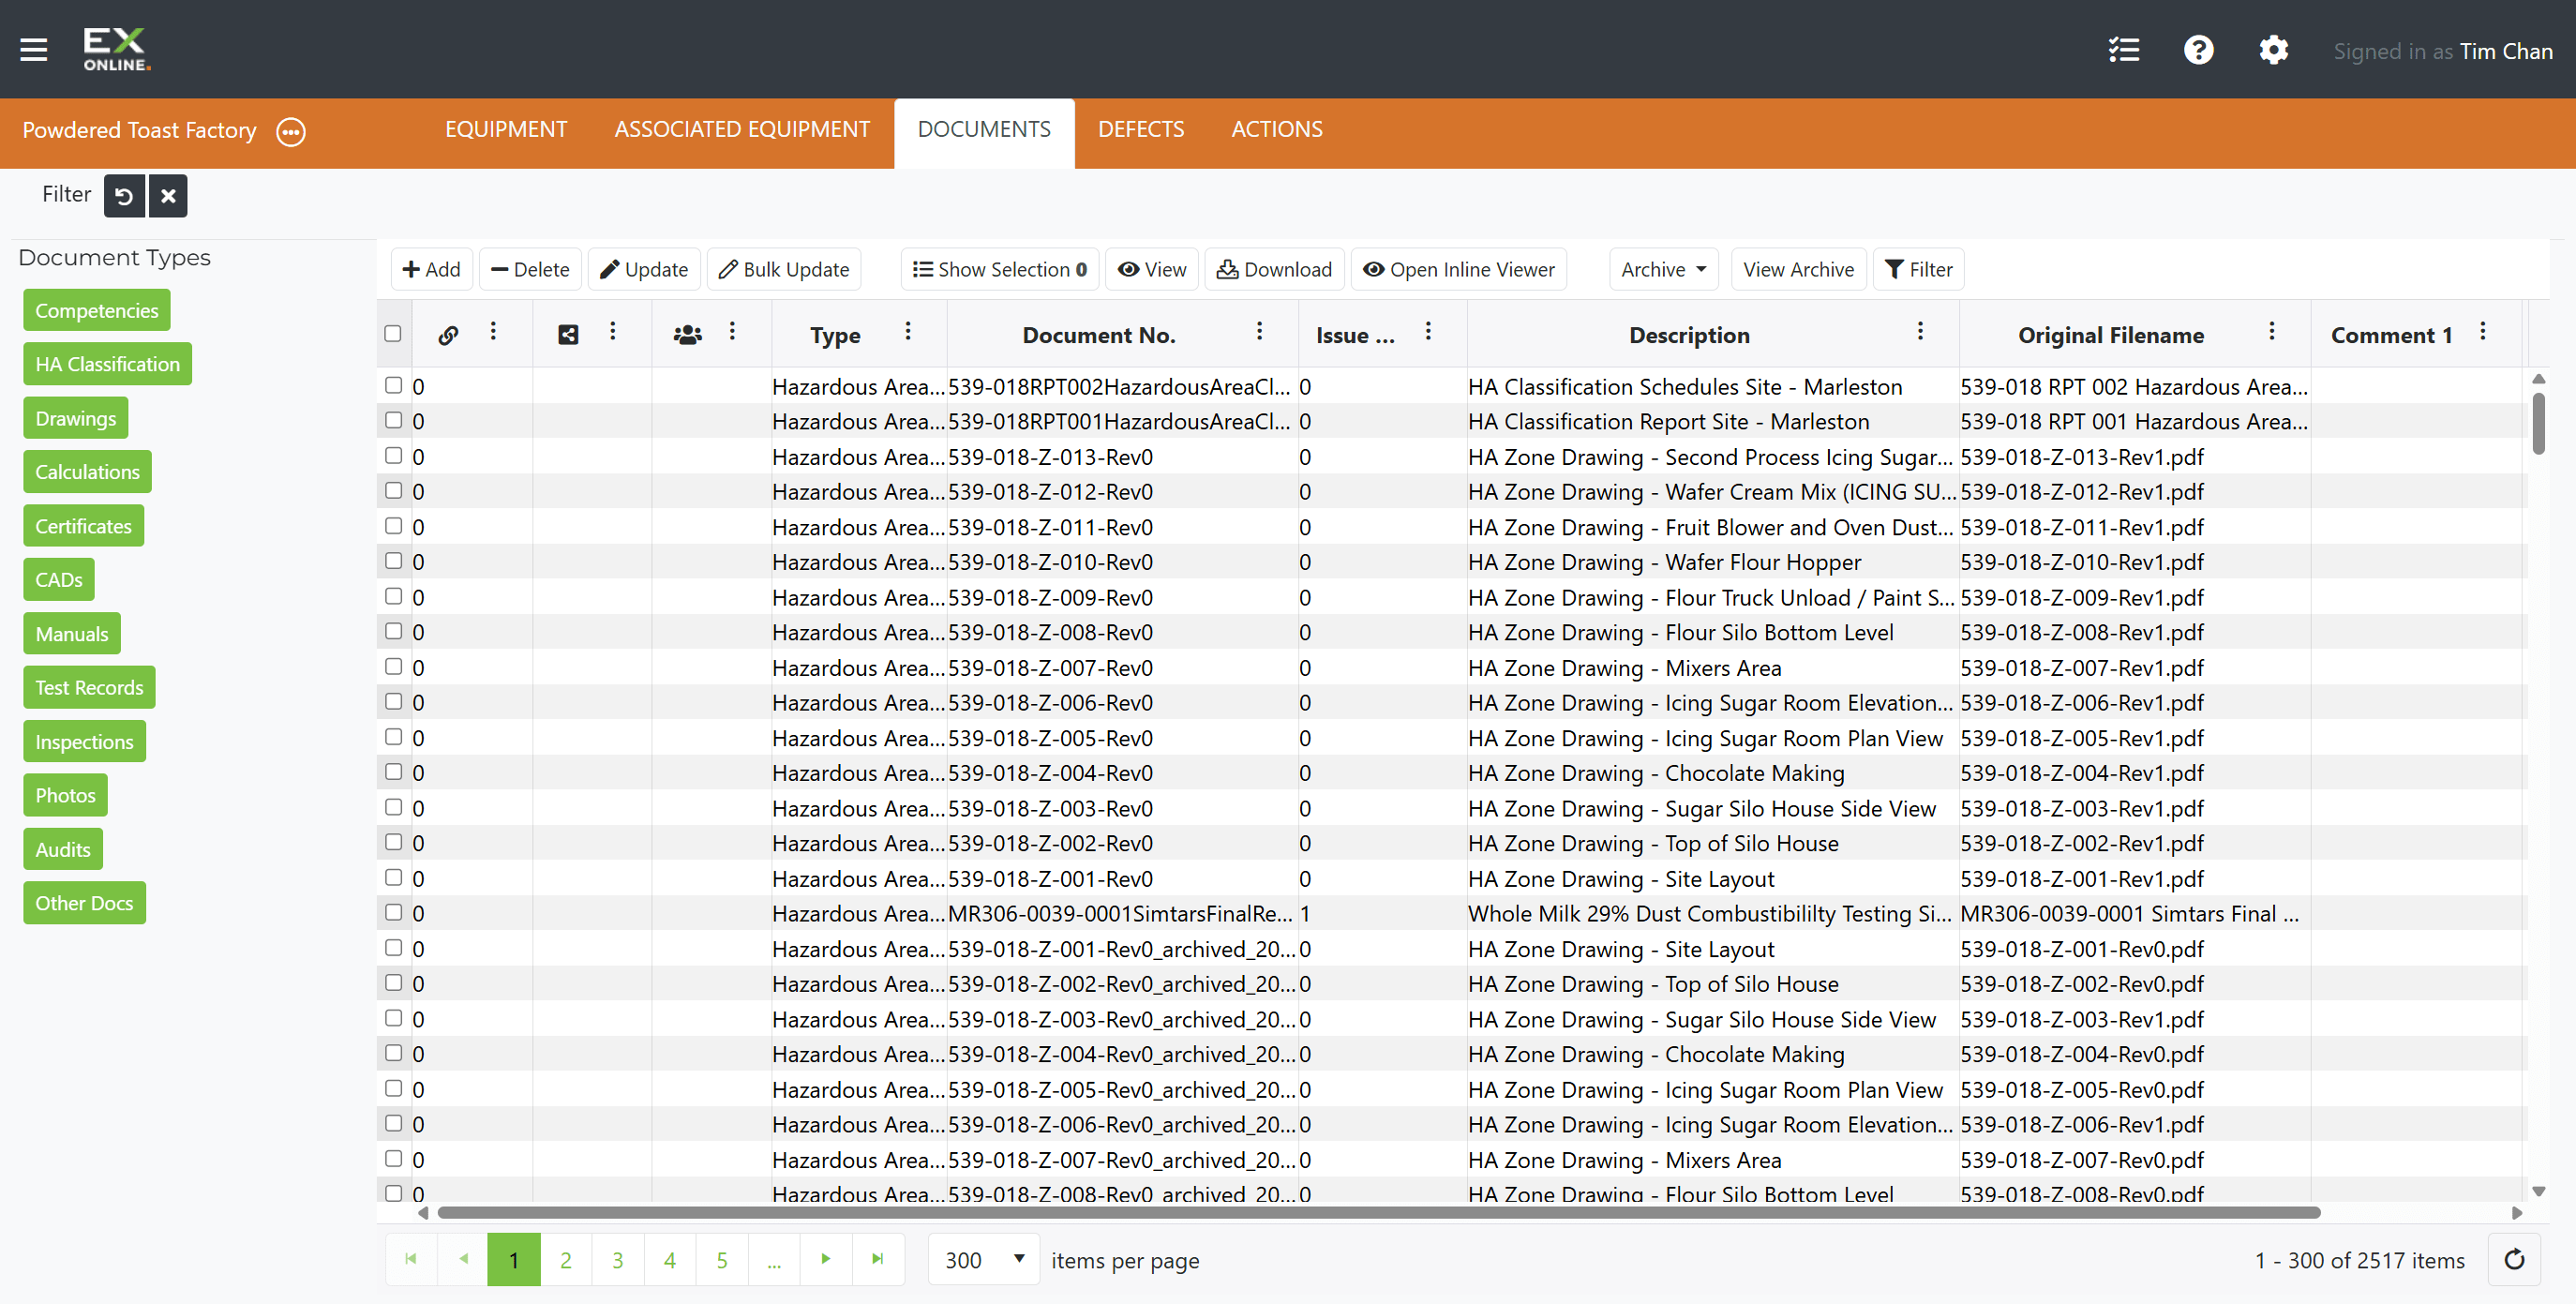
Uploading a Document
Section titled “Uploading a Document”To add a new project-level document:
-
Go to the DOCUMENTS tab and click Add in the toolbar.
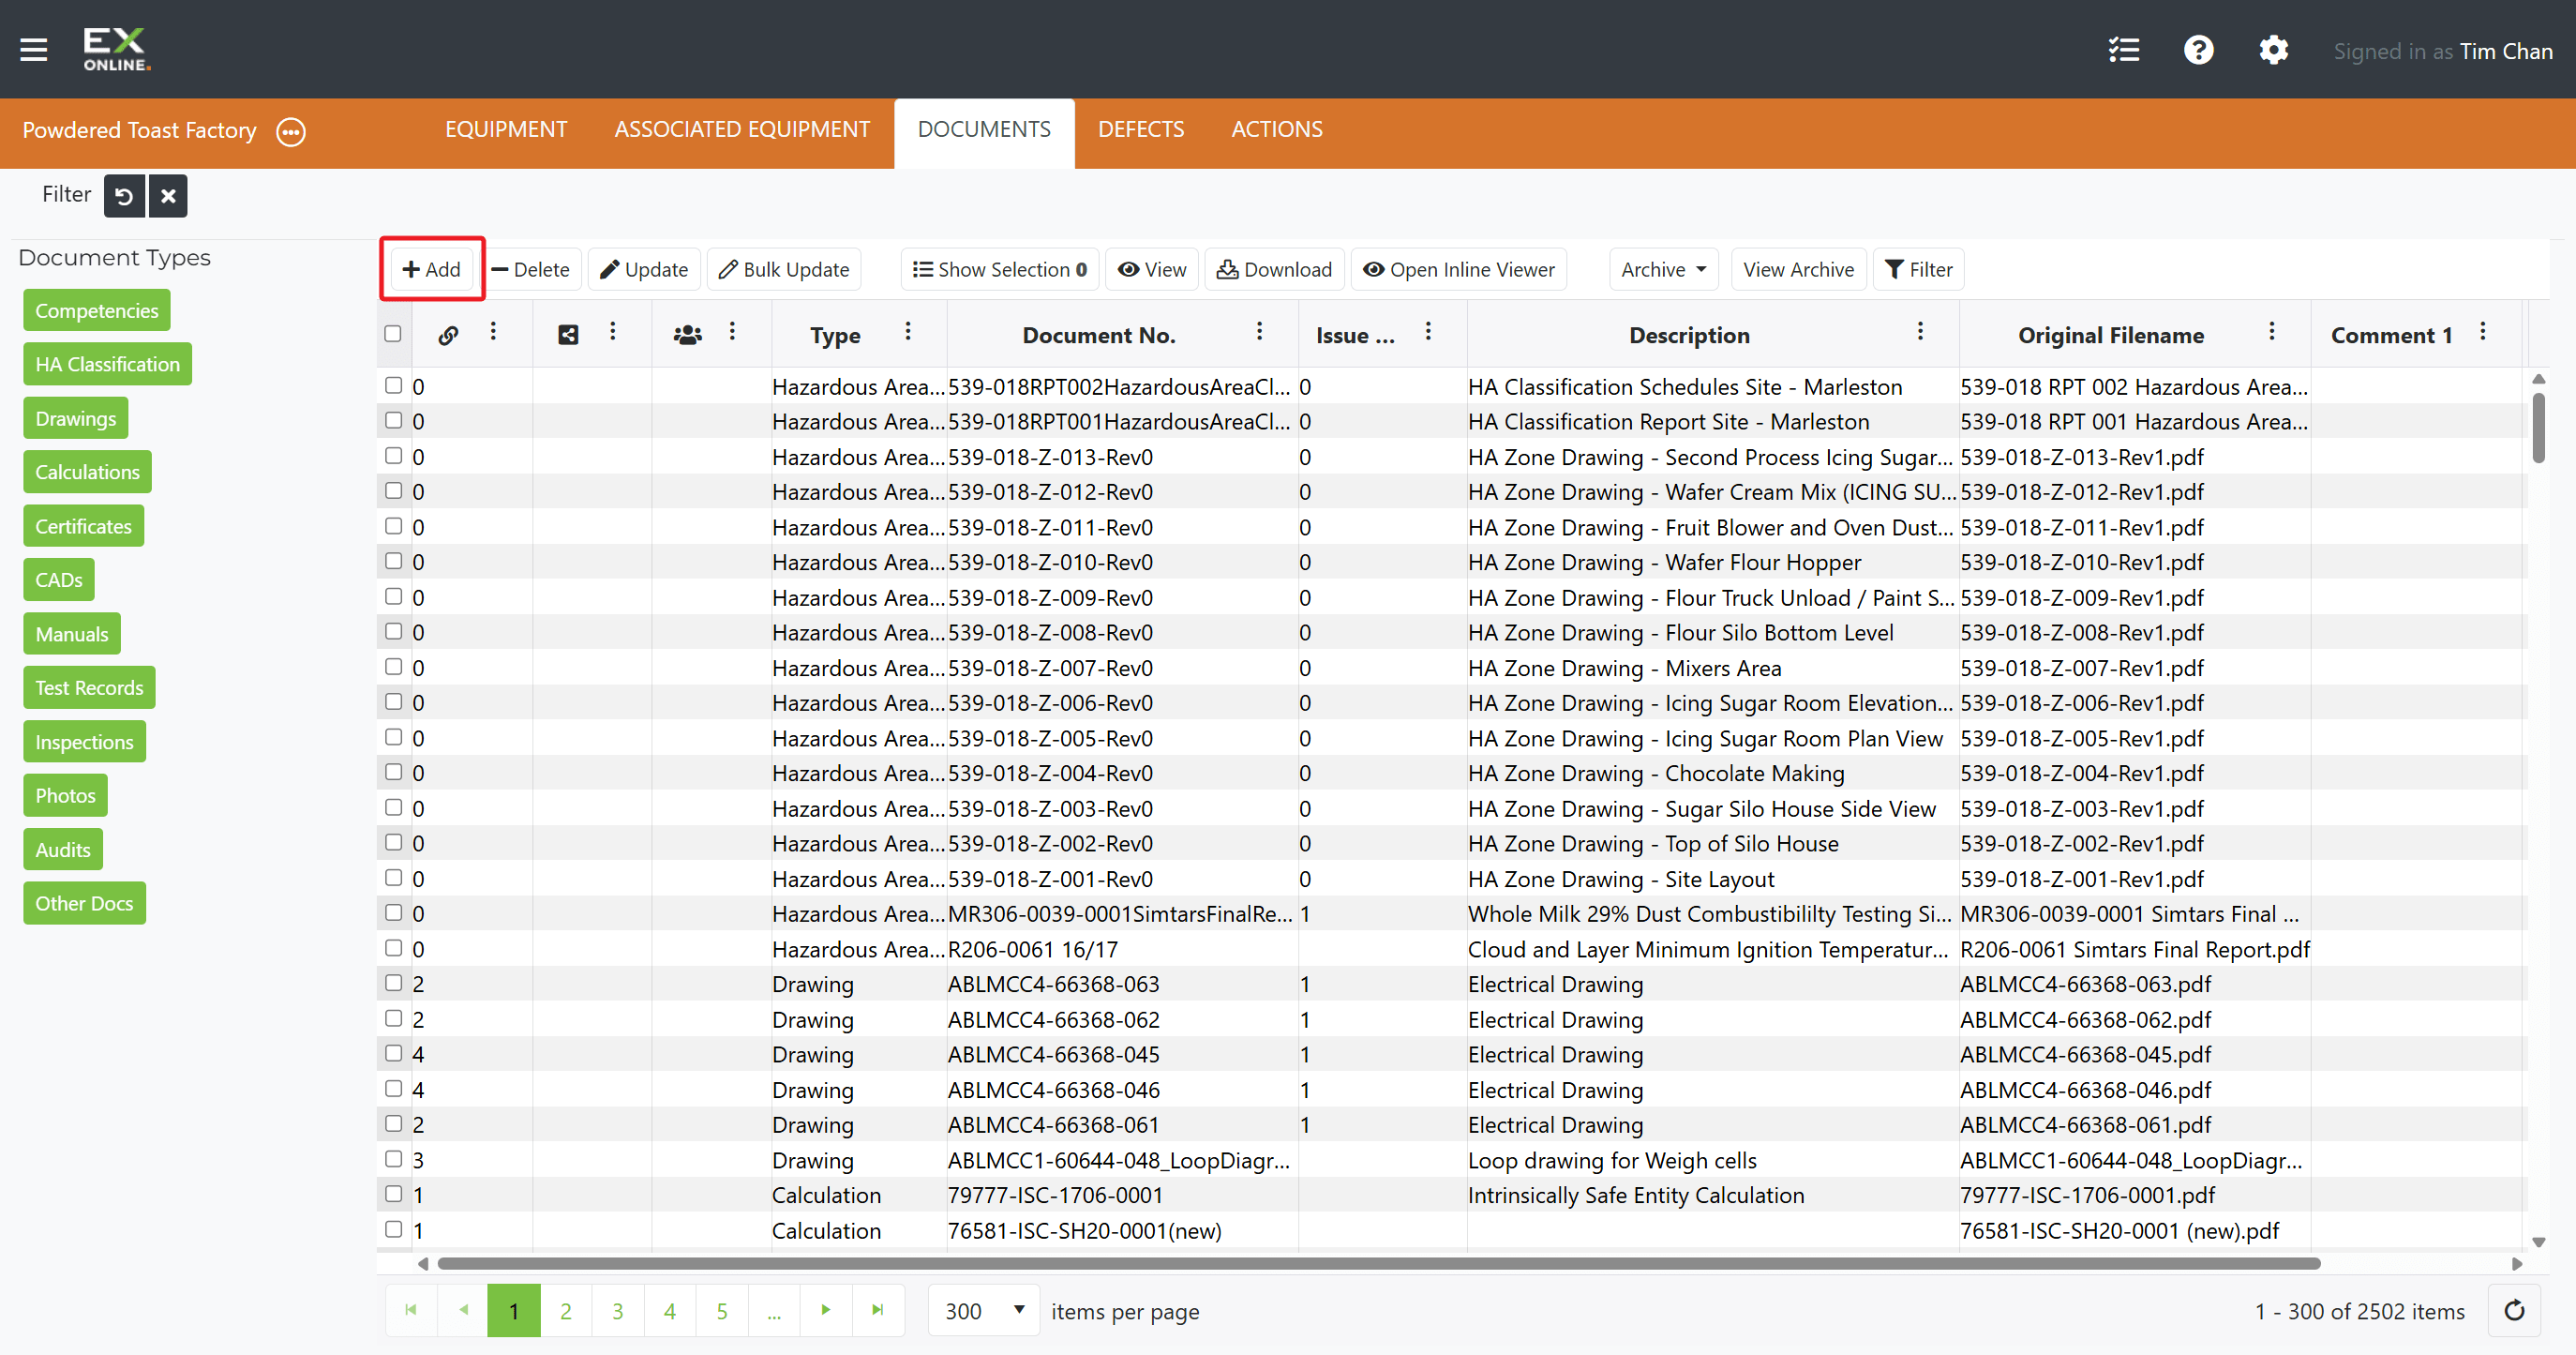
-
Fill in the document metadata:
- Doc Type — document category
- Issue — revision or issue number
- Doc No — document number or identifier
- Desc. — brief description
- Comment 1 / 2 — optional notes
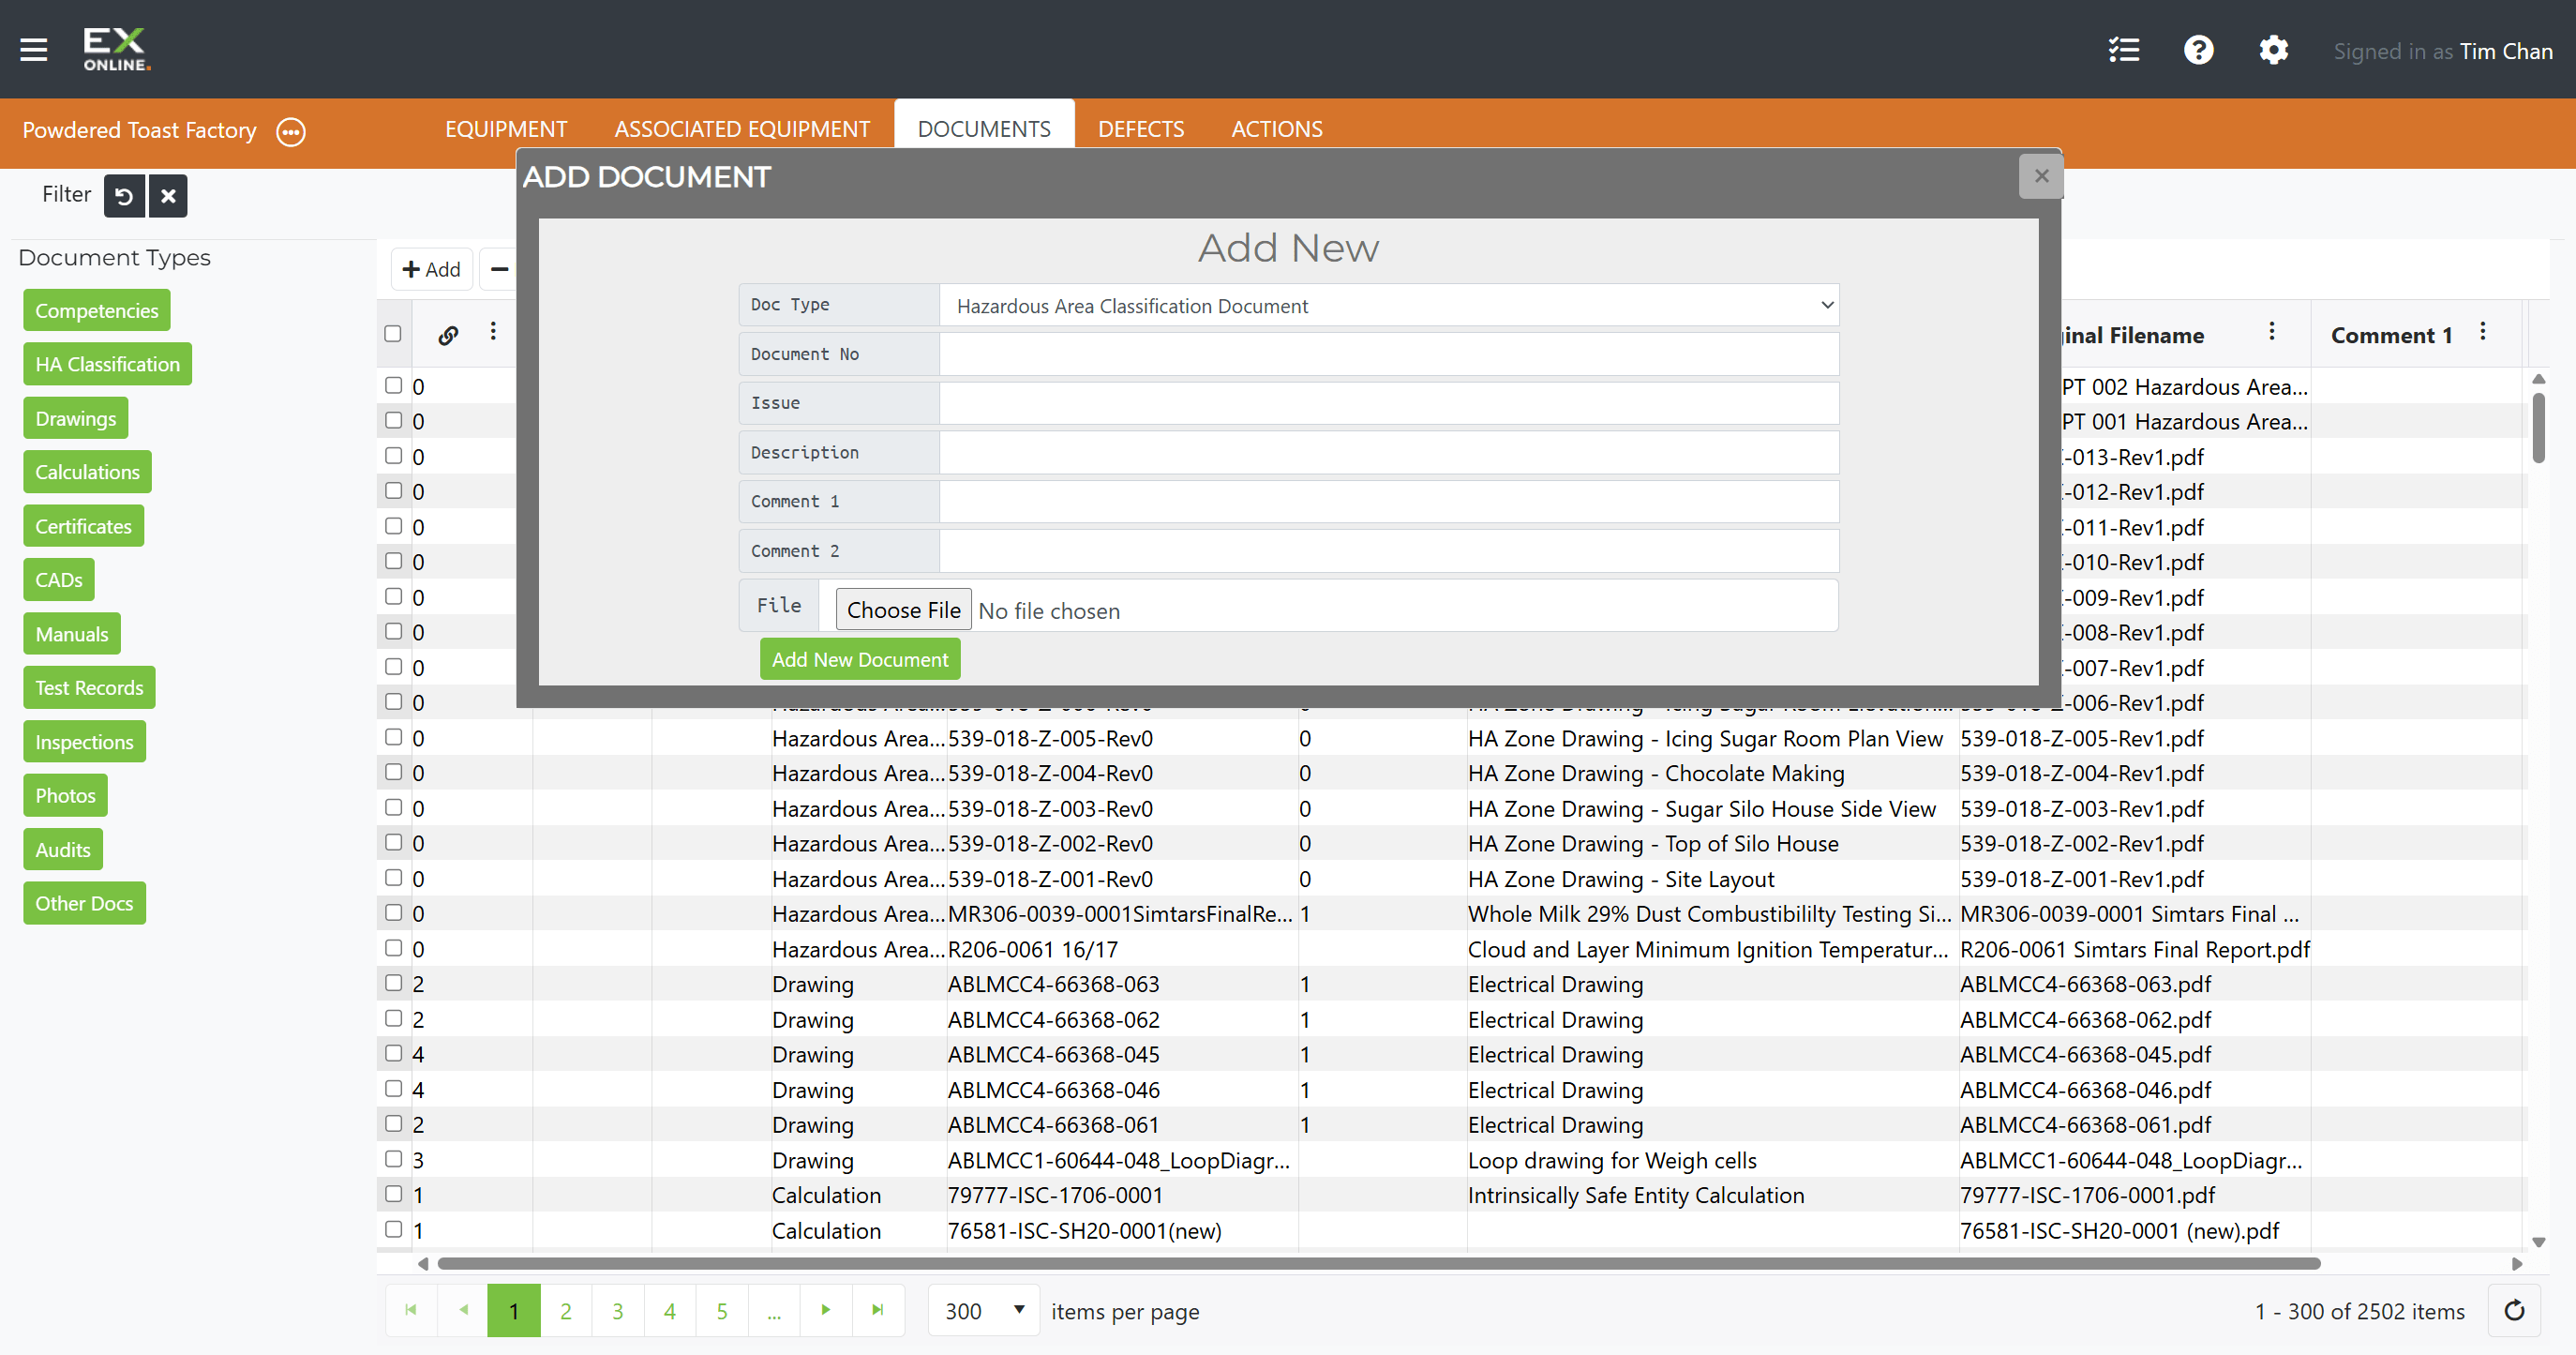
-
Click Choose File to select the file, then click Add New Document.
Finding Documents
Section titled “Finding Documents”The sidebar on the left groups documents by type — click a category (Certificates, Drawings, Photos, etc.) to filter the grid to that type only. Click Reset Filter to clear the selection. Column filters are also available via the filter icon on each column header.
Viewing or Downloading a Document
Section titled “Viewing or Downloading a Document”To open a document:
-
Go to the DOCUMENTS tab and select the document row.
-
Click View to open it in the Ex-Online document viewer, or Download to save it to your computer.
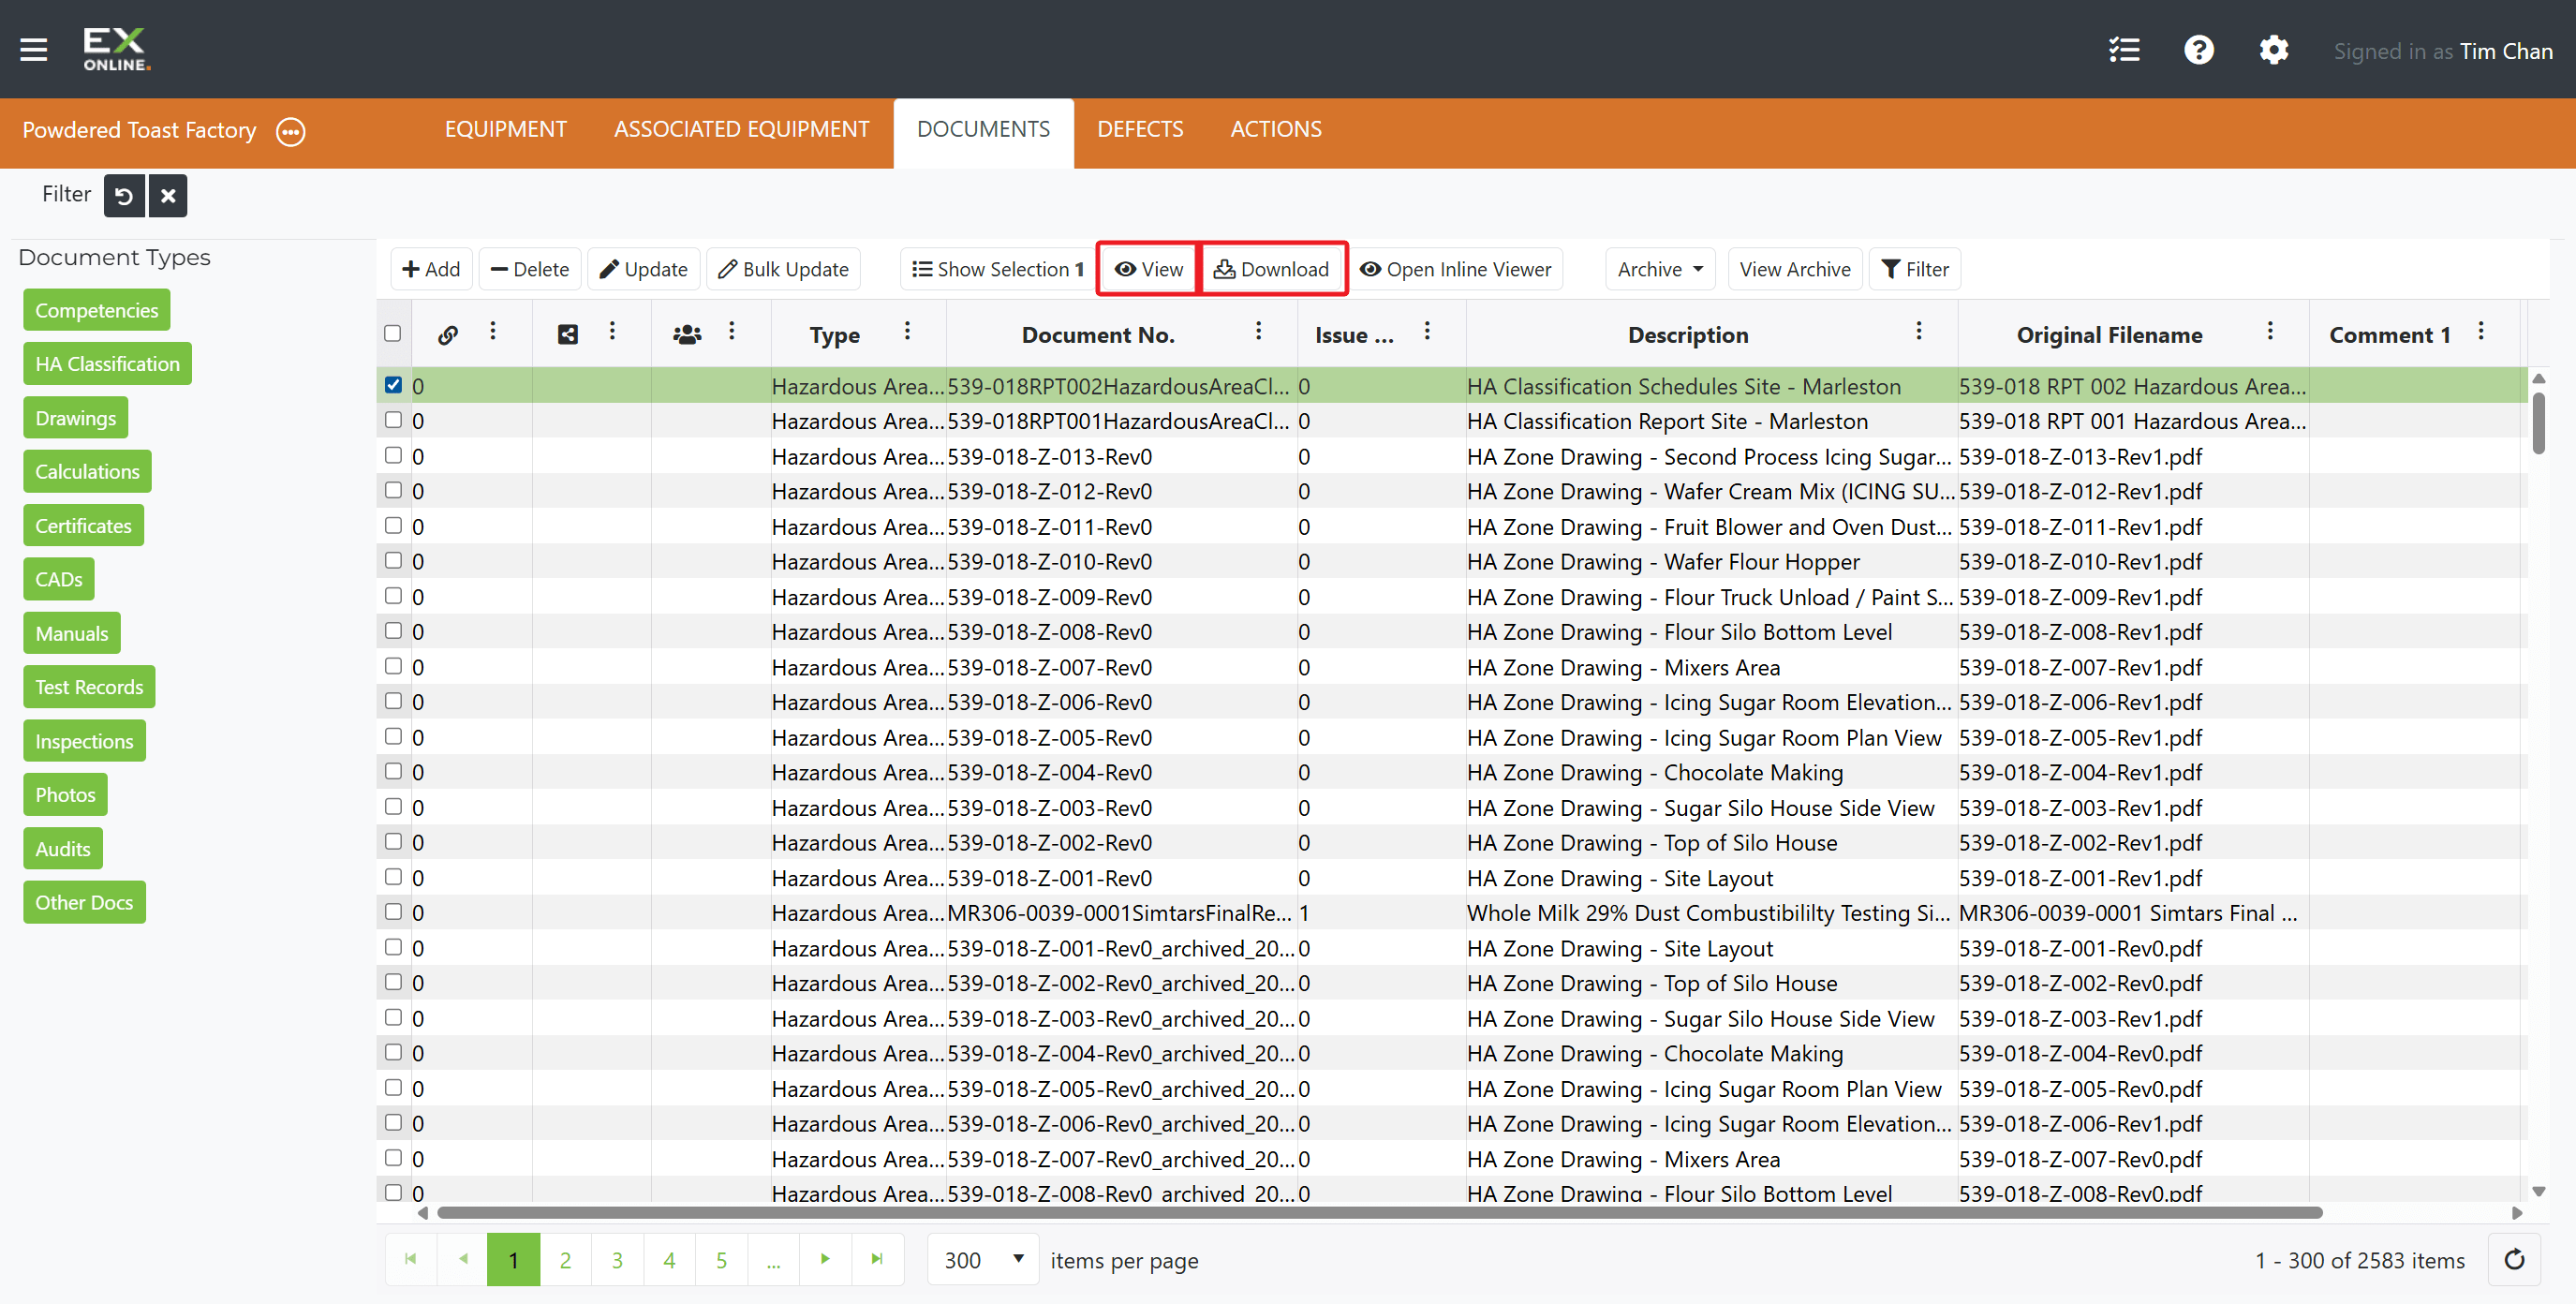
The Open Inline Viewer button previews the document within the application without opening a separate window.
Linking a Document to Equipment
Section titled “Linking a Document to Equipment”To attach a document to a specific equipment item:
-
Switch to the EQUIPMENT tab and click the green expand icon on the equipment row to open the Equipment Window.
-
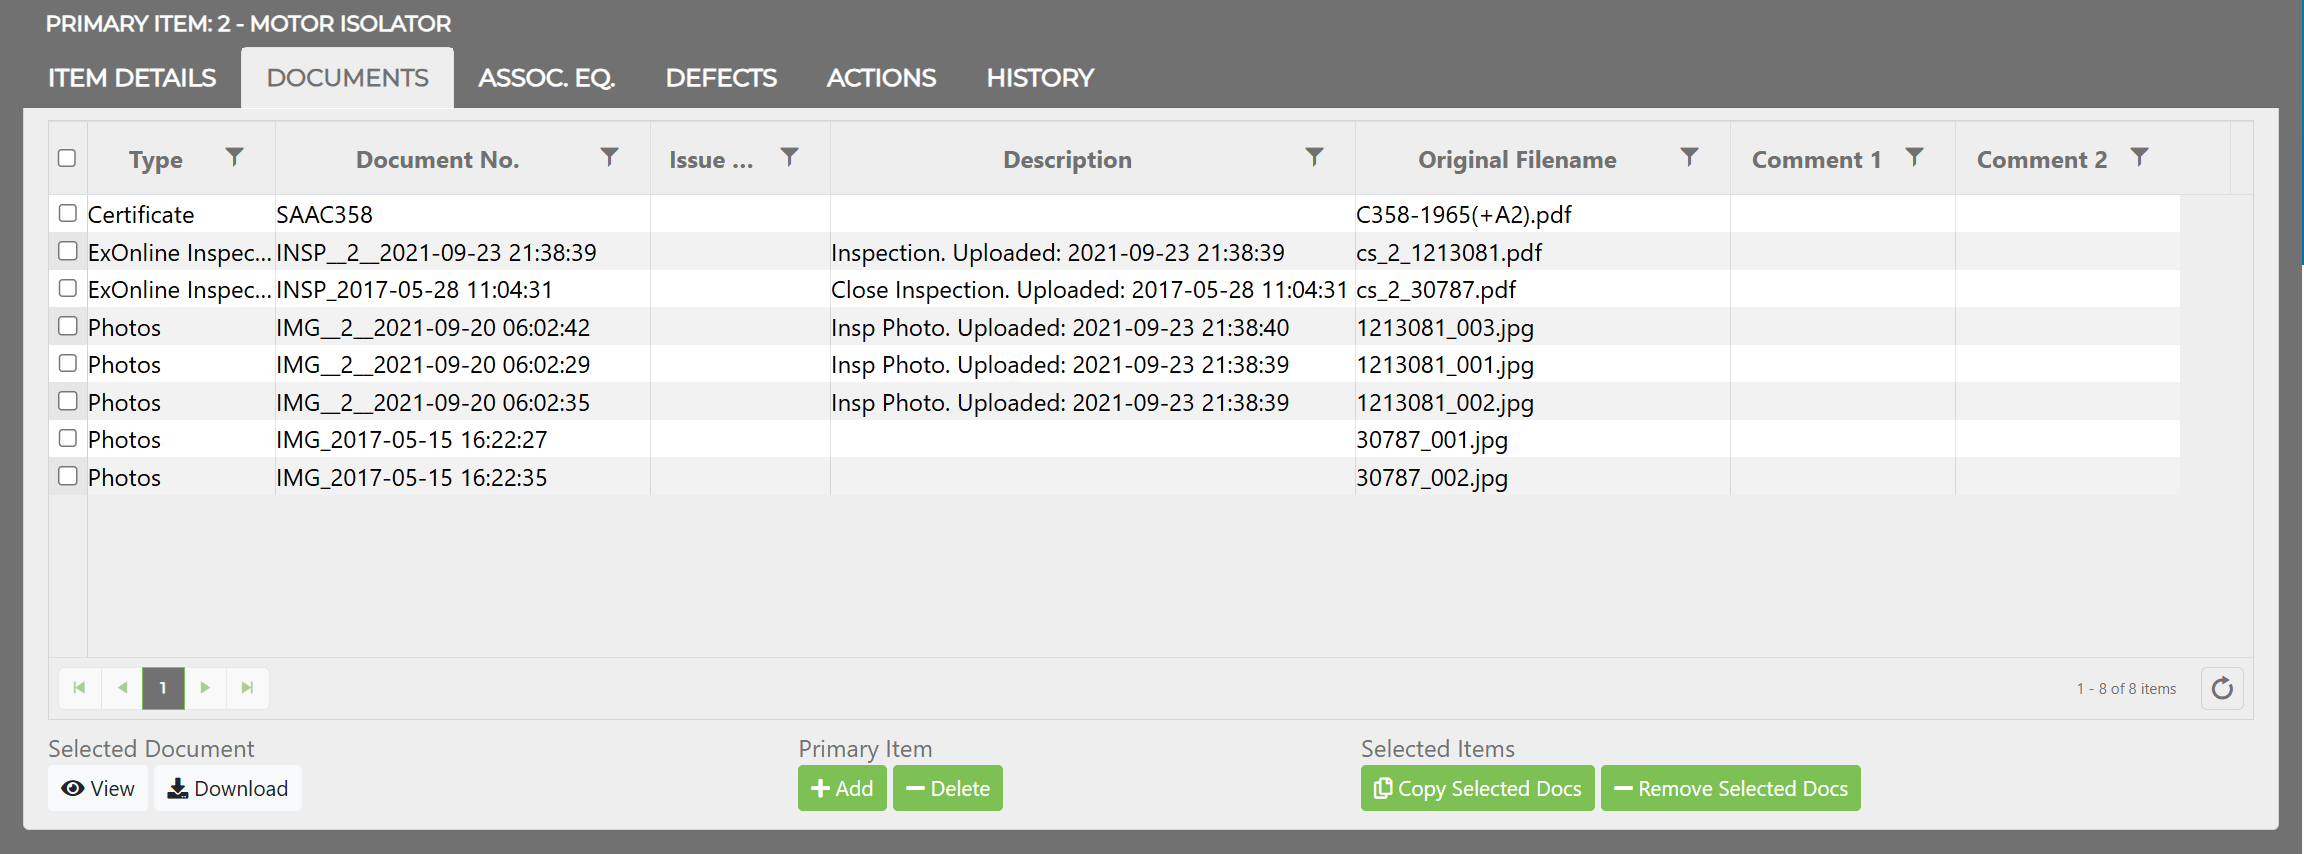
Switch to the DOCUMENTS tab in the Equipment Window header.
-
Click the Add button in the Primary Item row.
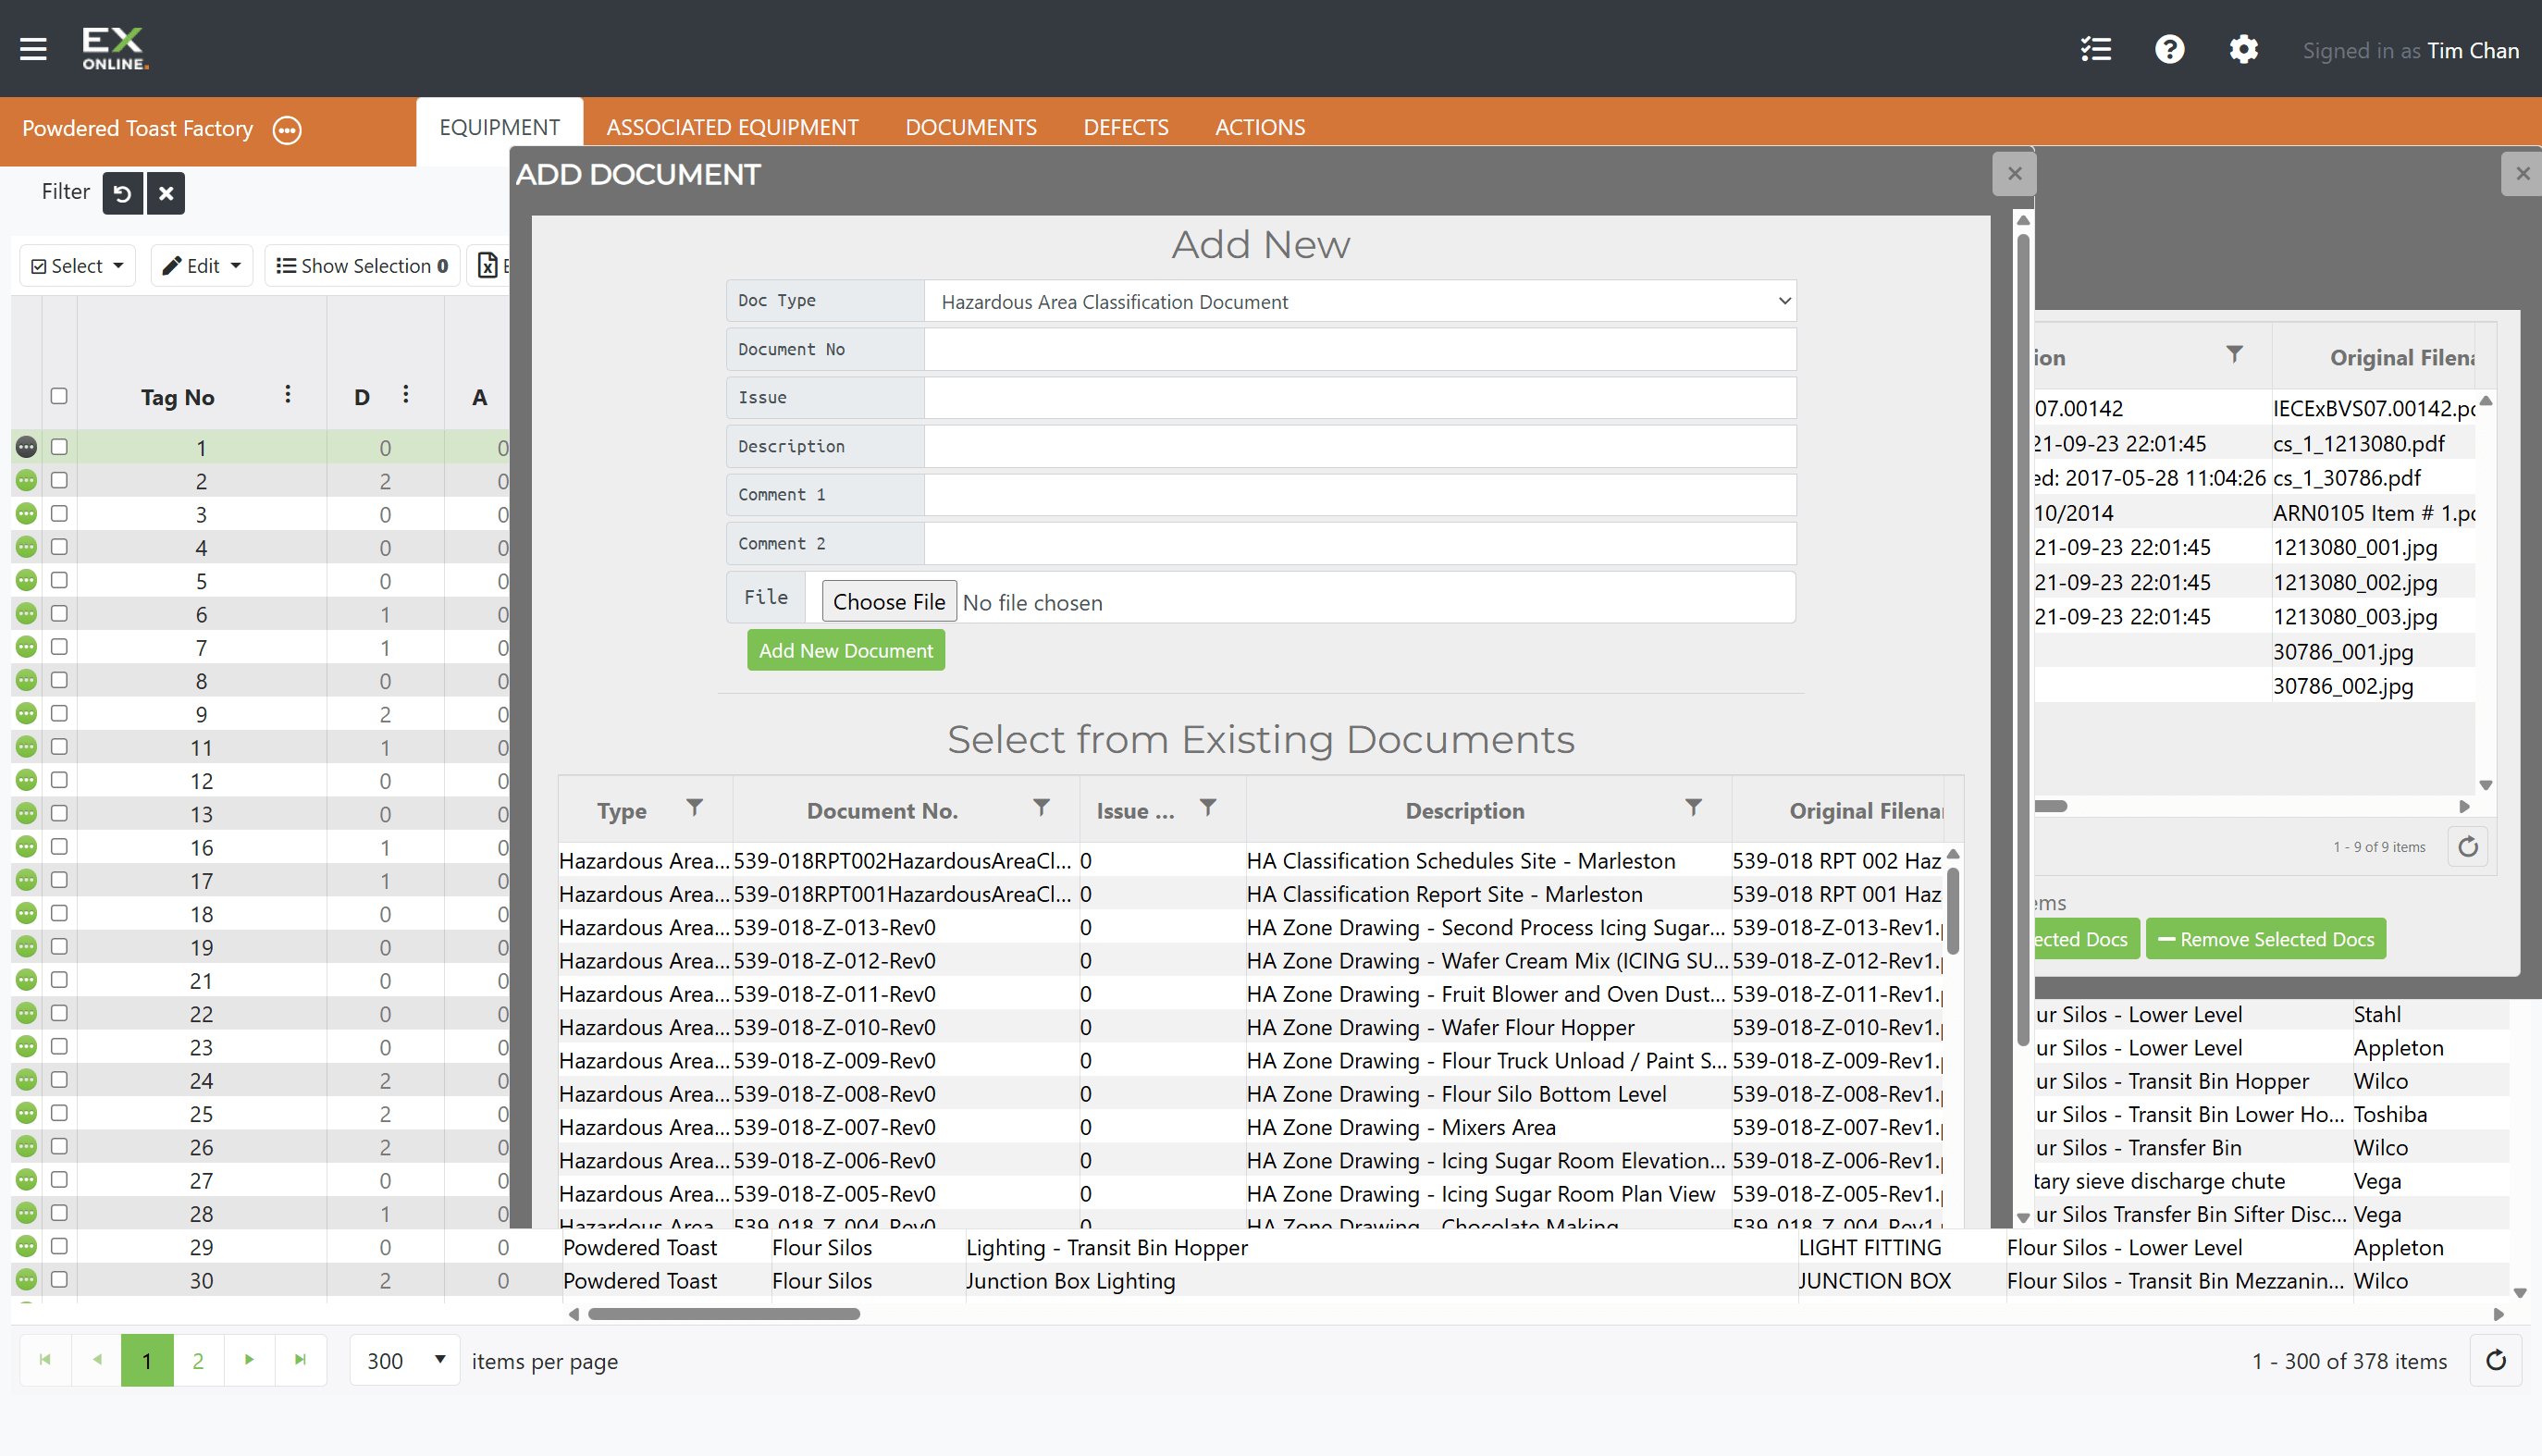
- To link an existing document, select the row in the table and click Add.
- To upload a new document, fill in the fields, choose a file, and click Add New Document.
Copying Documents to Multiple Items
Section titled “Copying Documents to Multiple Items”The Copy Selected Docs button in the Equipment Window copies selected documents from the Primary Item to all selected items in the equipment grid — useful for attaching the same certificate or drawing to many items at once.
Removing Document Links
Section titled “Removing Document Links”To unlink a document from equipment without deleting it from the project:
-
Open the Equipment Window for the item and switch to the DOCUMENTS tab.
-
Select the document(s) to unlink.
-
Click the - Remove button.
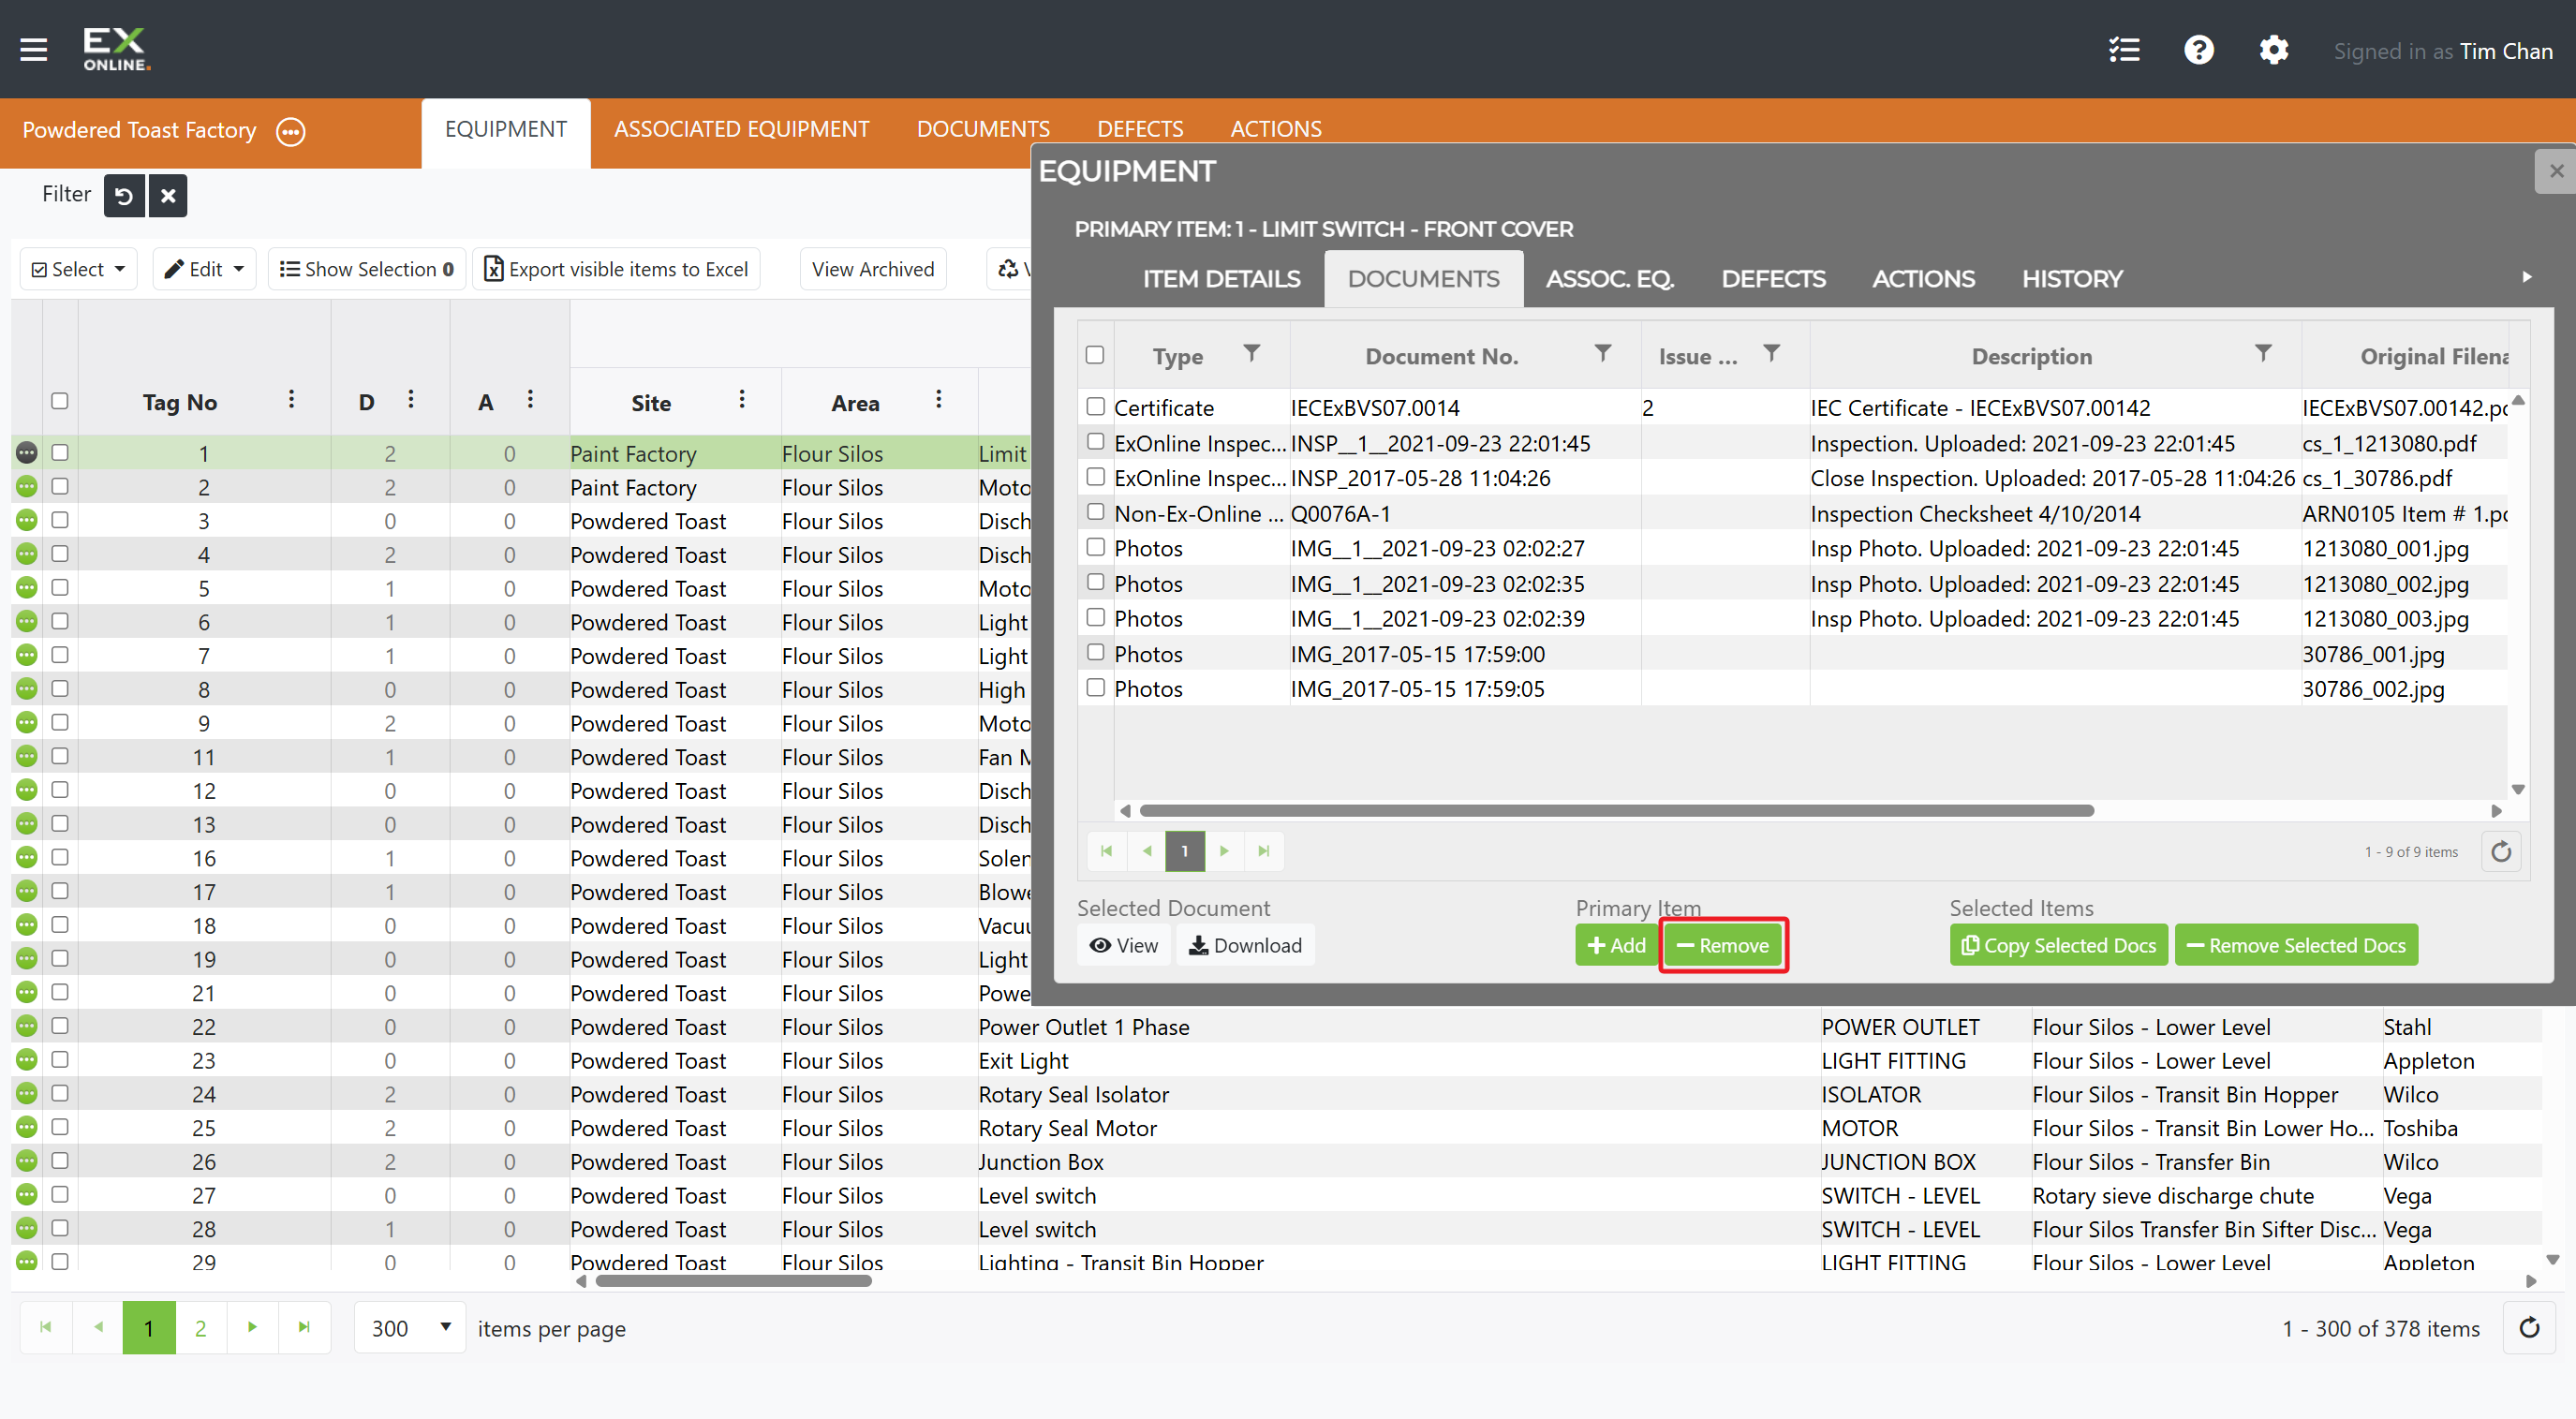
This removes the link from all selected equipment items. The document itself remains in the project under the DOCUMENTS tab.
Updating a Document
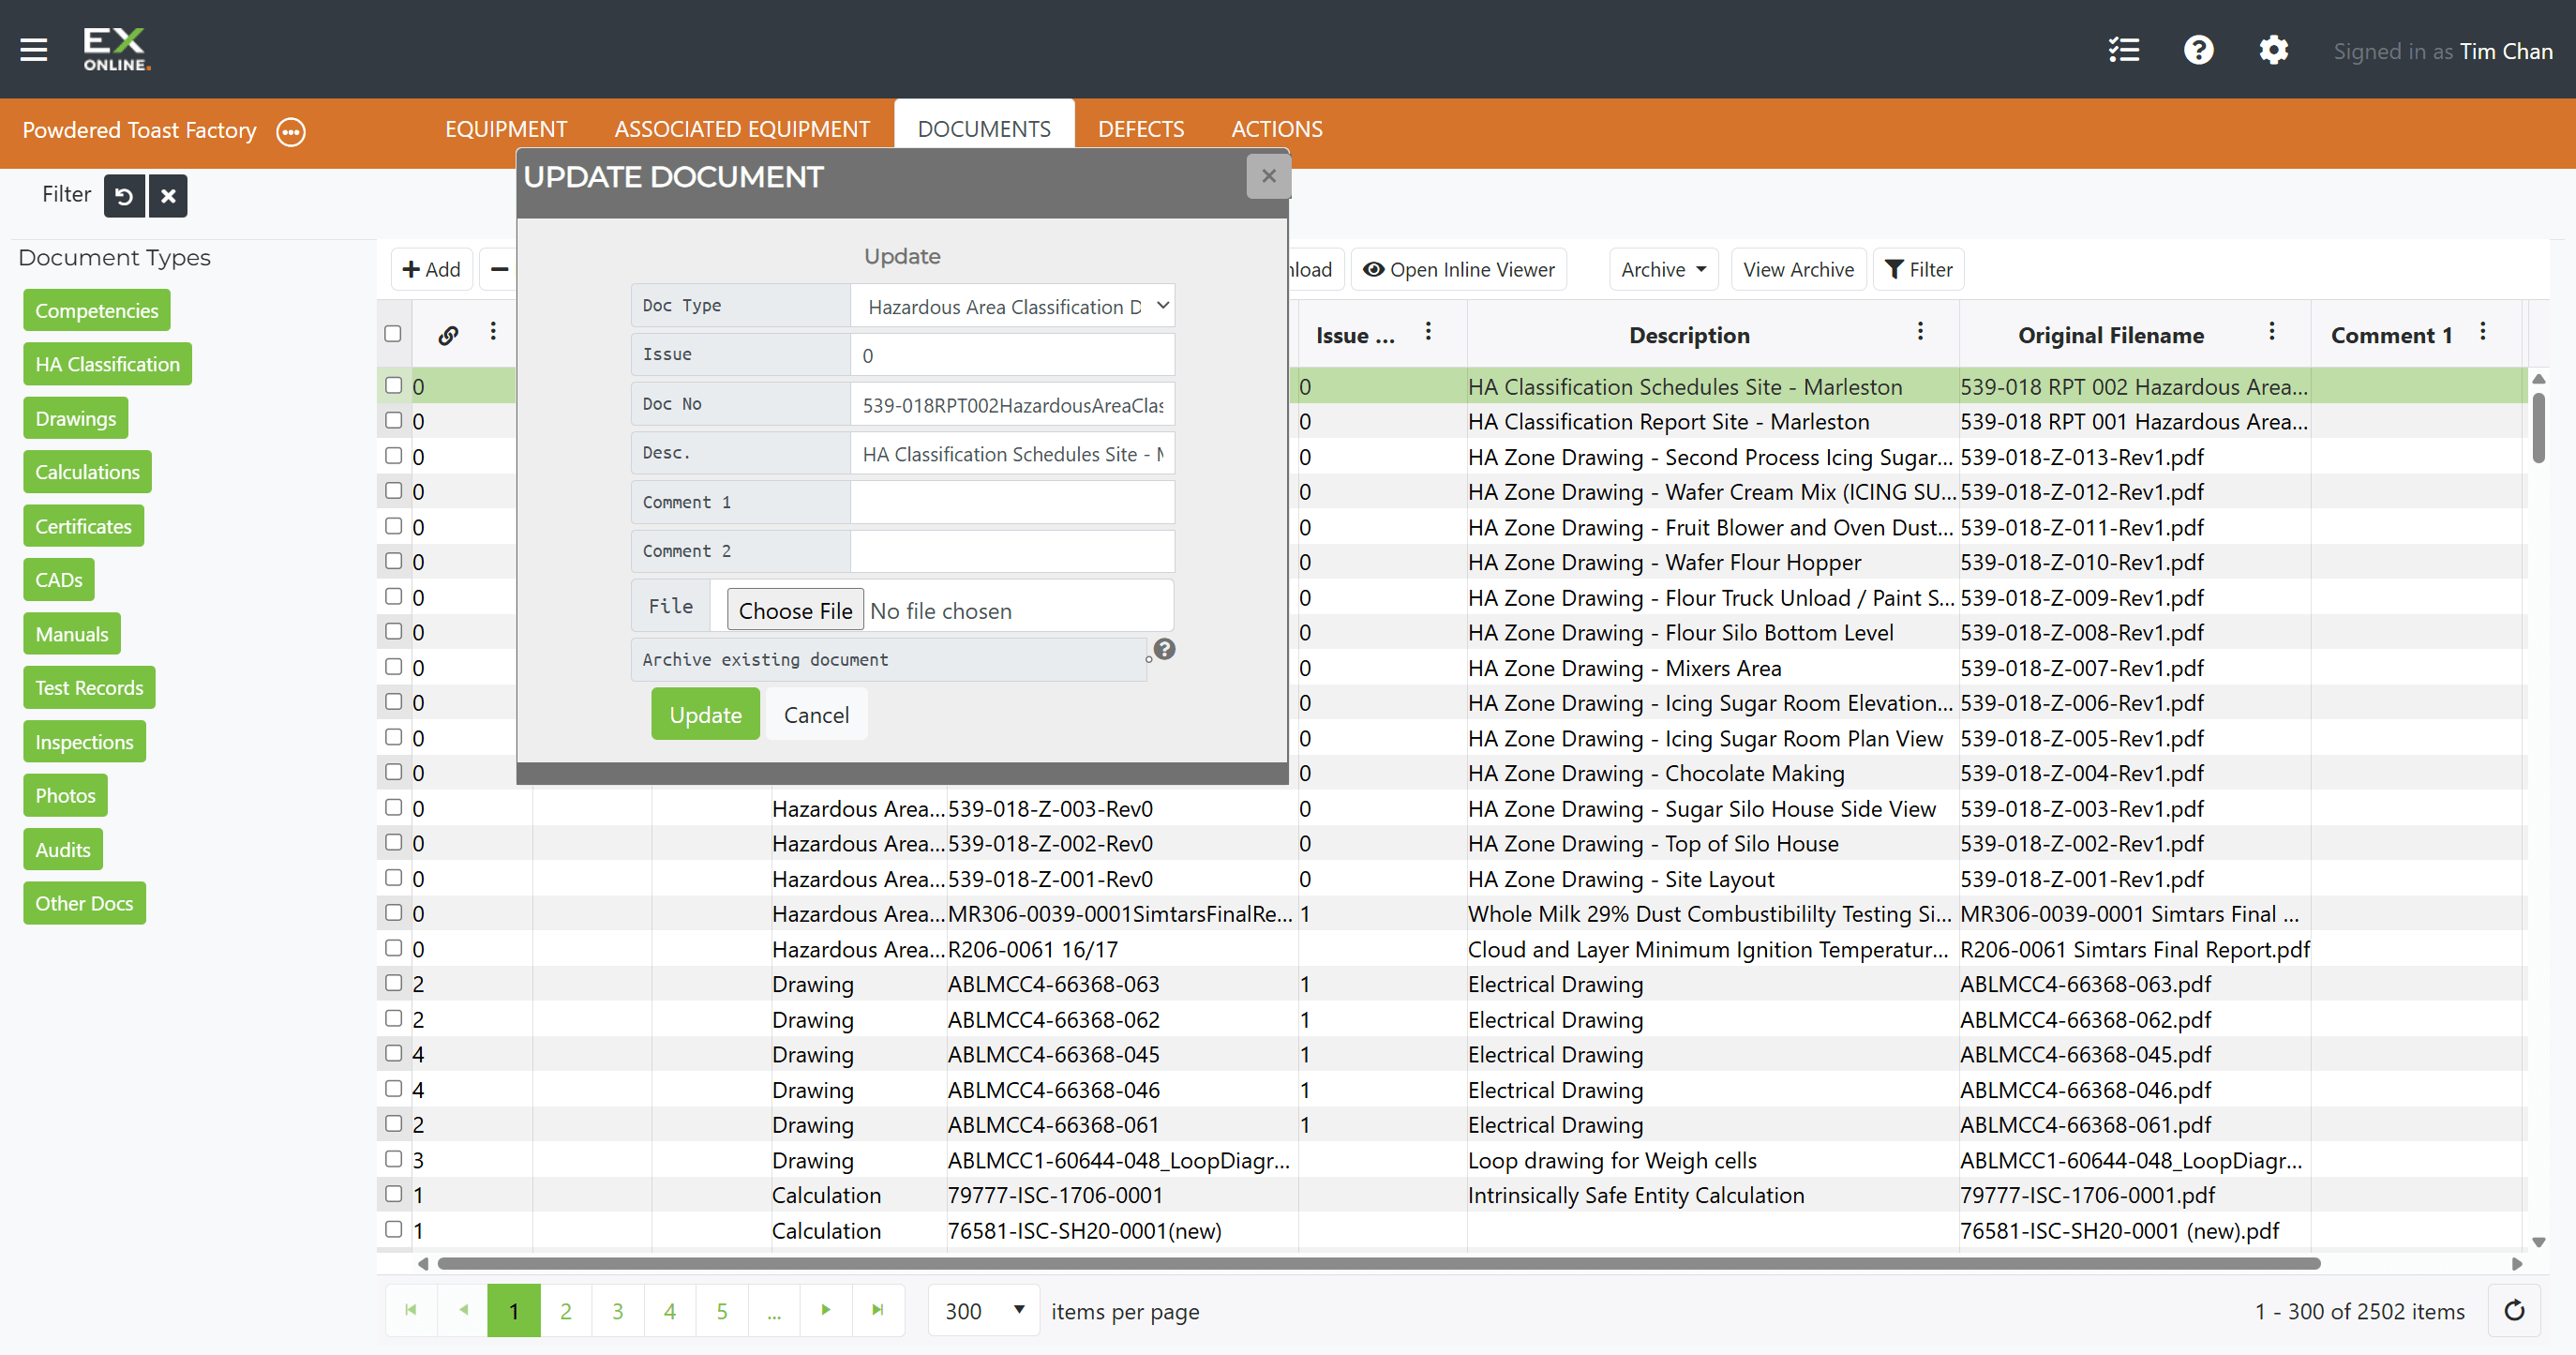
Section titled “Updating a Document”Documents cannot be edited inline. To update a document:
-
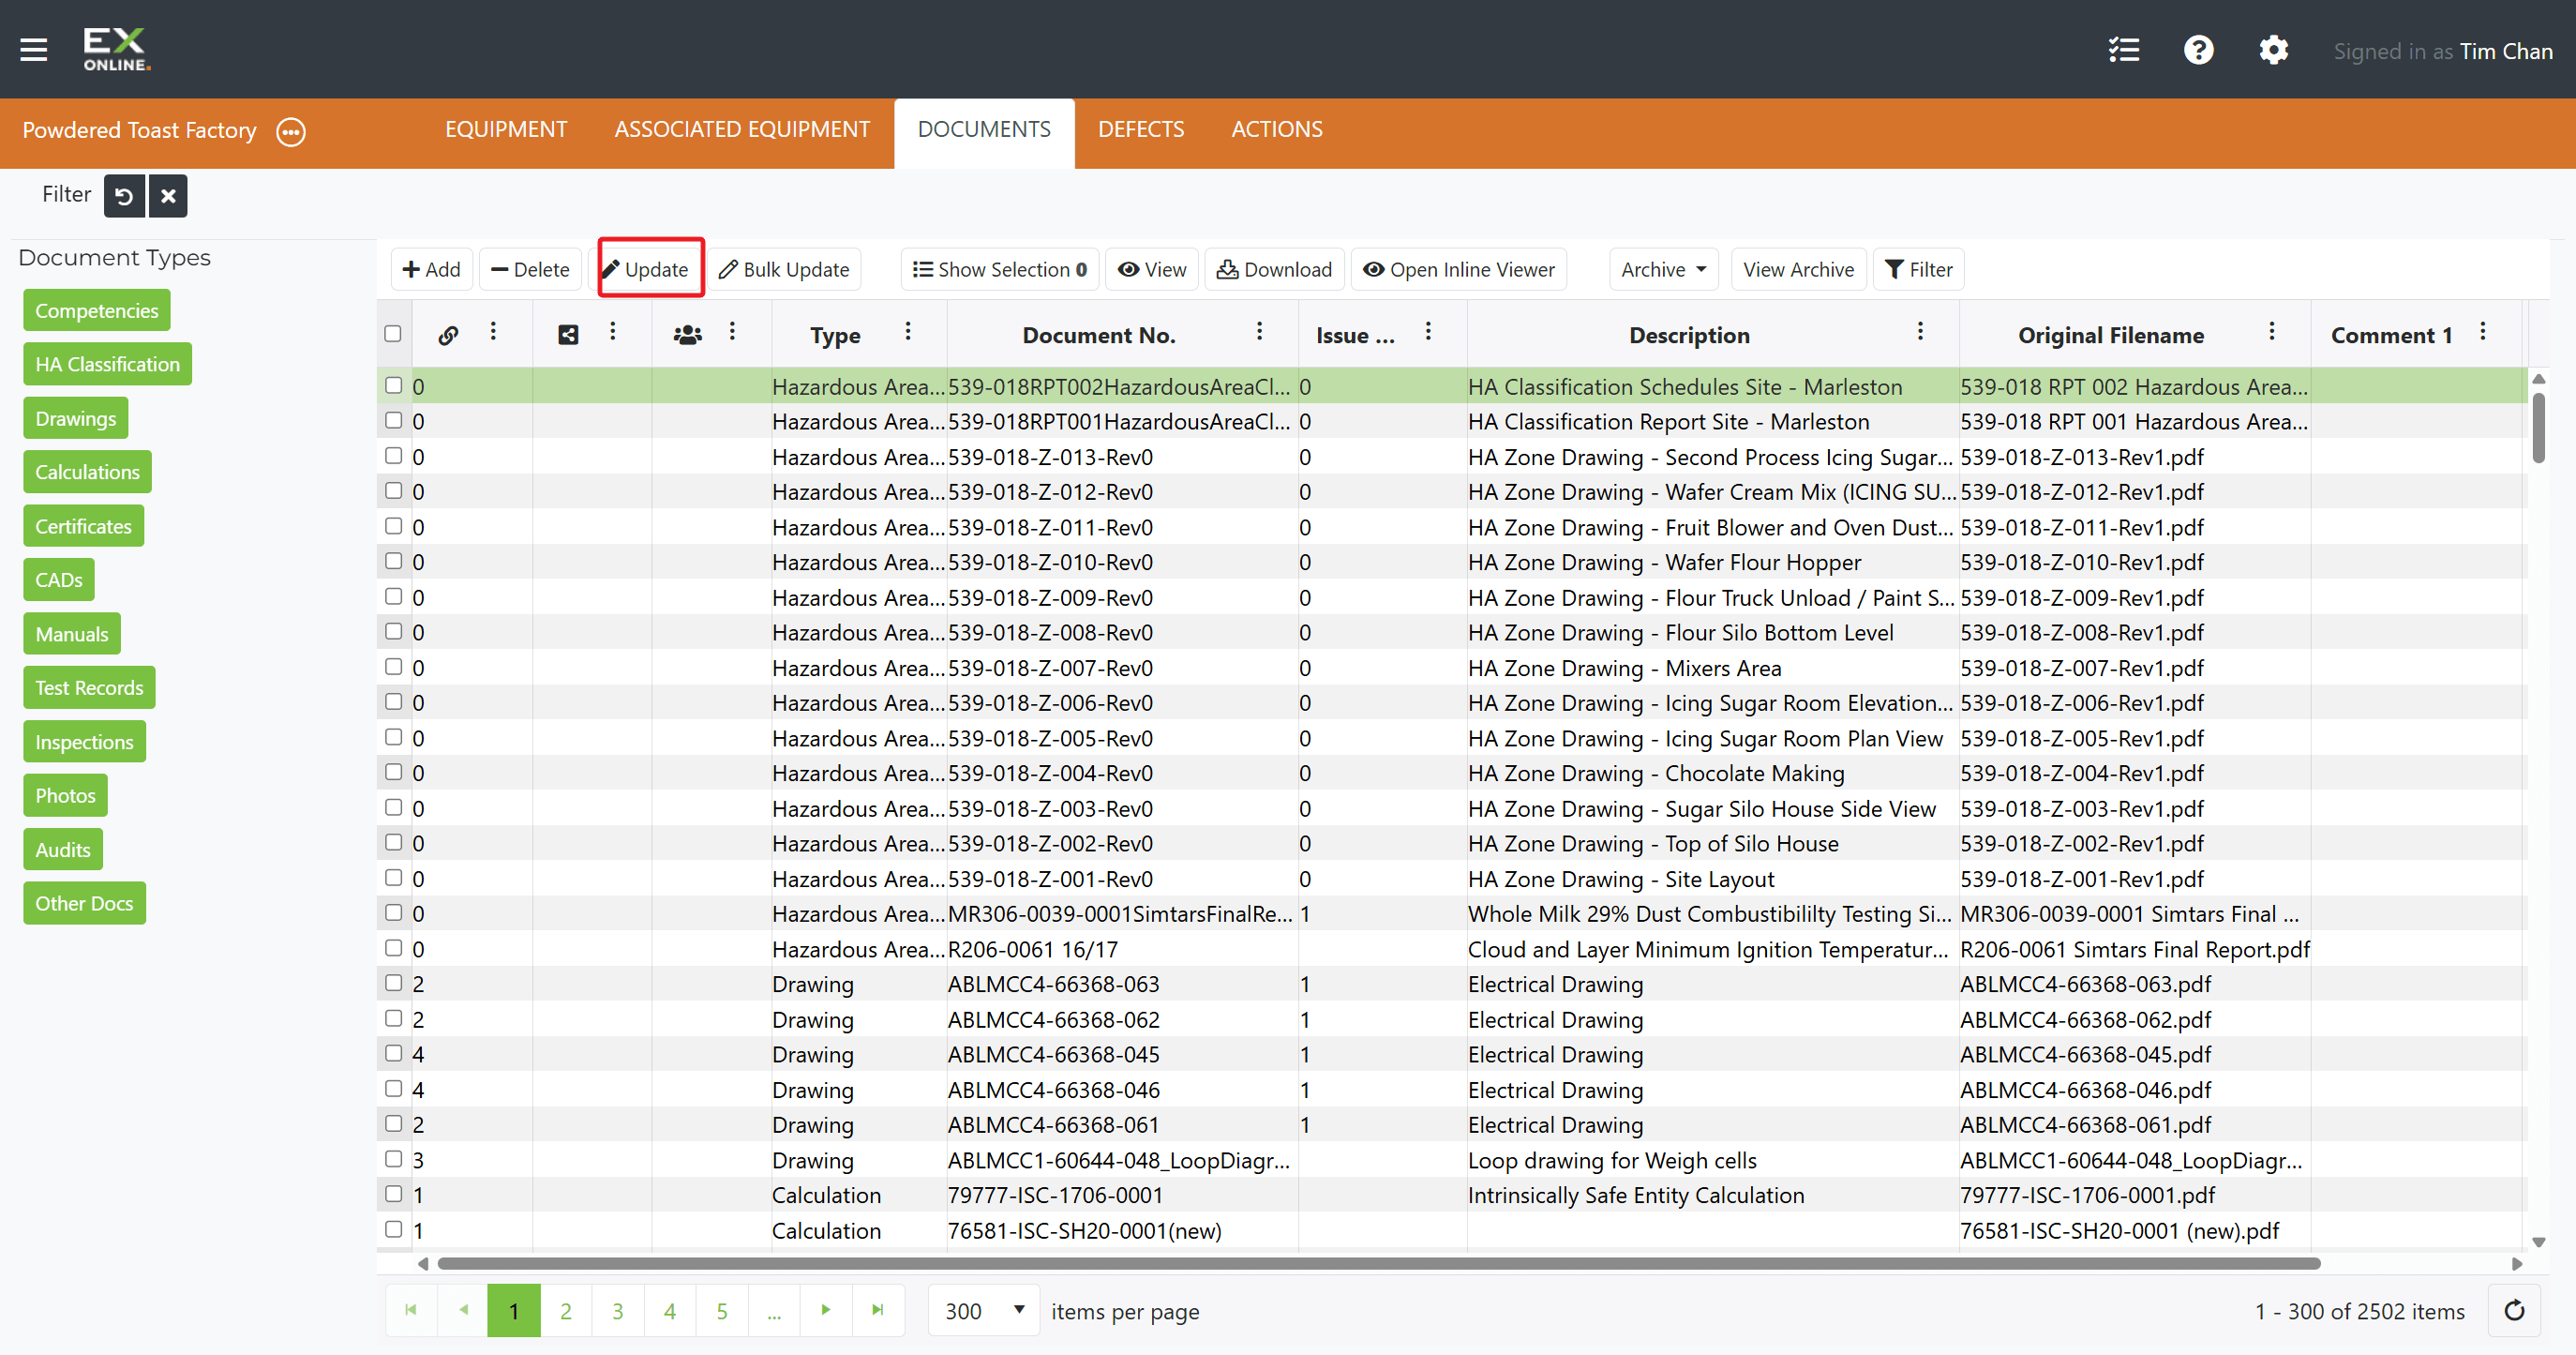
Go to the DOCUMENTS tab, select the document row, then click Update in the toolbar.
-
Modify the metadata fields as needed (Doc Type, Issue, Doc No, Description).
-
To replace the file, click Choose File and select the new file.
-
Check Archive existing document to keep the previous version.
-
Click Update to save.
Bulk Updating Documents
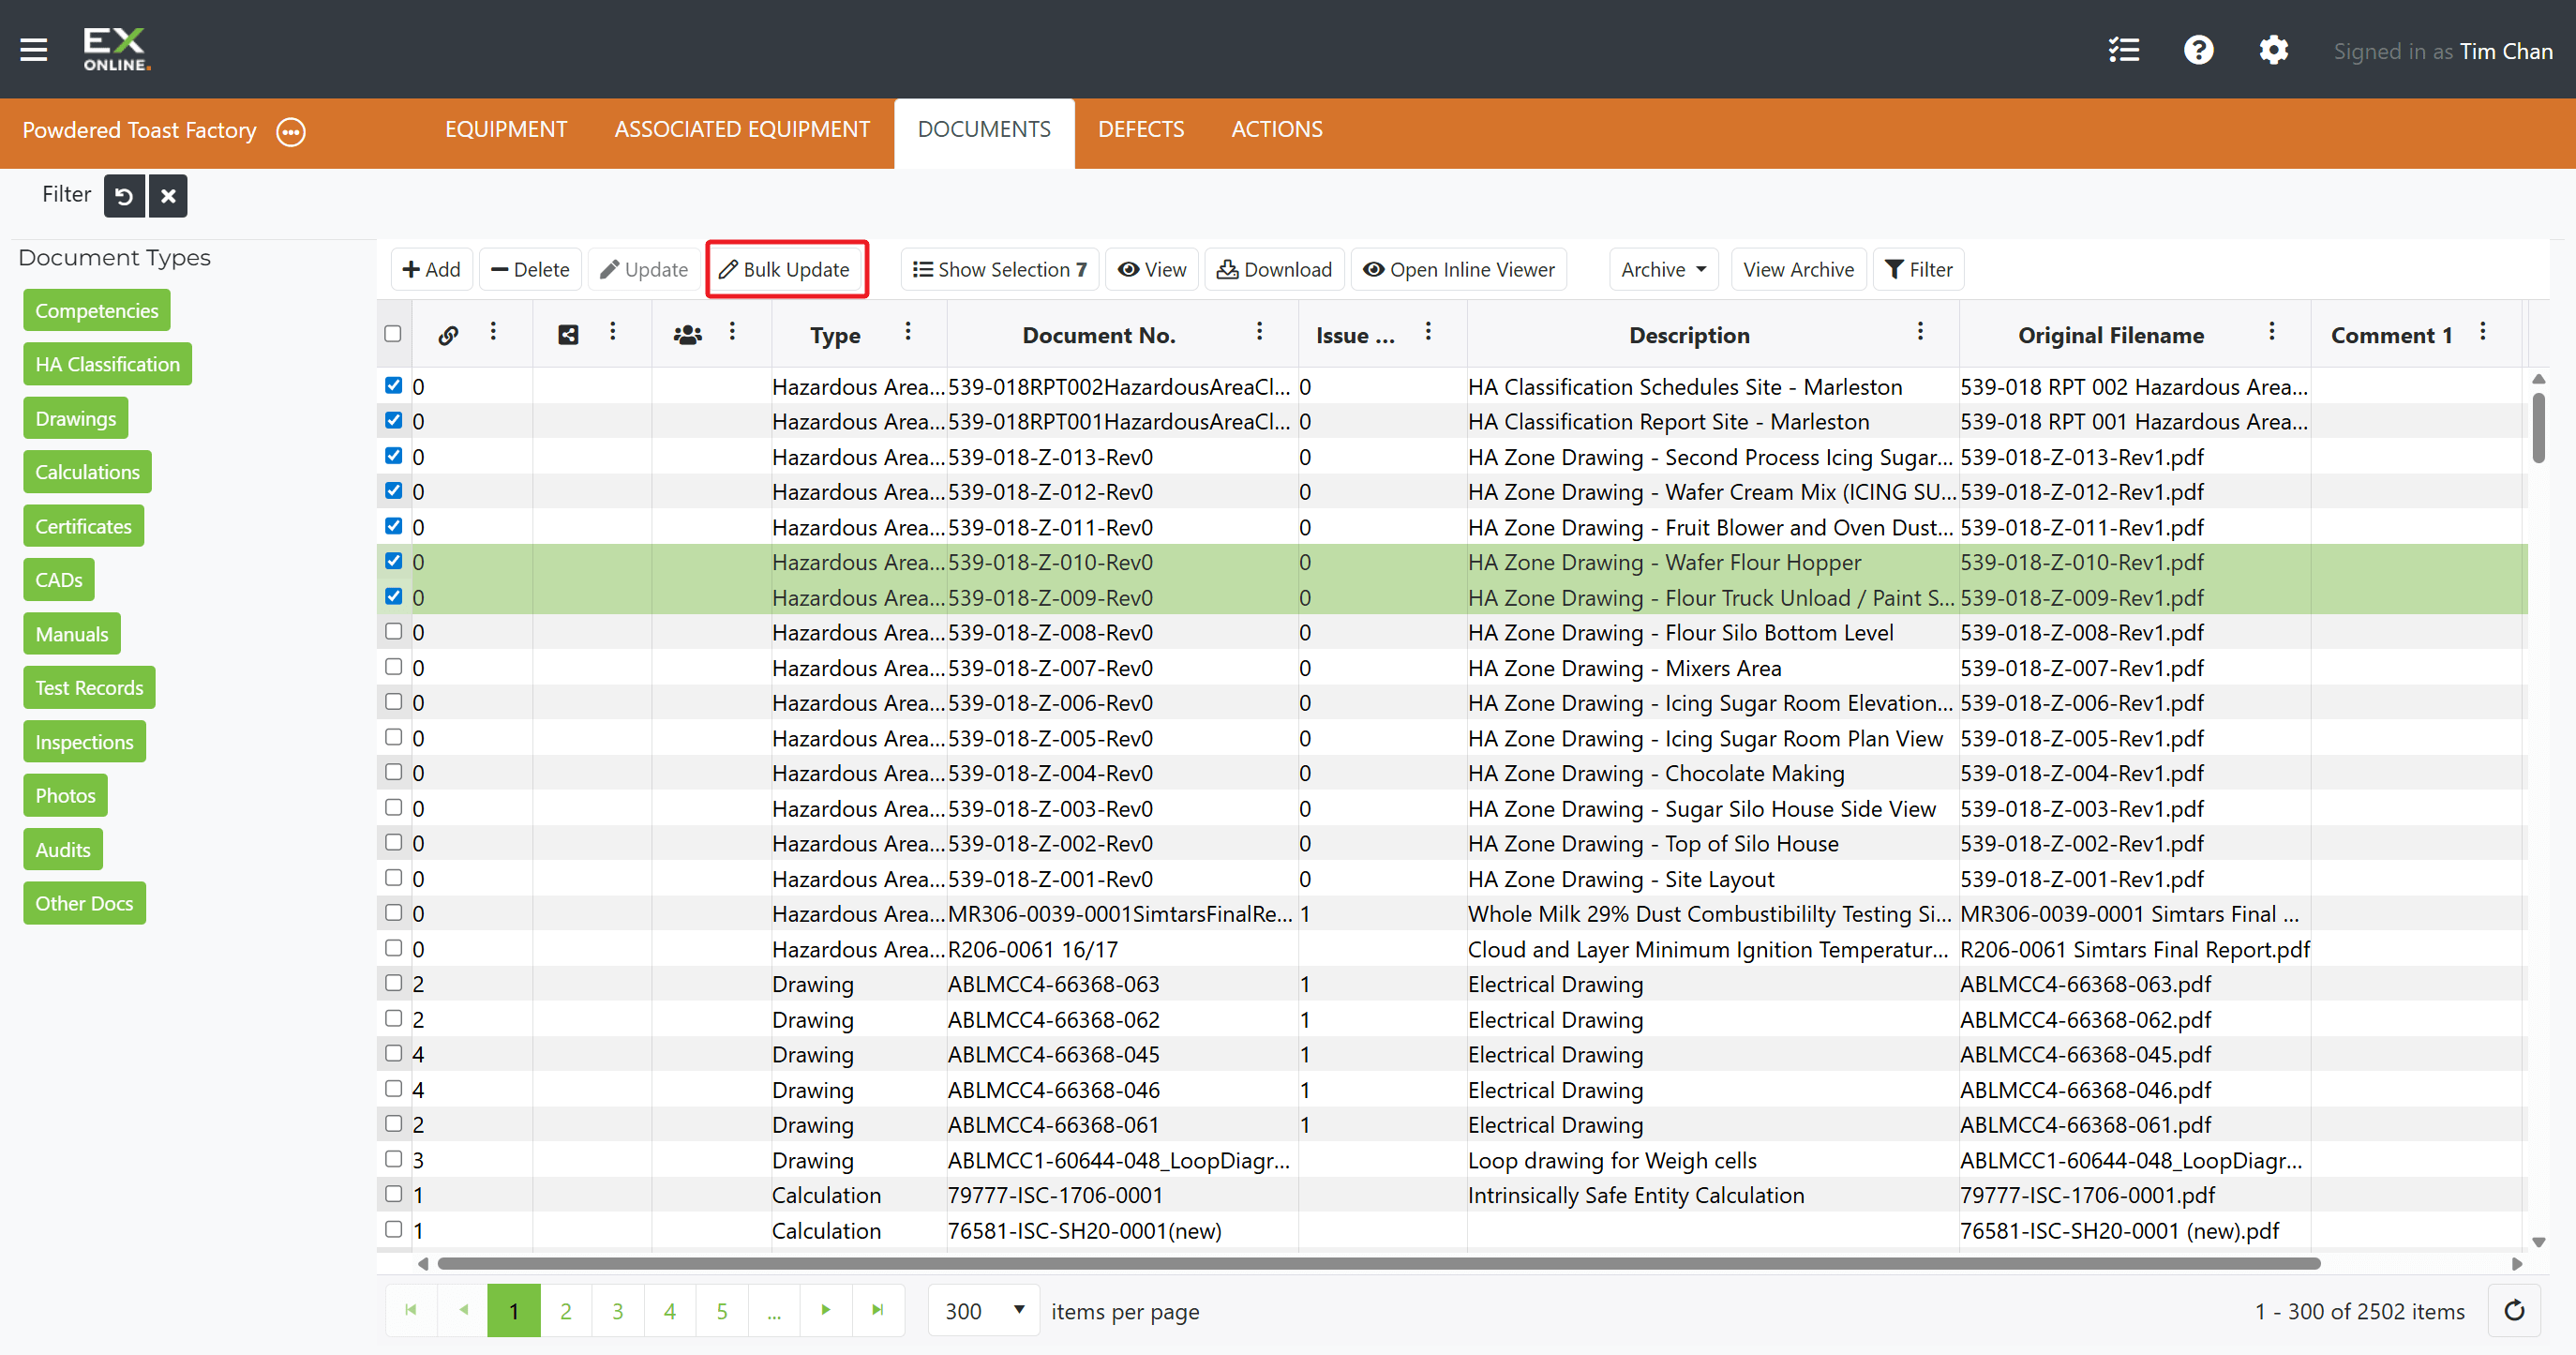
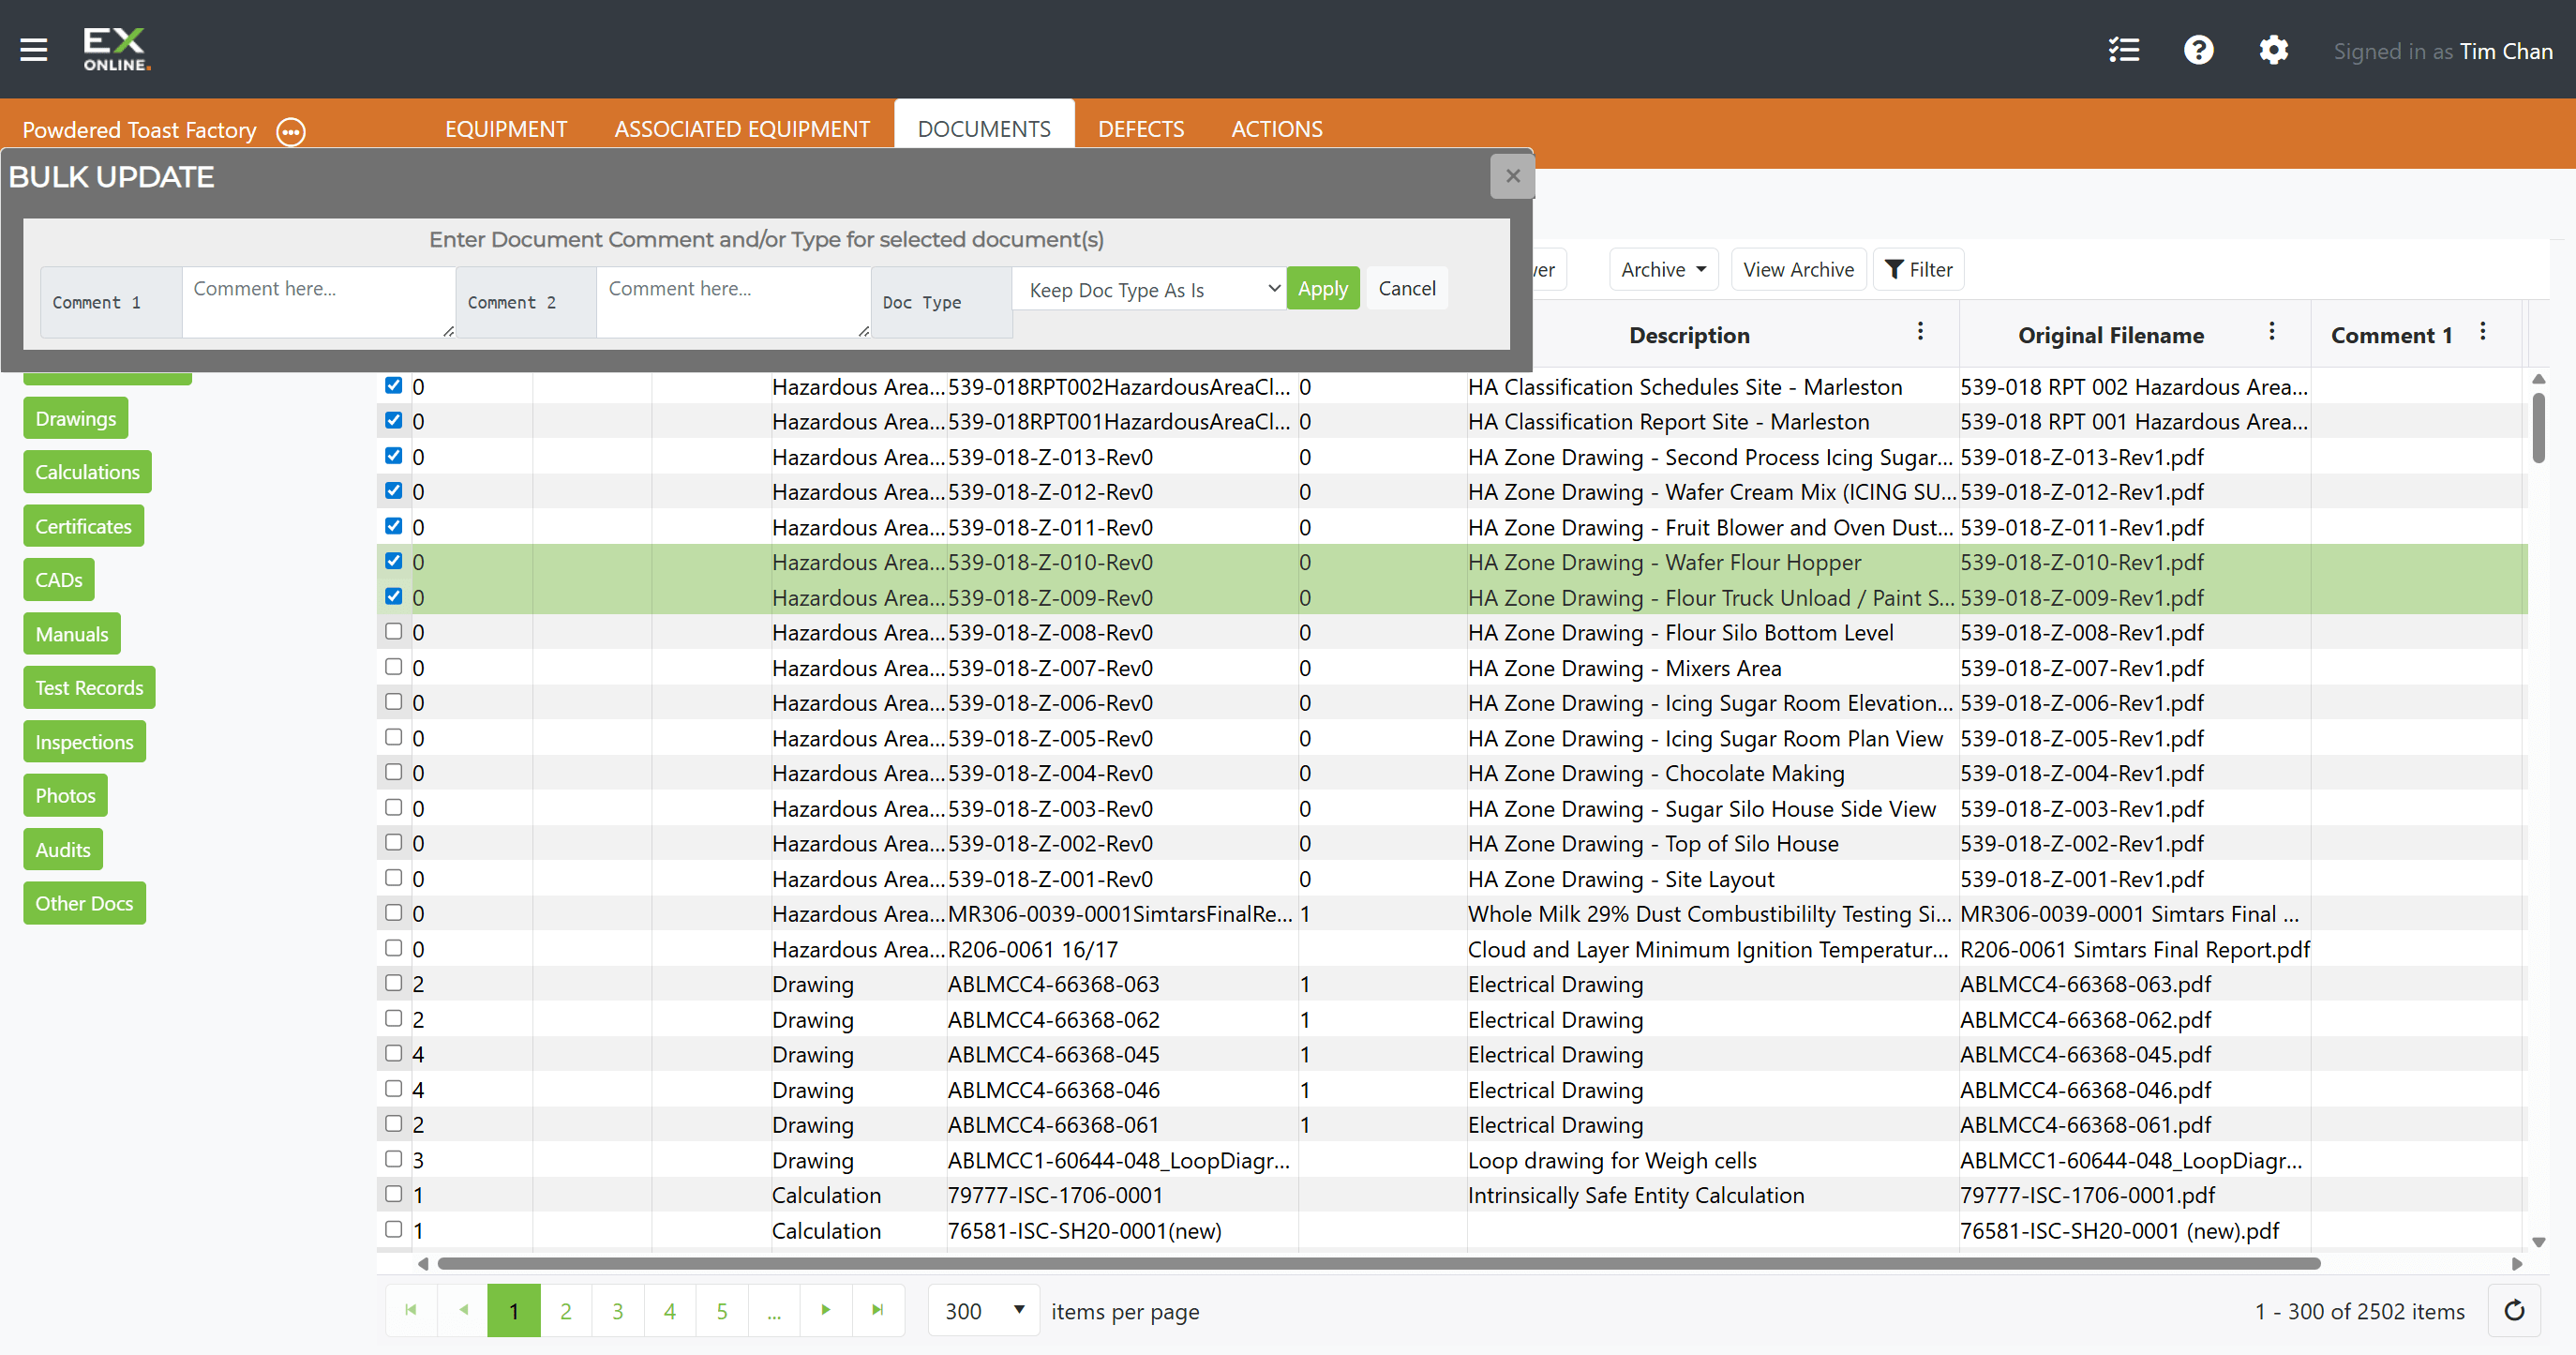
Section titled “Bulk Updating Documents”To update shared fields across multiple documents at once:
-
Go to the DOCUMENTS tab, select multiple documents using the checkboxes, then click Bulk Update.
-
Modify the fields you want to change (Comment 1, Comment 2, Doc Type), then click Apply.
Archiving Documents
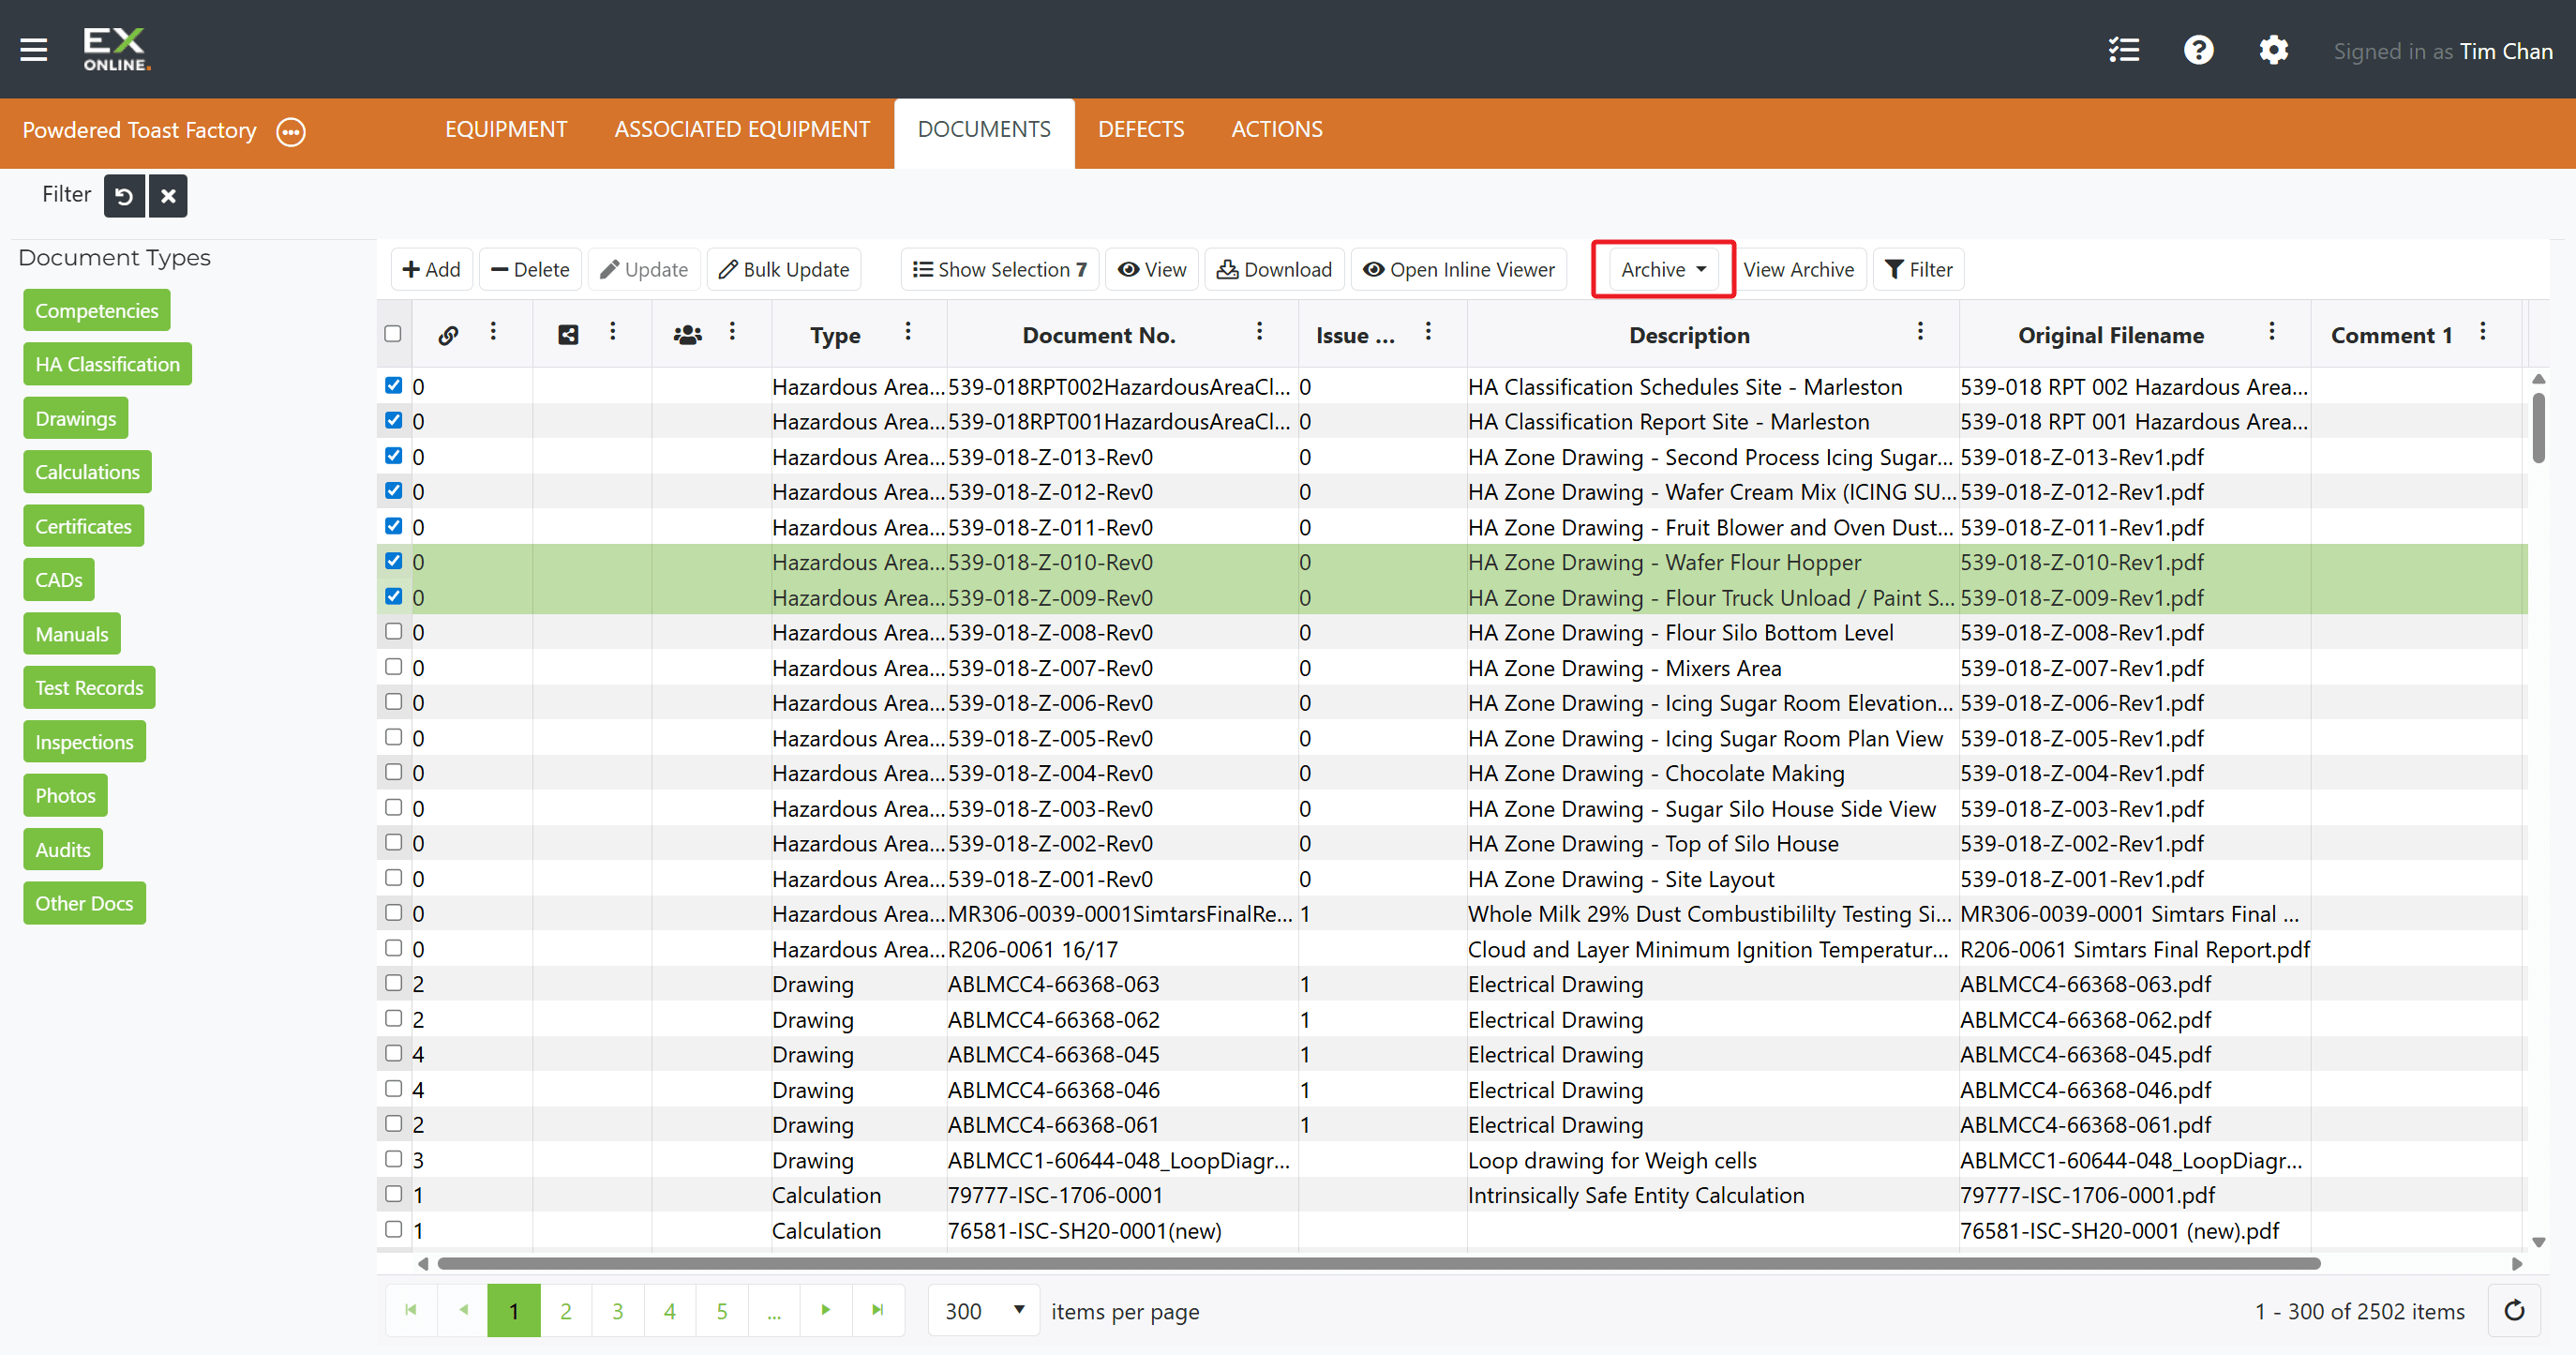
Section titled “Archiving Documents”To move documents out of the active view without deleting them:
-
Select the documents to archive, then click Archive in the toolbar.
-
Archived documents are hidden from the default view. Click View Archive to toggle them back into the grid.
Deleting Documents
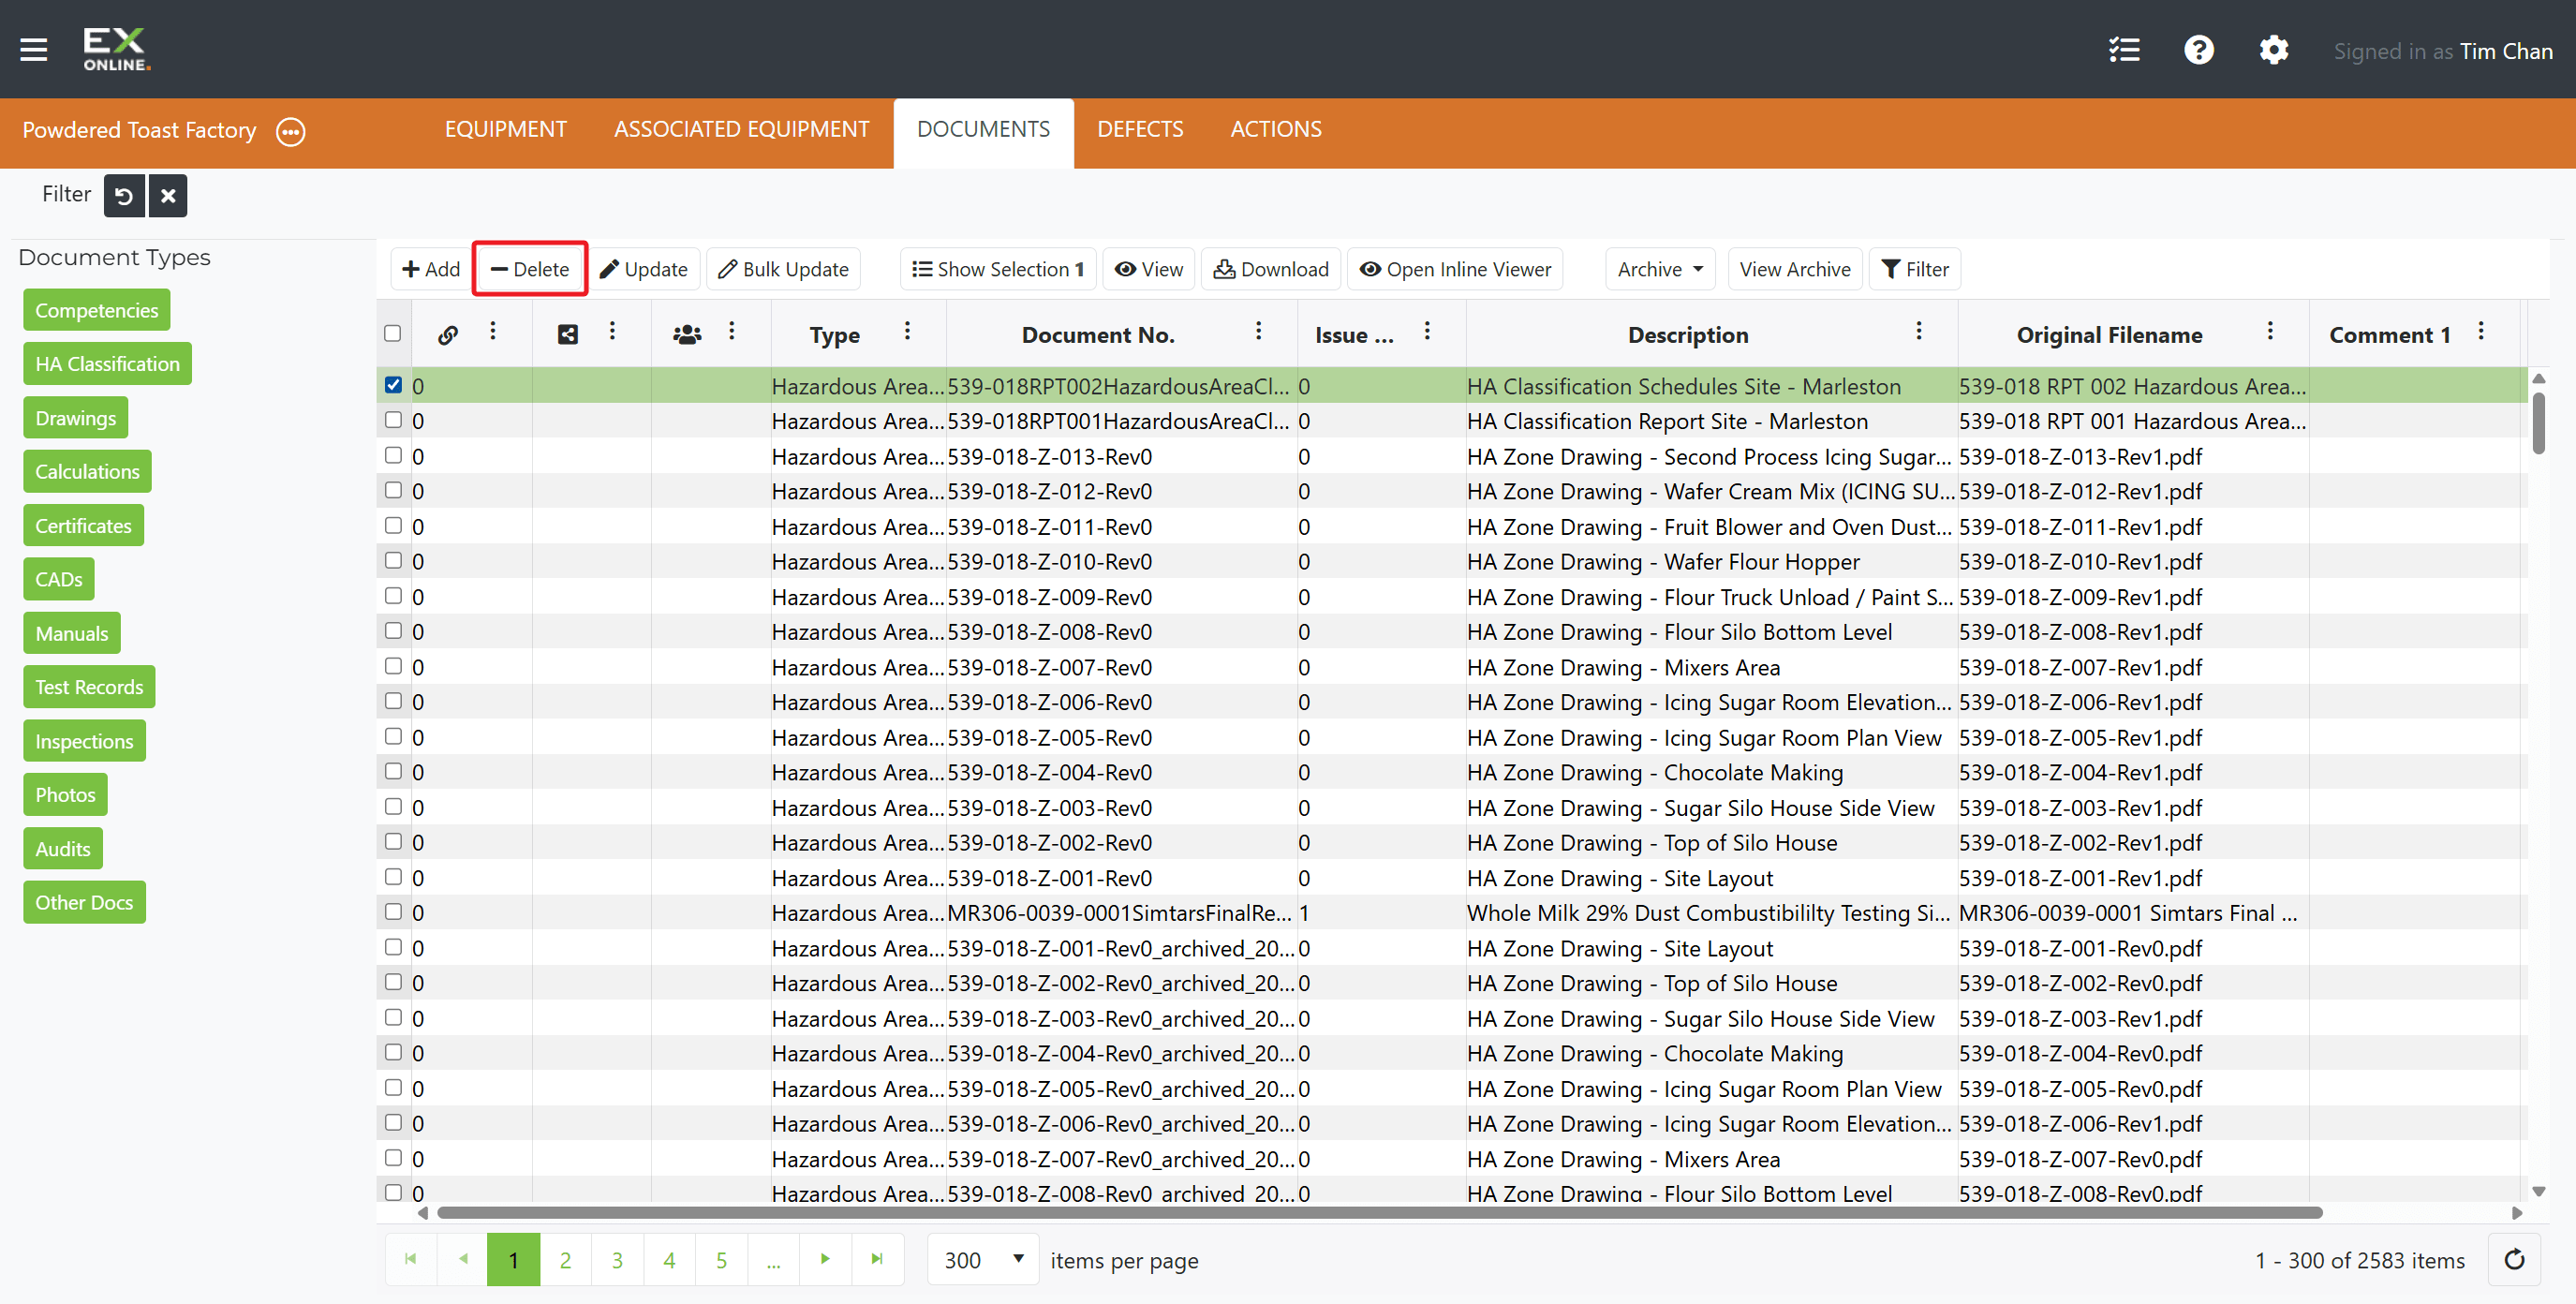
Section titled “Deleting Documents”To permanently remove documents from the project:
-
Go to the DOCUMENTS tab and select the document(s) using the checkboxes.
-
Click Delete in the toolbar.
-
Confirm the deletion.
Troubleshooting
Section titled “Troubleshooting”| Issue | Solution |
|---|---|
| Upload fails | Check file size limits and supported formats (PDF, JPG, PNG, GIF) |
| Document won’t open | Try downloading instead of inline viewing |
| Can’t find document | Check filters and the archived view — use View Archive to toggle archived documents into the grid |
Related Topics
Section titled “Related Topics”- Documents Reference — Full field descriptions, toolbar options, and document types