
Exporting Data
This guide covers downloading project data as a read-only ZIP from the IMPORT / EXPORT tab in the Project Window. You tick equipment rows on the EQUIPMENT tab first, then choose categories and export options in the Export section and click Export Selected. For every control on the tab, see Project Window — Import/Export tab.
Open the project from the Accounts Page if you are not already in it. Exporting only downloads a snapshot; it does not change anything in the project.
Select equipment to export
Section titled “Select equipment to export”Choose which equipment rows to include before opening the export options.
-
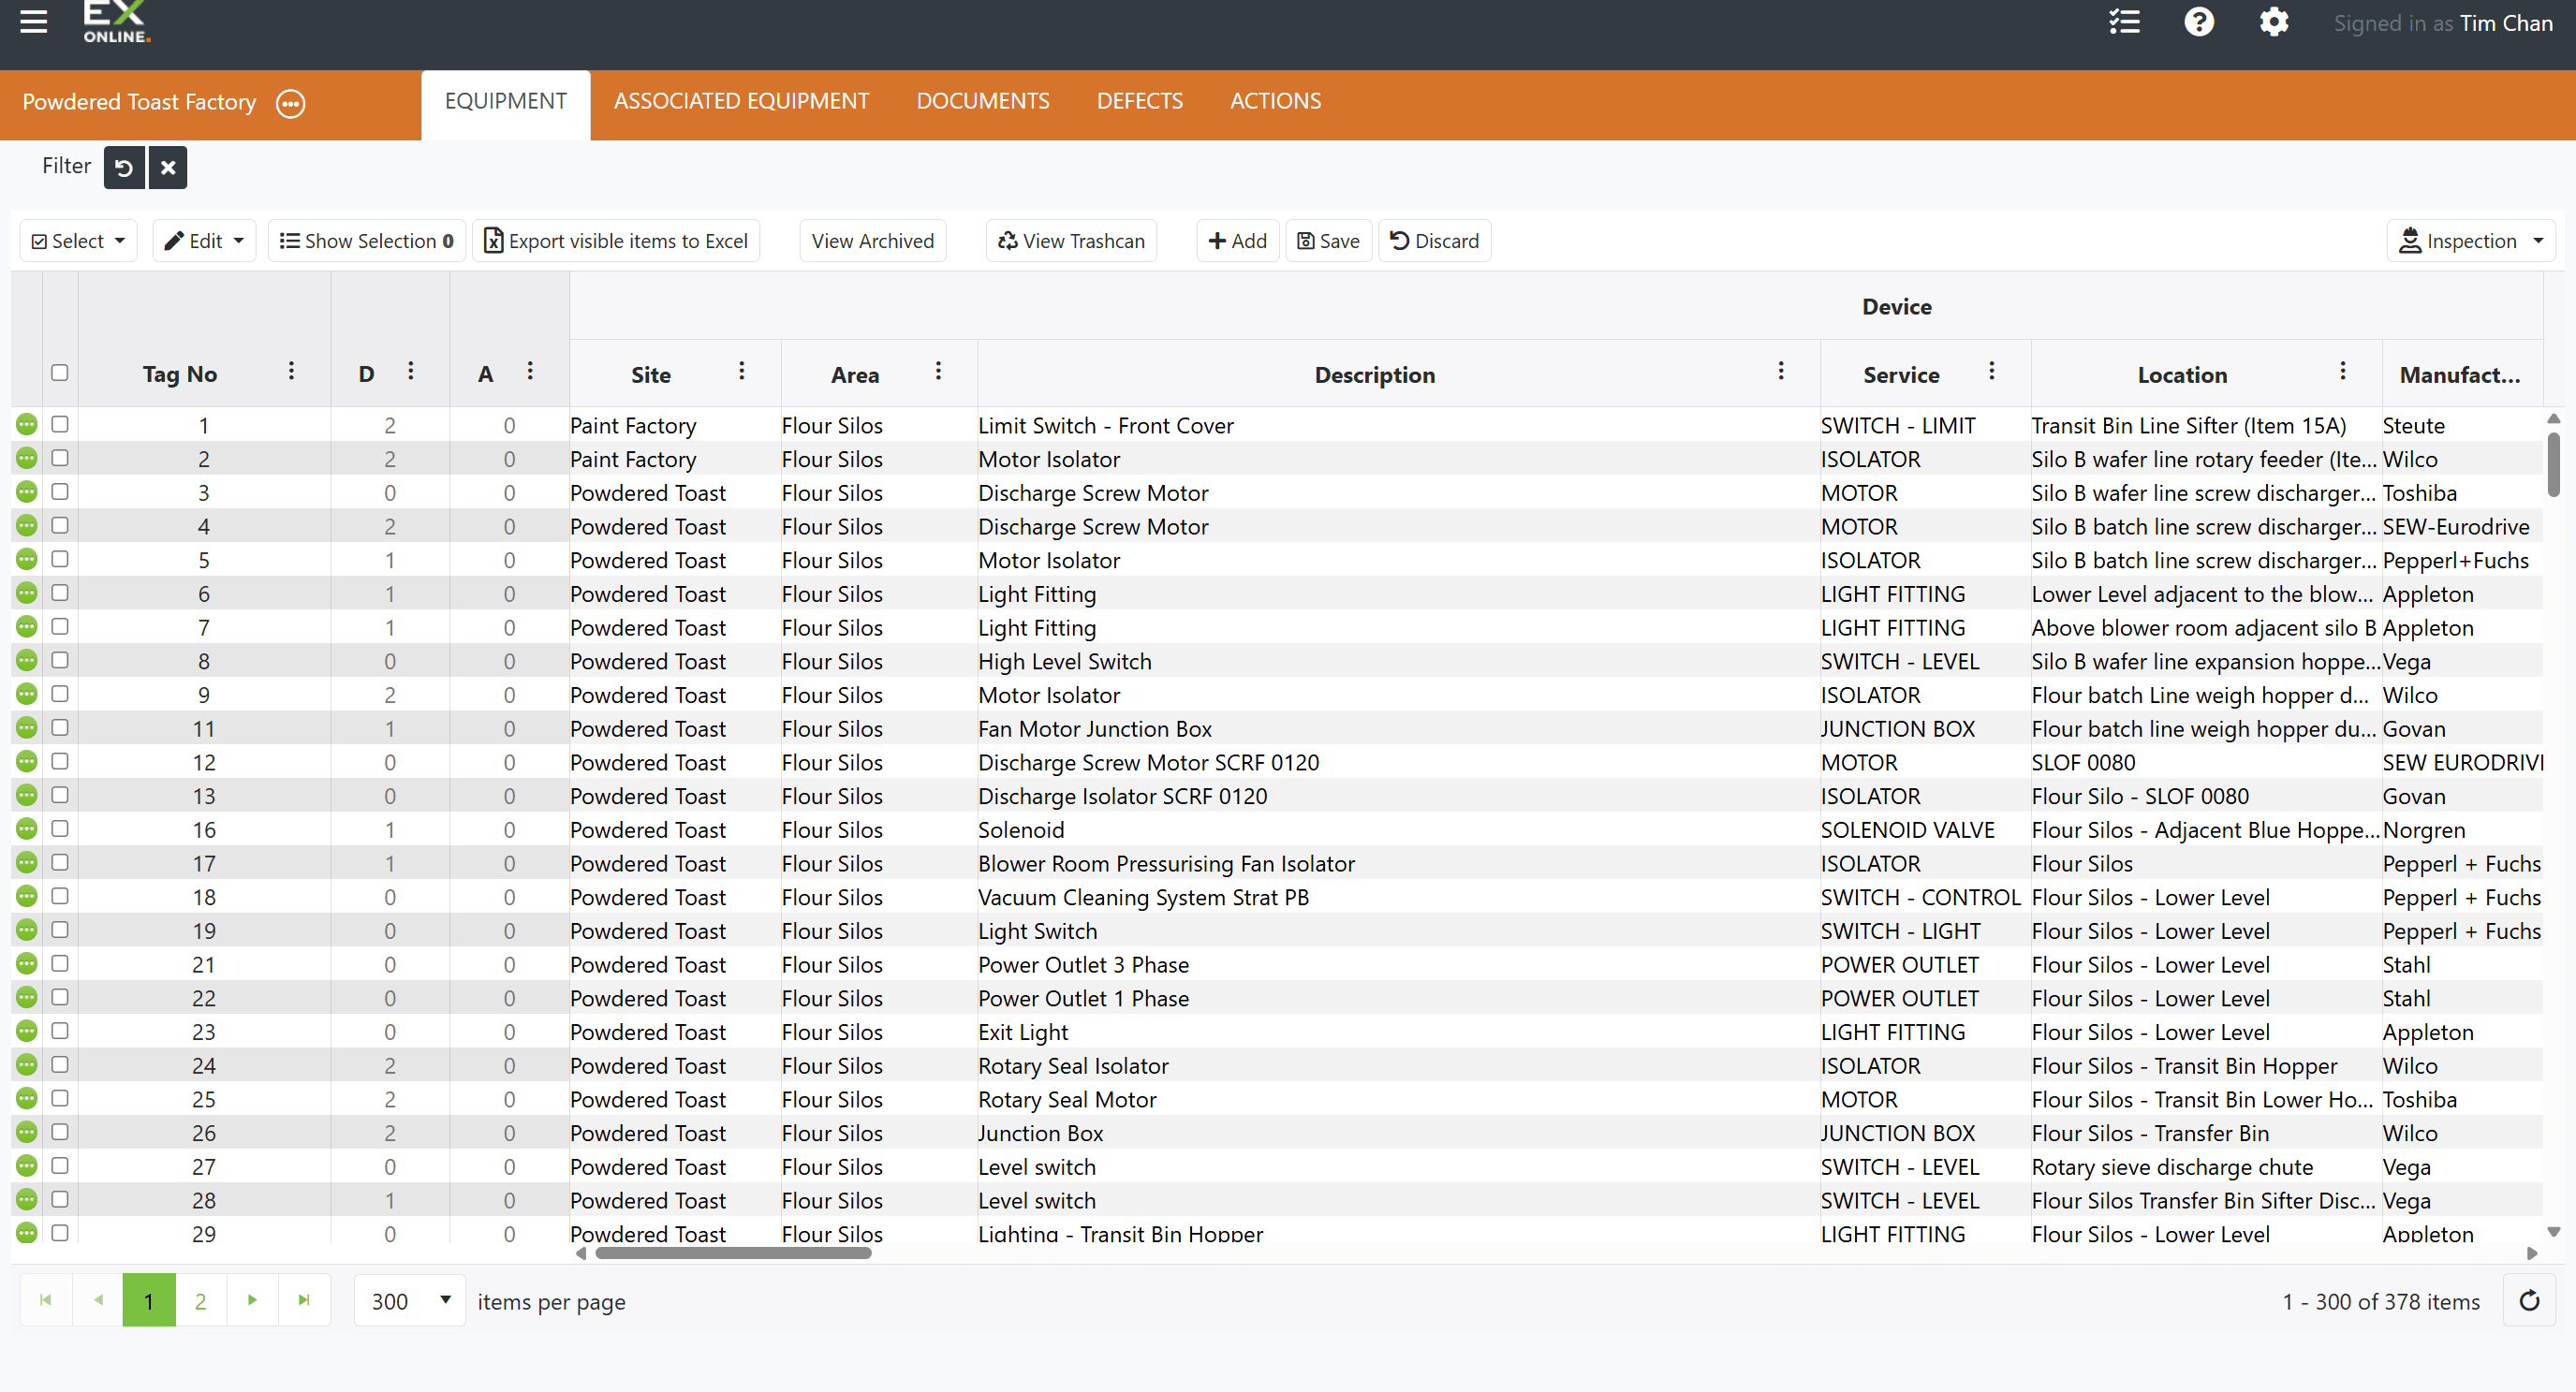
In the Project Dashboard, stay on the EQUIPMENT tab (this is the usual default when you open a project).
-
Tick the checkbox on each equipment row you want included in the export. To select or clear many rows at once on the current page, use the Select control in the toolbar (for example Select all or Clear). The header checkbox selects or clears every row on the current page only. For more detail on selection, see Managing Equipment.
Open the IMPORT / EXPORT tab
Section titled “Open the IMPORT / EXPORT tab”Open the Project Window and navigate to the export controls.
-
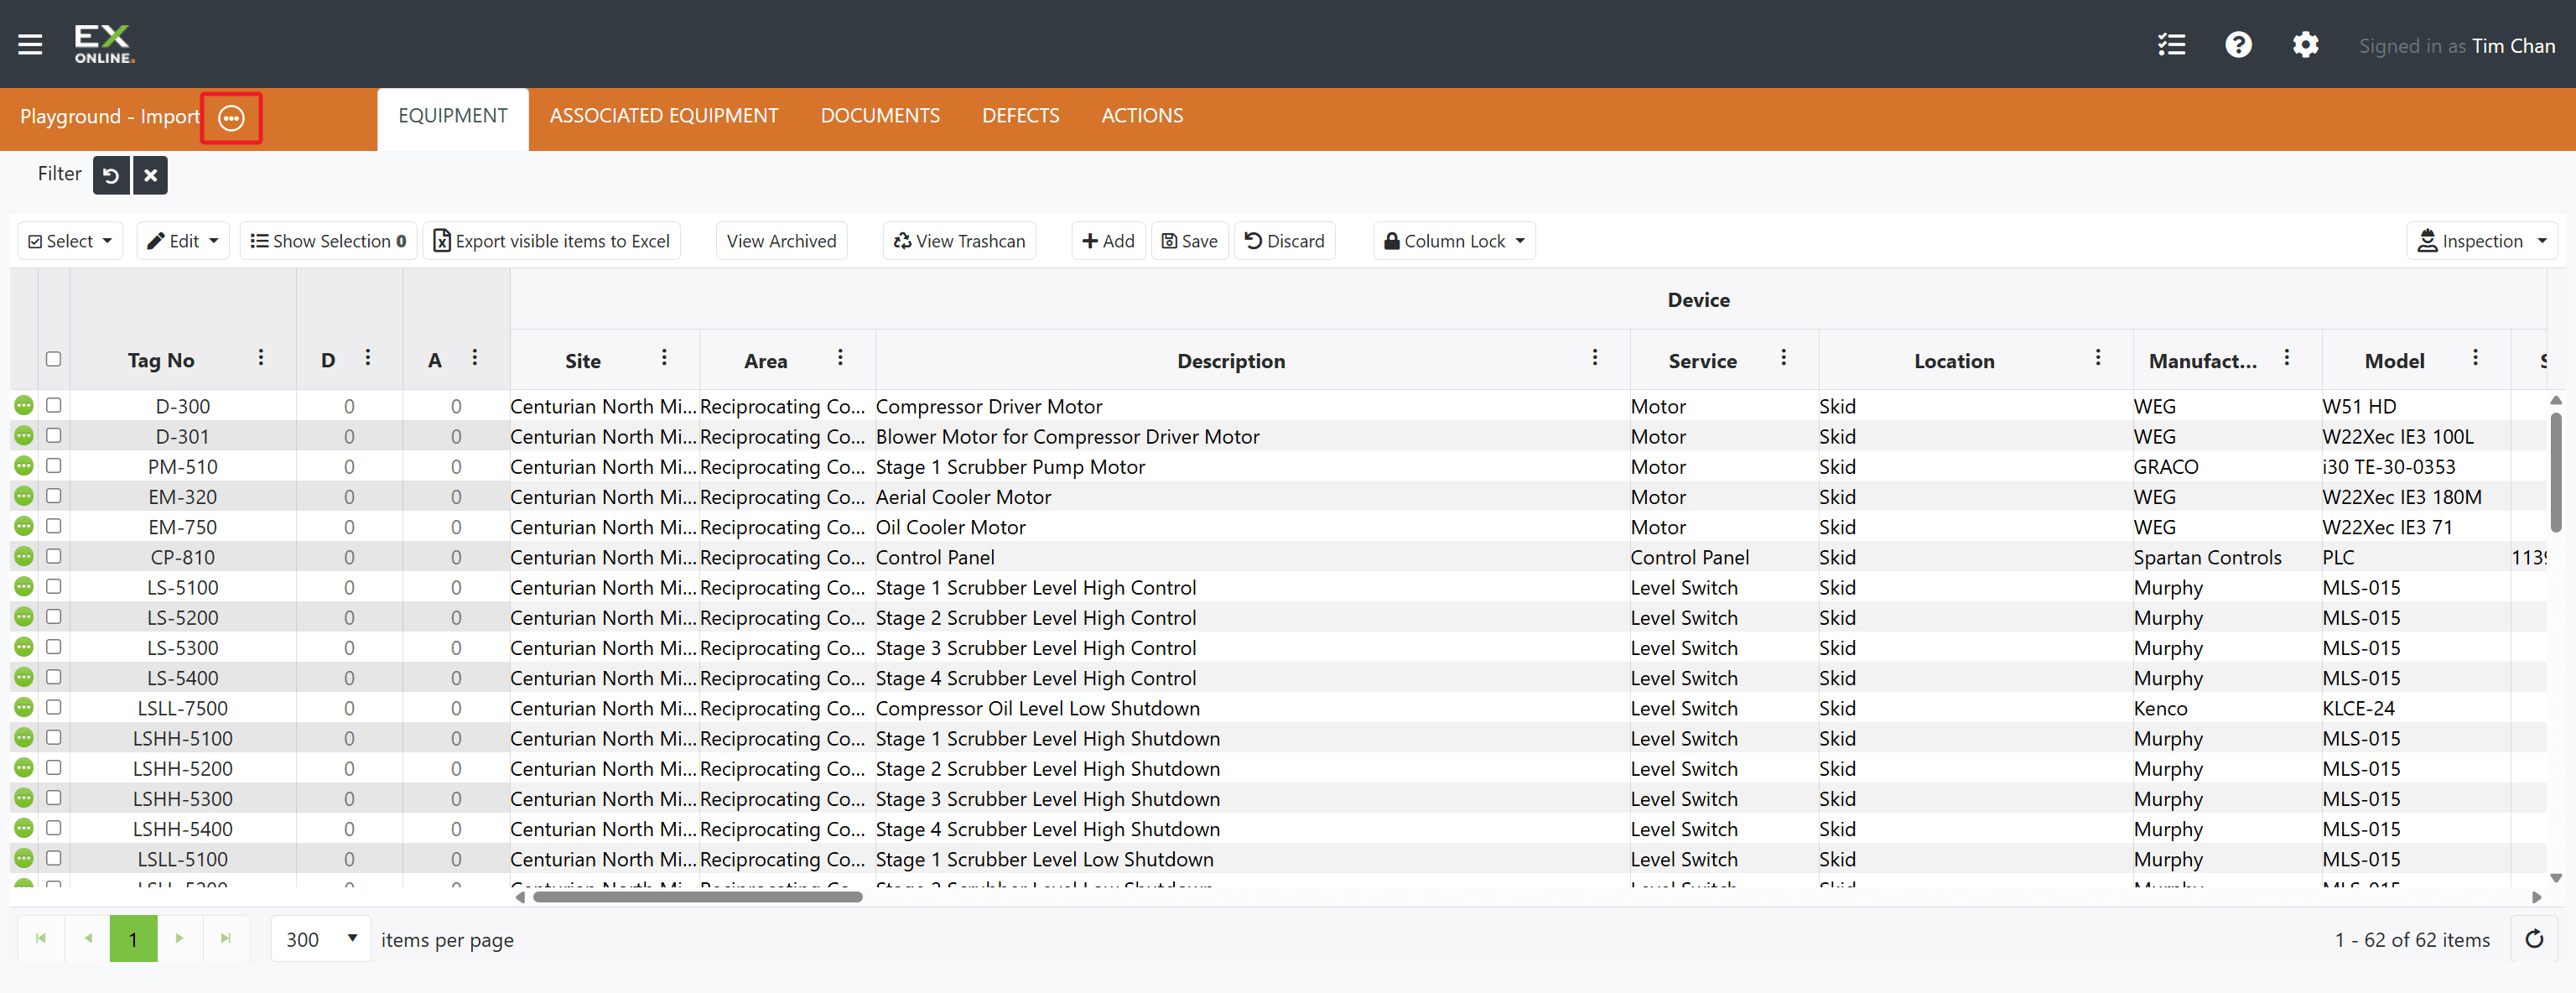
In the Project Dashboard, click Project Options (white circle with three dots) next to the project name on the orange header bar.
-
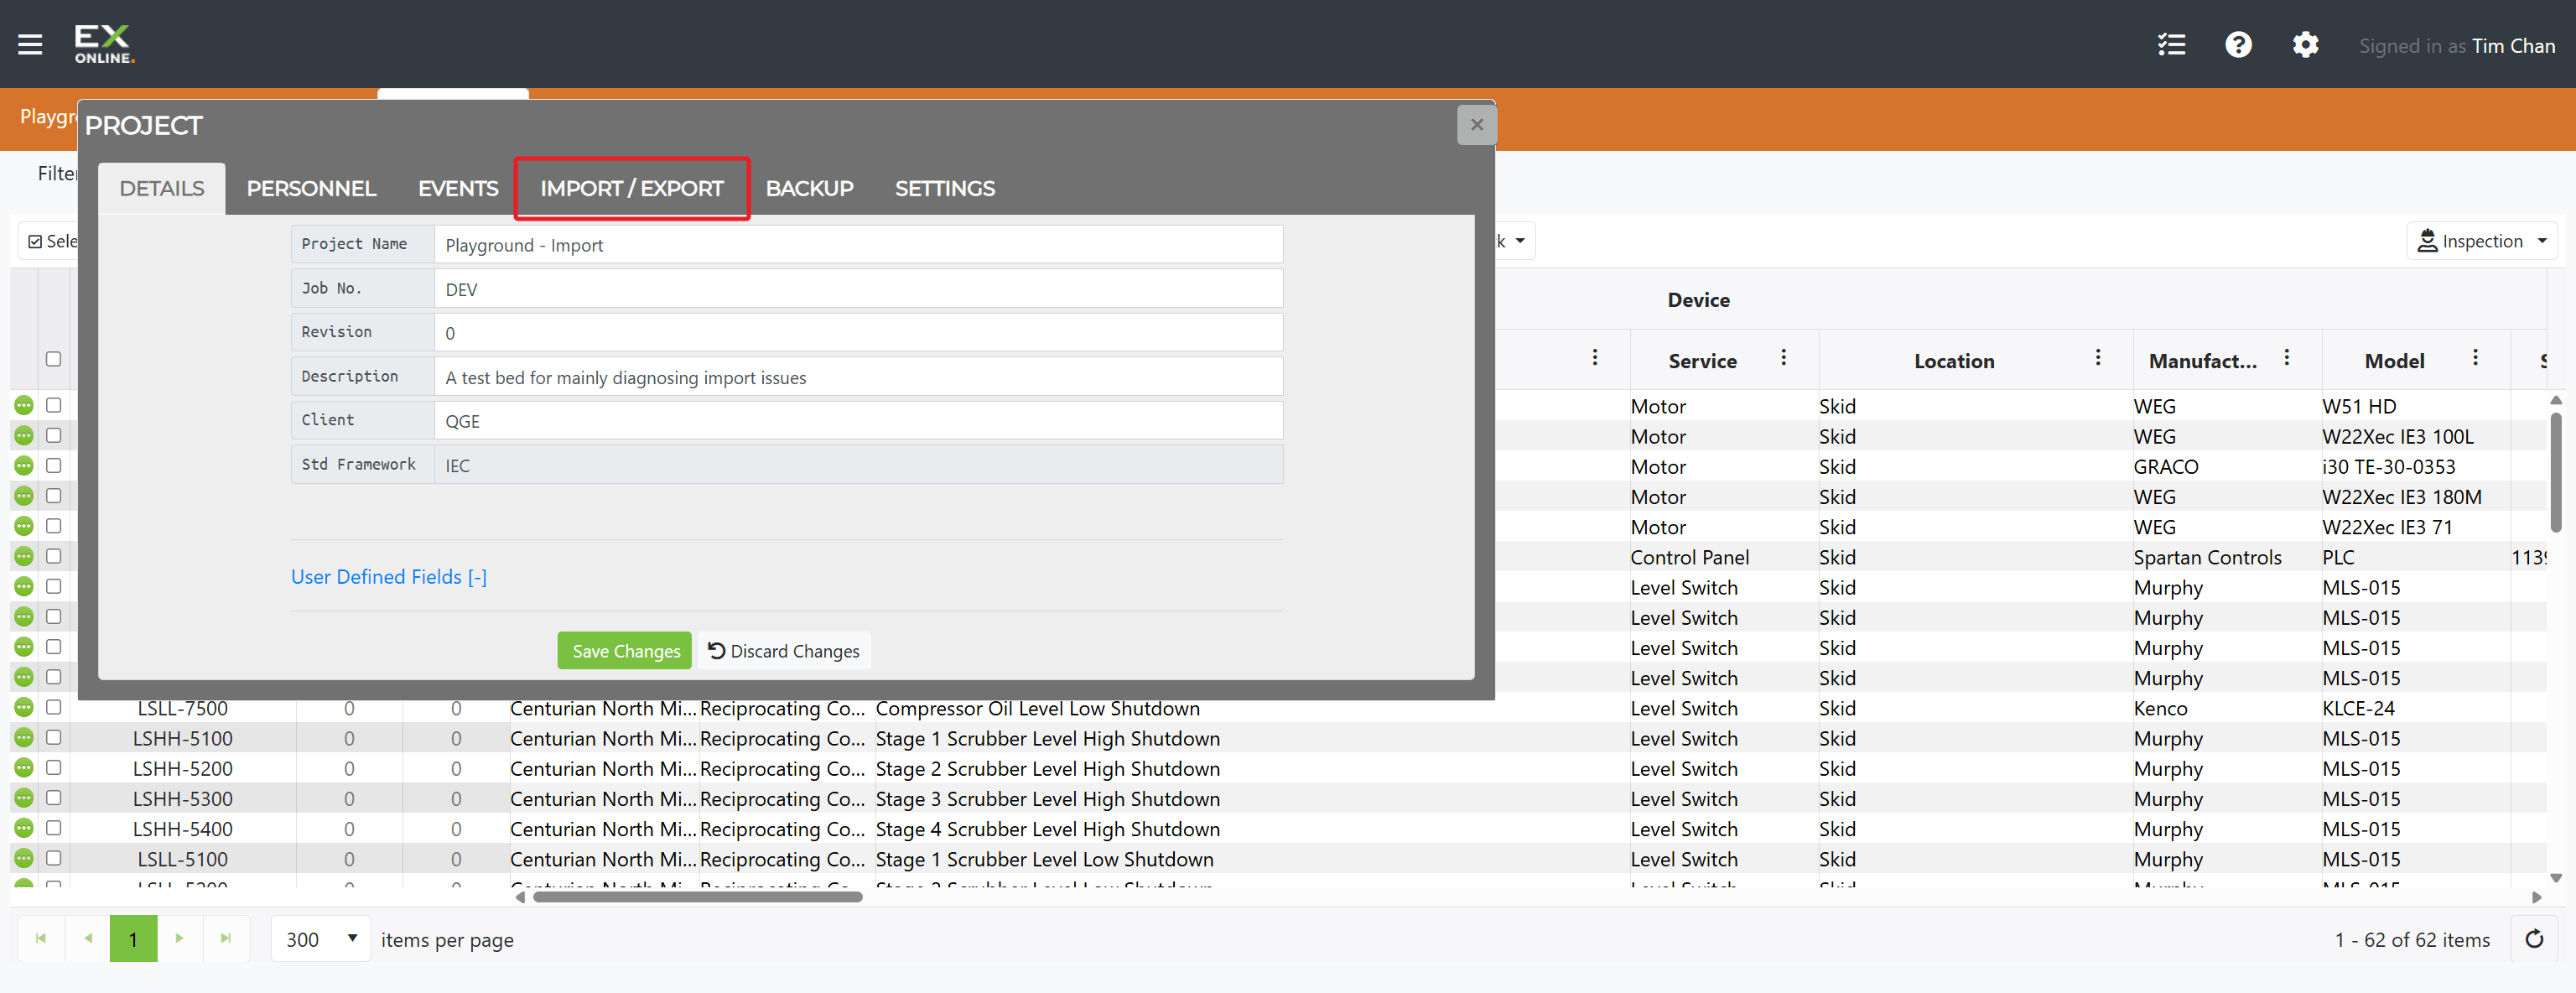
Click the IMPORT / EXPORT tab.
-
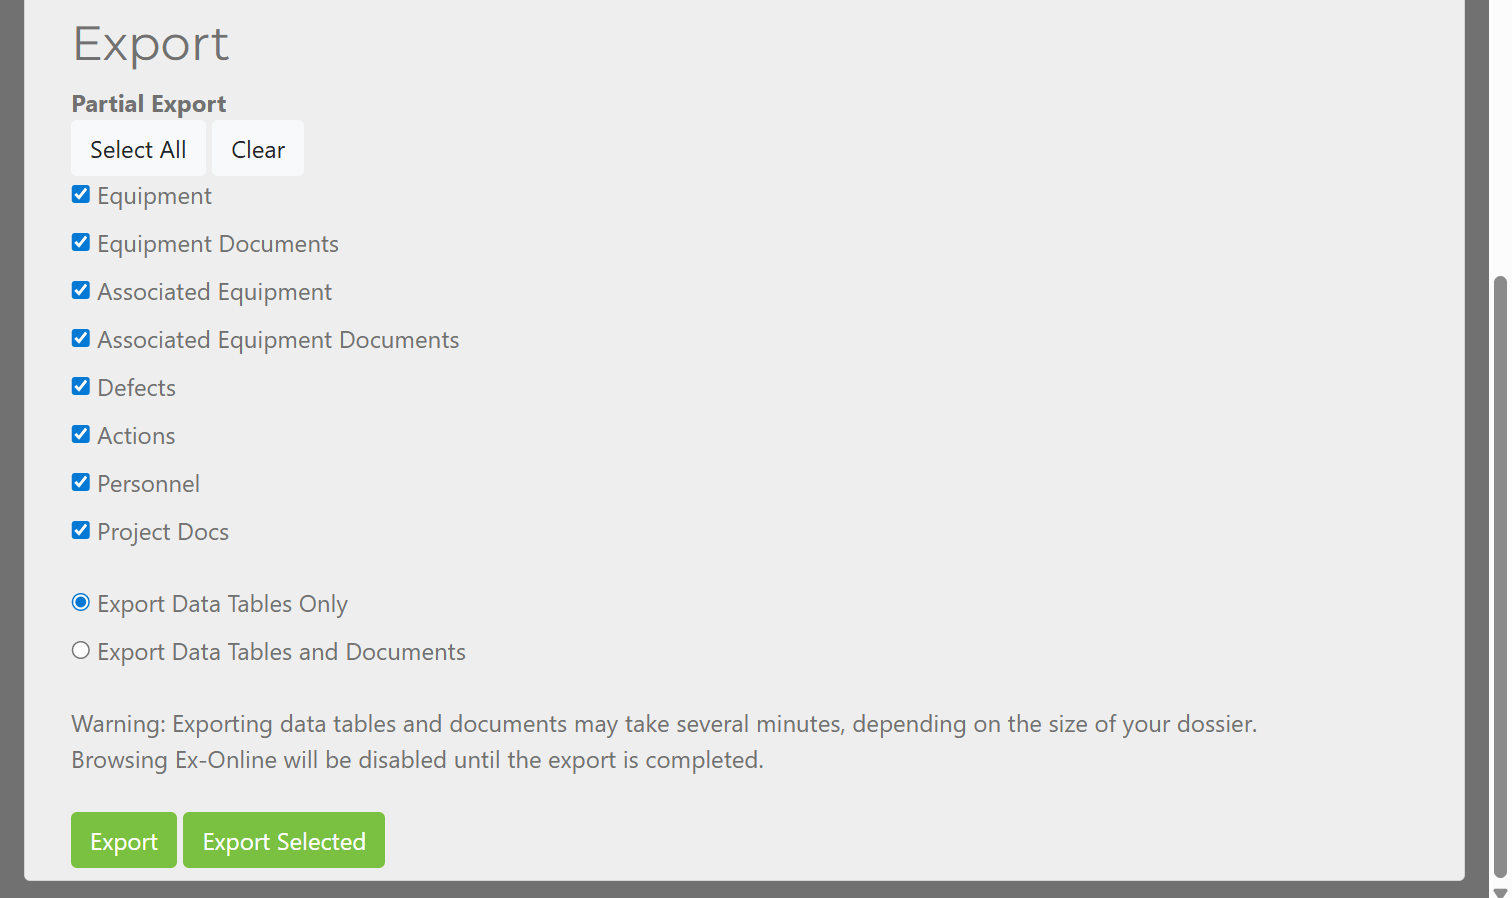
Scroll down to the Export section.
Configure the export
Section titled “Configure the export”Set the export categories and format, then download the ZIP.
-
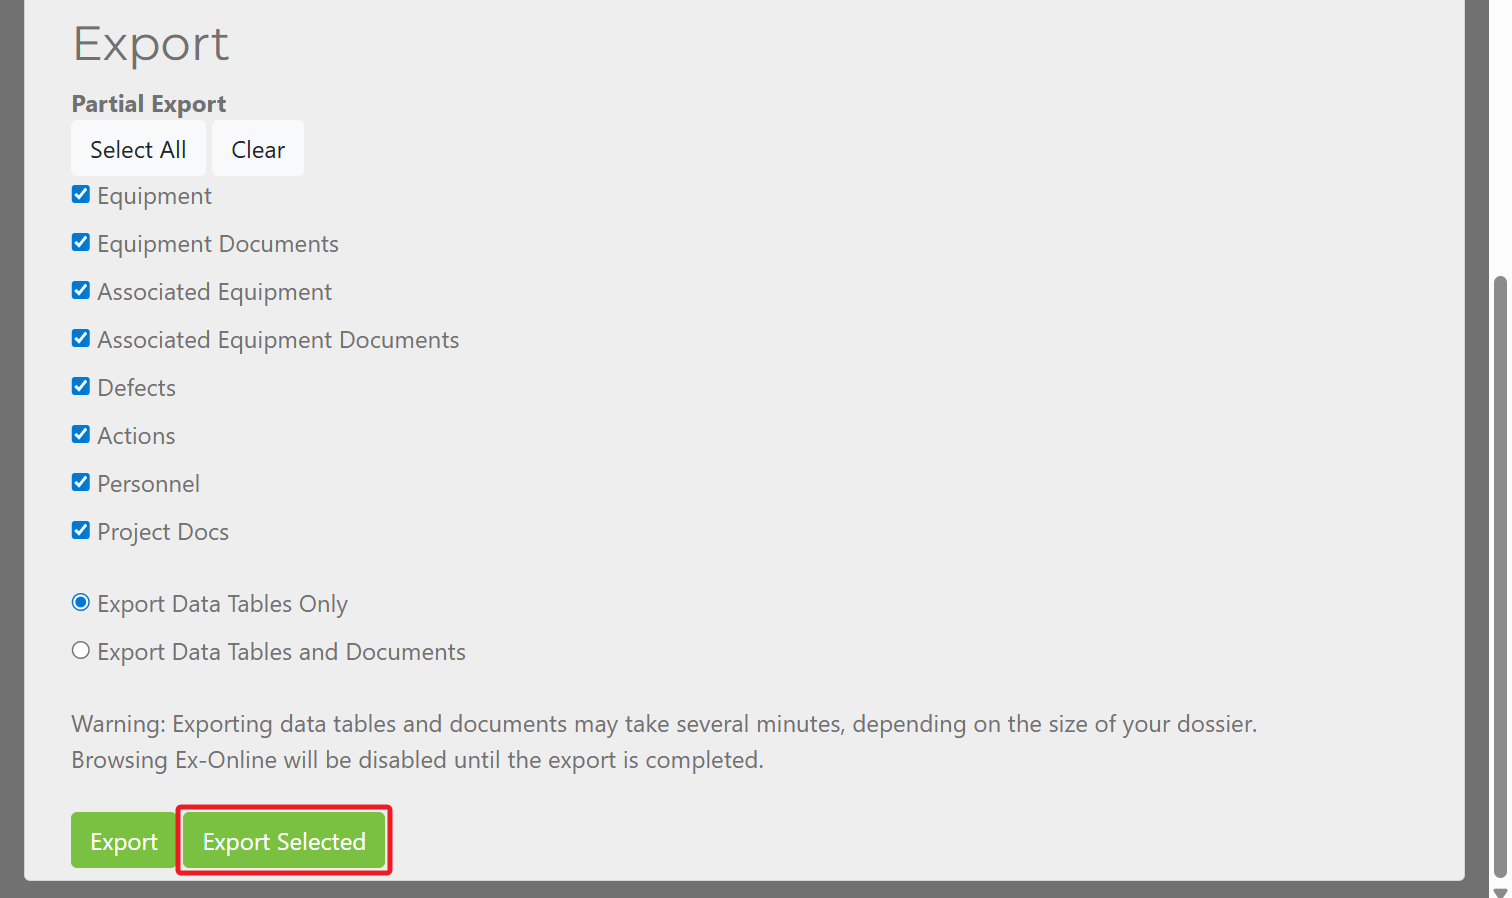
Tick the items you want — Under Partial Export, tick the categories to include in the ZIP (for example Equipment, Equipment Documents, Defects, Actions, Personnel, Project Docs). Which equipment rows are included still follows the rows you ticked on the EQUIPMENT tab. Use Select All or Clear to set every category checkbox at once.
-
Choose data only or with documents — Select one of:
- Export Data Tables Only — Spreadsheet-style data without bulk document files (faster, smaller archive).
- Export Data Tables and Documents — Includes linked documents where applicable. Large dossiers can take several minutes; Ex-Online shows a warning and browsing is disabled until the export finishes.
-
Click Export Selected — Downloads the ZIP for the options you chose.
After the download
Section titled “After the download”The ZIP is a snapshot for offline use, migration, or sharing. To load data into a project later, use Choose Files and Import in the Import section on the same IMPORT / EXPORT tab.
Related Topics
Section titled “Related Topics”- Project Window — Import/Export tab — Tab layout and controls
- Importing Data — Uploading an import package
- Import and Export Lifecycle — What happens during import and export